Inspiring Your Art: Wood
Today I’d like you to think about wood as an inspiration for your artwork. There are many facets of “wood” that you can explore: the colors or the textures, how the bark differs from the inner wood. What about wood as a material? It can be cut into pieces and assembled as a mosaic or carved into a sculpture or even used as a substrate, like in wood panel paintings. It can be painted or you can make use of its natural colors and patterns.
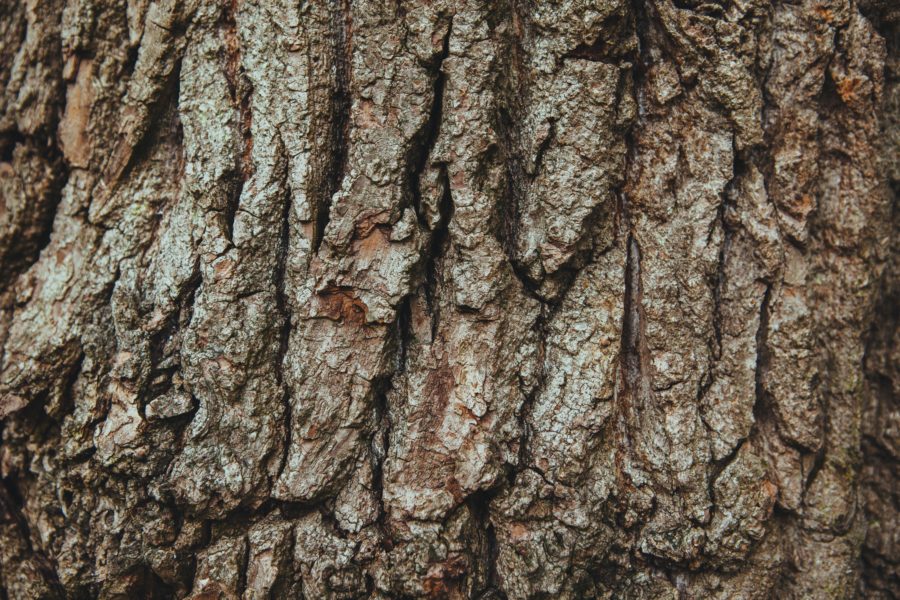
I often use natural materials like wood in my abstract, sculptural “paintings.” It can help to provide depth and structure as well as texture or even color. I like to use texture in my artwork, and wood has so many possibilities!
As a fun challenge, I’d like you to choose an aspect of wood and see how you can work that into your art. Will you work with the colors? The textures? Are you going to modify it in some way? Perhaps a series of pieces, each focused on a different aspect of wood? How about contrasting the wood with another material?

What will you choose? I’d love to see what you come up with. Feel free to share your thoughts in the comments.
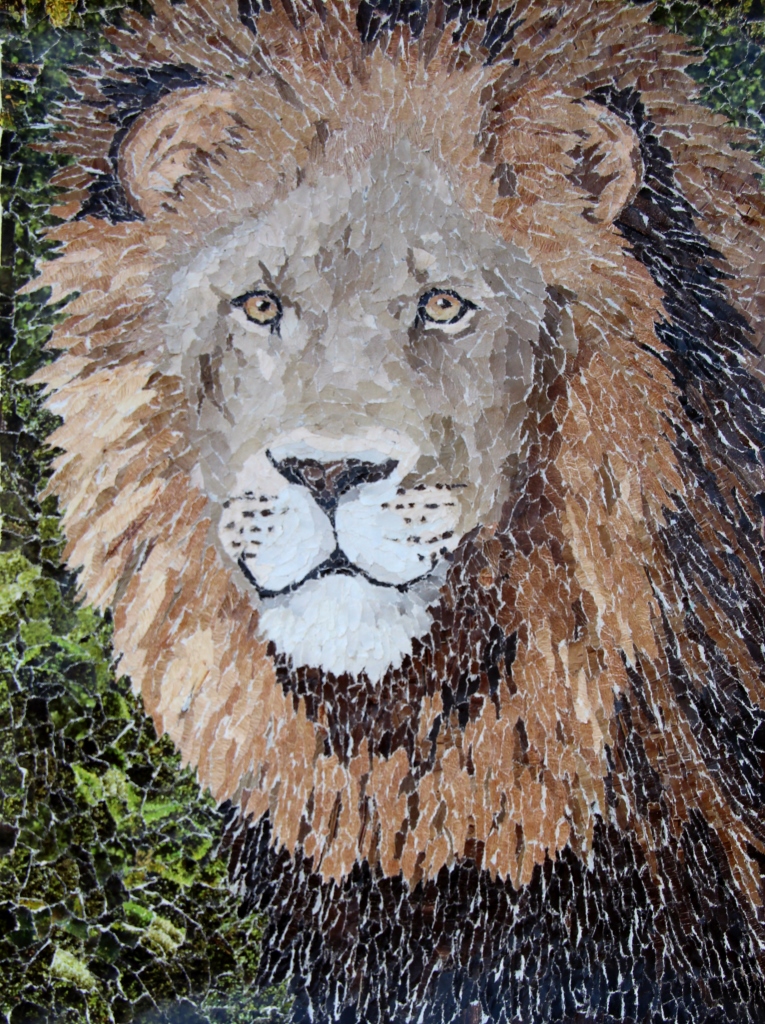
New Artwork: Lion torn paper collage
With the end of the semester followed by the holidays, things have been a little busy so it’s taken me a while to finish my latest piece. This piece is still untitled—some pieces seem to find their title easily while others can take some time. Anyway, this is a lion at the Akron Zoo named Tamarr. His name always amuses me, since it’s so close to my own! I do plan on a companion piece to this one, depicting the lioness that lives with Tamarr. Stay tuned for that one. I think they’ll make a nice pair, hanging on the wall together.
Oh, and if you want your own copy of Tamarr, fine art prints of this piece are available in my Etsy shop here.
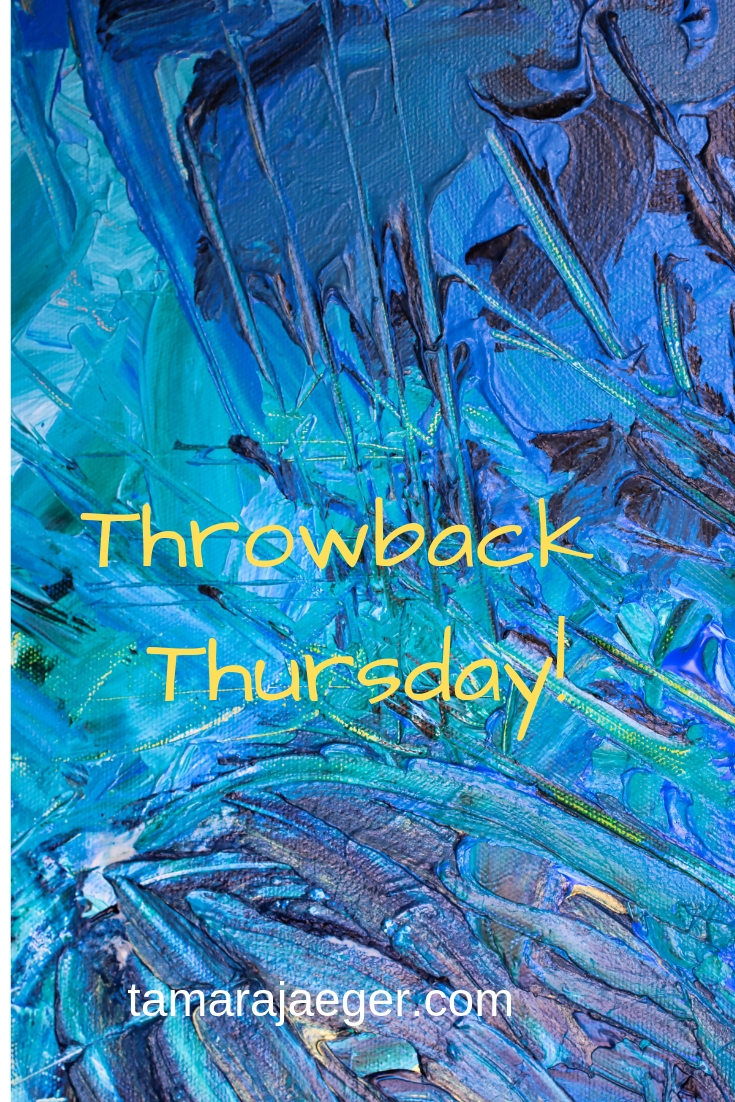
Throw Back Thursday: Origin
I took a lot of ceramics classes in college. It was a medium I particularly enjoyed, though I typically made hand-build pieces rather than wheel-thrown ones. I truly wish I had access to the facilities necessary to continue to work in ceramics, but those are few and far between, particularly since I prefer working with high-fired stoneware and gas-fired rather than electric kilns.
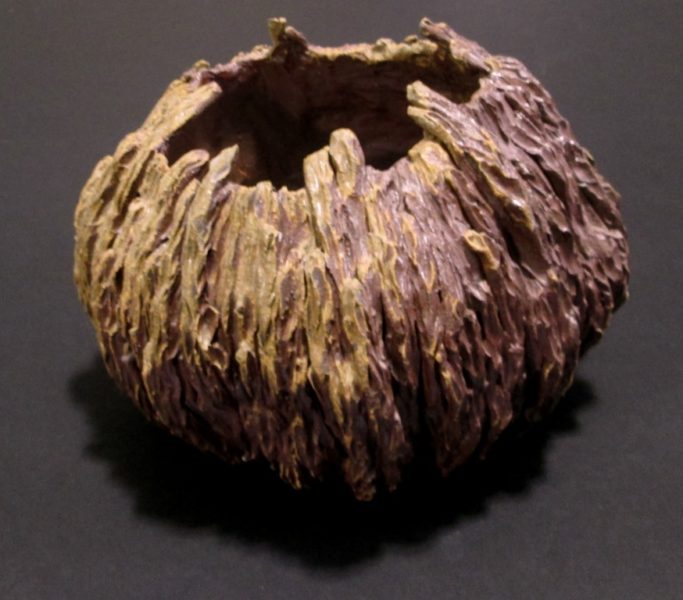
This piece is titled “Origin” and is one of the few wood-fired pieces I made. Wood-fired ceramics are typically not glazed before firing. Instead, the wood ash itself forms a glaze when it deposits on the piece during firing. Wood firing can be tricky and unpredictable, but the resulting look is quite unique. What I like about this piece is the contrast between the wood ash glaze on one side and the bare clay on the rest of the piece. I think it works well with the bowl’s highly textural surface and adds a lot to the earthy, organic feel I was trying to evoke. The piece reminds me of tree roots and growth and the resilience of nature.

Are there mediums you enjoy and but can’t currently work in? What new techniques would you like to try out?

Inspiring Your Art: Parties and Celebrations
With the ending of the old year and the start of a new one, this time of year brings to mind both reflections on what I’ve experienced over the last year and anticipation for what is to come. Some years are better than others, but they all have both good and bad times; that’s just life. Though I don’t typically make any New Year’s resolutions, there’s still some appeal in the idea of starting over with a clean slate.
The other thing the New Year brings to mind is celebrations! I’ve lived in Scotland a couple times and if there’s one place to go for New Year’s celebrations, it’s there. The last day of the year is called Hogmanay and its origins reach back to the Viking celebrations of the winter solstice in the 8th and 9th centuries. If anything, it’s a bigger deal than even Christmas. There are a number of older customs related to Hogmanay, including visiting neighbors and relatives and the giving of gifts, but modern celebrations also typically include large parties and fireworks. Another Hogmanay custom is singing “Auld Lang Syne,” which was written by the famous Scottish poet, Robert Burns. This custom has since made its way to many other countries, including America.

So, what are you celebrating with the turn of the year? Your successes of the last year? Surviving the trials you encountered? Or perhaps the opportunity to start again? I wish you all a happy, healthy new year!
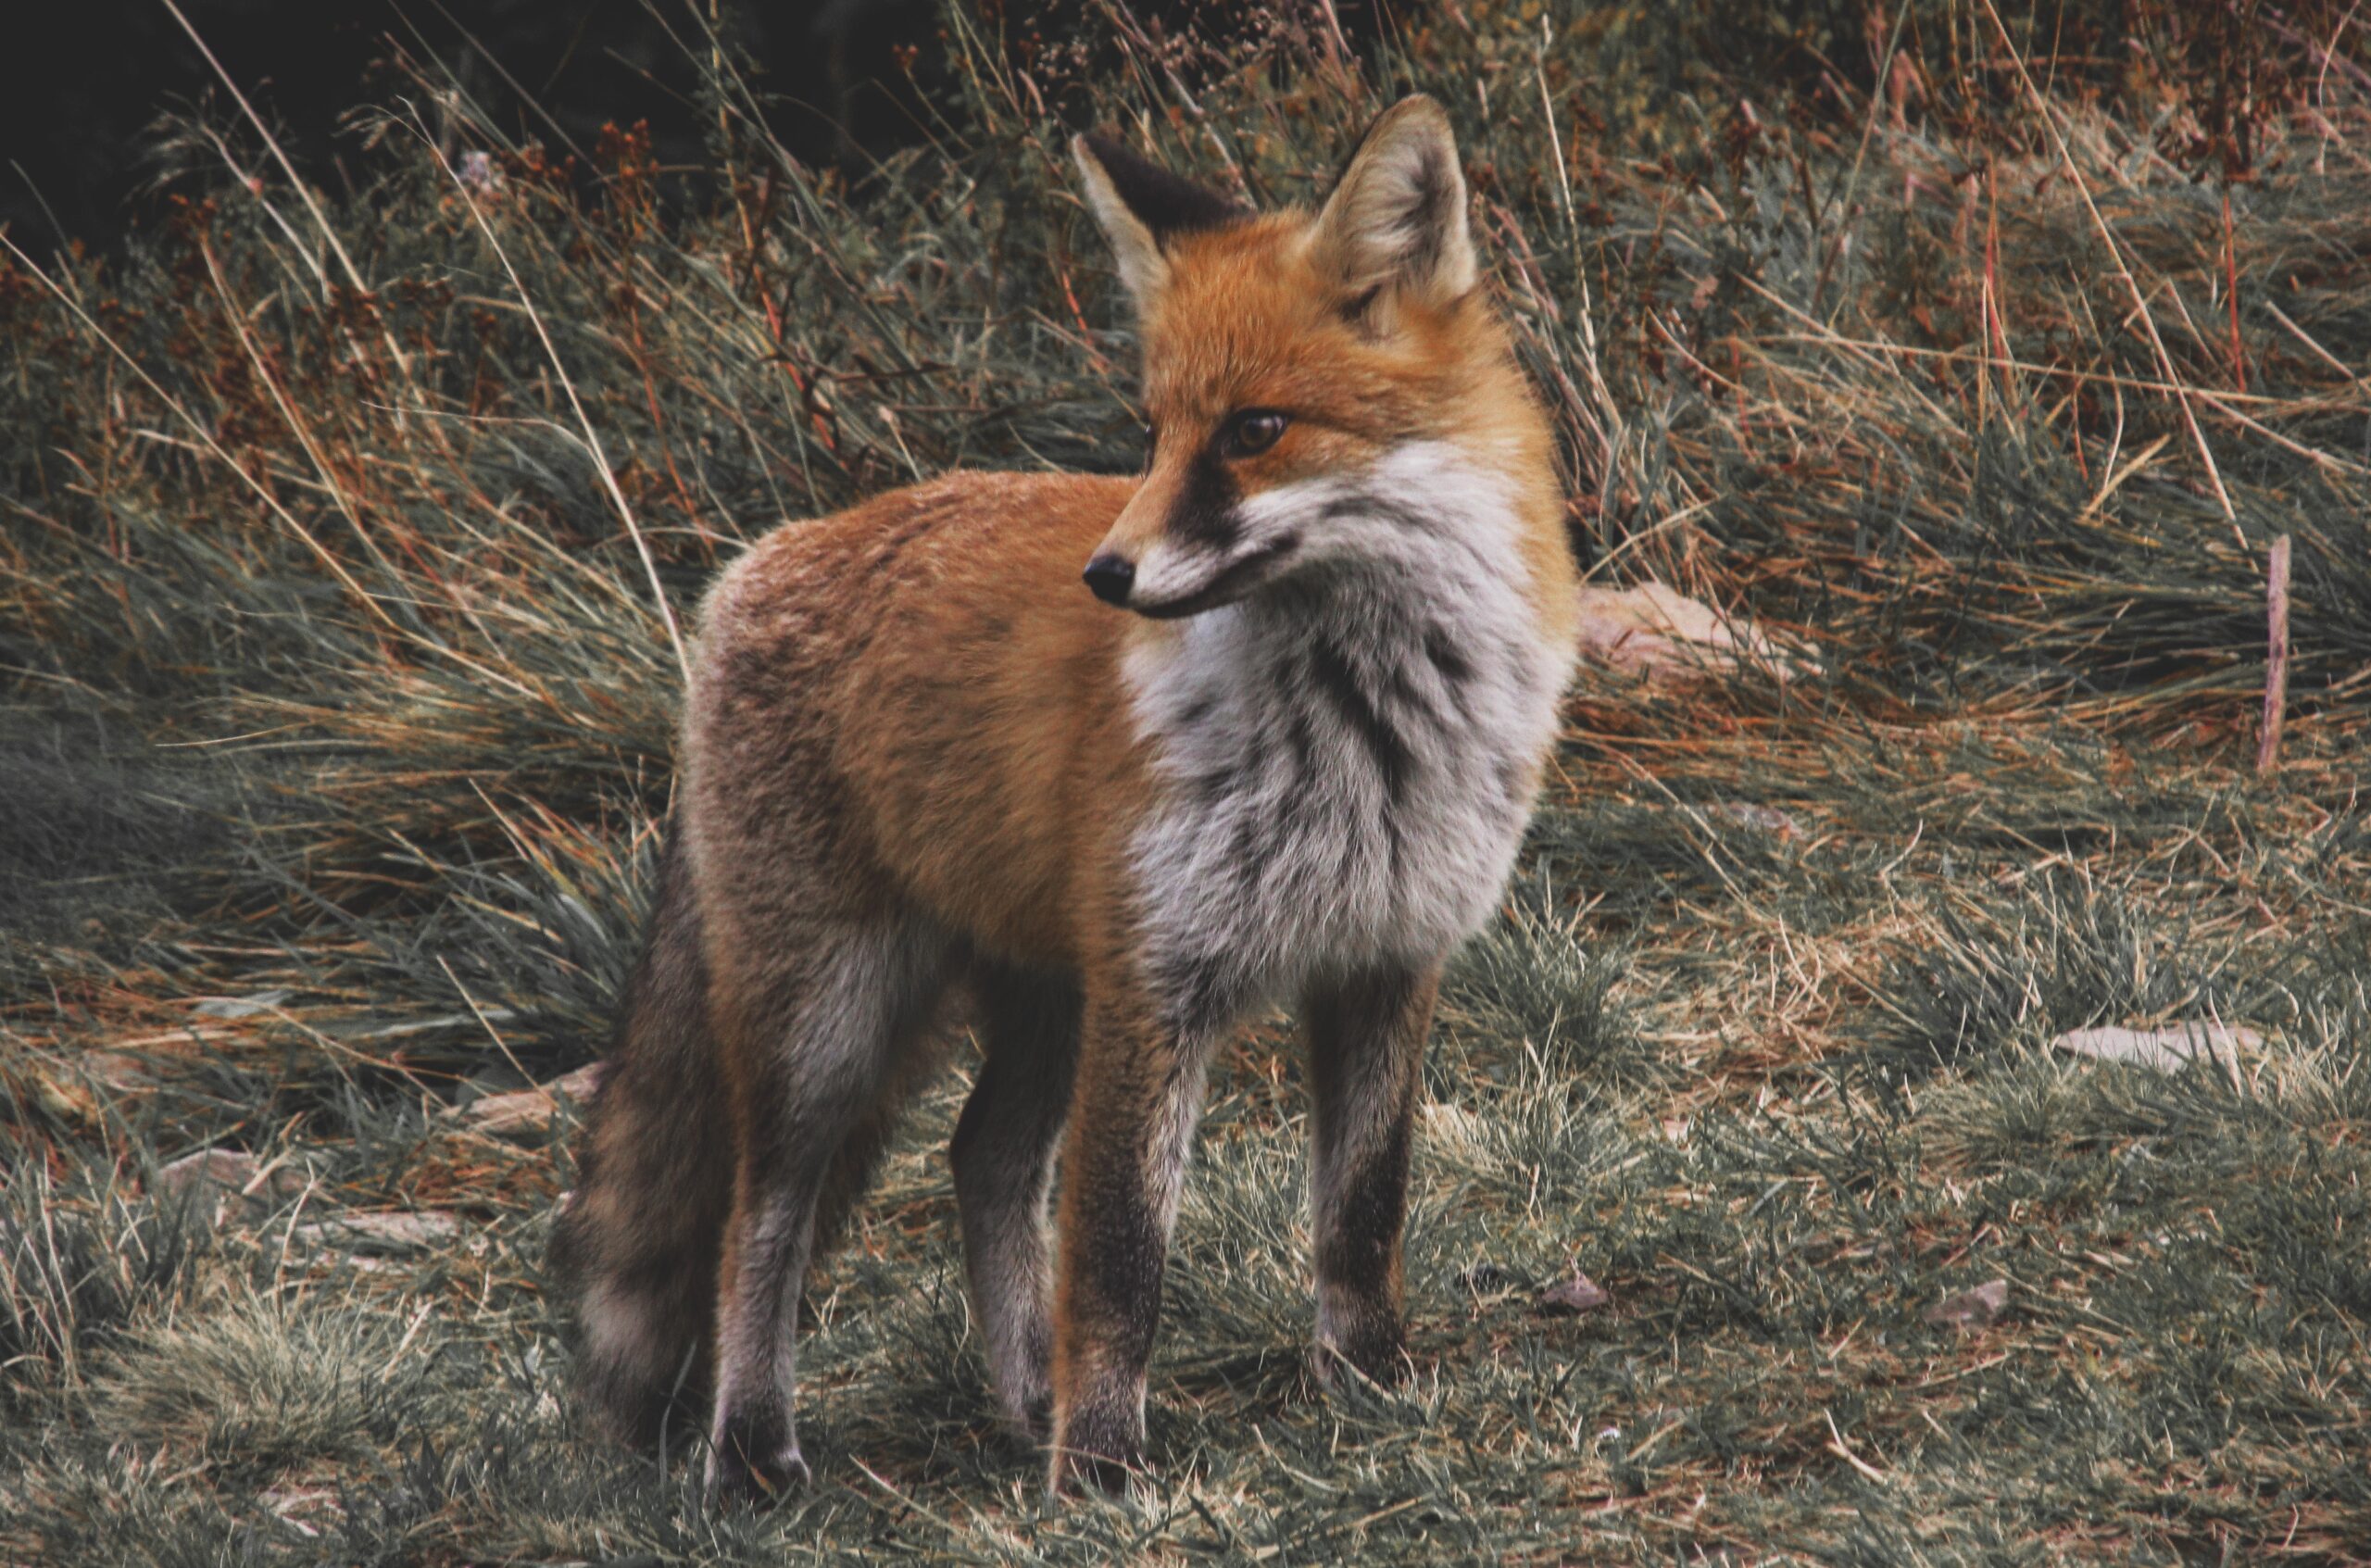
Animal Profile: Fox
What is a Fox?
The fox is a small to medium-sized member of the dog family (Canidae) with long fur and a bushy tail. The largest and most common species is the red fox, which is thought to be the most wide-spread carnivore in the world. Typically a reddish-brown color, with black legs and ears and a white-tipped tail, red foxes can also be found in other colors, including black and silver. They are about 3 feet long and weigh around 10-15 pounds. Highly clever and adaptive animals, foxes can thrive even in urban environments. I spent many nights watching foxes from my apartment when I lived in London!
Foxes in Folklore
Foxes appear in the folklore of many cultures, frequently in a ‘trickster’ role. For example, in Japanese folklore, the kitsune, or fox spirit, is described as an intelligent entity with paranormal abilities. Their wisdom and power are thought to increase with age and they have the ability to shapeshift between fox and human form. While they are sometimes cast as a trickster, other tales show kitsune as guardians, friends, lovers, or spiritual messengers.
As a trickster, the fox appears frequently in European folklore, from the Russian “Kuma Lisa” figure to Finnish and Scottish stories, the trickster fox is rarely evil or cruel. He is often paired in the tales with a more sinister wolf figure, which he outsmarts despite being weaker, representing the triumph of cunning and intelligence over brute strength. Foxes are also common in many Native American cultures though its role varies from culture to culture. In some Midwest and Plains cultures, the fox is seen as embodying wisdom and intelligence whereas in other native cultures, he is seen as a greedy thief. The fox is also a common clan animal in several Native American cultures, including the Hopi, Creek, and Menominee tribes.
The fox is also a popular ‘spirit animal,’ where it provides guidance on quickly finding your way around obstacles. Symbolically, the fox can be seen to represent increased awareness, cunning, the ability to see through deception, the ability to maneuver tricky situations and an affinity with nocturnal activities and dream work.
A beautiful and striking animal, the fox appears in many cultures and fulfills a variety of roles in tales and stories. Have you seen foxes in the wild? What does the fox represent for you? Is it a sinister trickster or a helpful guide?

Inspiring Your Art: Christmas
“Our hearts grow tender with childhood memories and love of kindred, and we are better throughout the year for having, in spirit, become a child again at Christmastime.”
―Laura Ingalls Wilder
This quote reminds me of the excitement and anticipation that always went along with Christmas when I was a child. The joy of playing in the snow and seeing all the lights and decorations on all the houses. The evergreen scent of the Christmas tree.
When I was a kid, we did have a real tree for many years, before we purchased an artificial one. There are a lot of fun (funny?) memories that go along with those real trees. I remember once we had made a catnip mouse as a present for our cat and placed it, wrapped, under the tree. Well, he quickly found that present and batted it right into water in the Christmas tree stand, soaking the toy and turning the wrapping paper into a soggy mush. Another year, our Christmas tree lost all its needles the week before Christmas! My uncle stopped by on his way home from college and helped us haul it out to the trash. I think we got our artificial tree the next year!
As an artist, it is important to remember to play. To take notice of and joy in the simple things that often get overlooked in the rush to meet all our daily obligations. Reclaiming that child-like spirit of wonder helps promote creativity, which can only improve both our artwork and our overall outlook on life.
How do you ‘play’ with your art? Are there special techniques you try or subjects you choose? Have you tried a new method or medium?
Throw Back Thursday: Glass Christmas Pickle
There is a tradition where a pickle ornament is hung on the Christmas tree on Christmas Eve and the first person to find the pickle on Christmas morning gets a special gift. In most cases, it is claimed to be an old German tradition, but I can’t actually find any evidence that this is, in fact, true! Nobody seems to know the real origin of the tradition, but some claim it was made up in America in the 1880s by Woolworth’s company after they started selling German glass Christmas ornaments. Regardless of the true origin, it’s potentially a fun little ‘extra’for Christmas day.
A few years ago I took some glass blowing classes, since that was something I’d always wanted to try but had never had the opportunity.It was a fun and challenging experience, to be sure! The instructor of our class was really great and he never discouraged us from attempting something that might be beyond our current abilities. After all, how else are you supposed to improve? So I decided one night that I was going to try and make a pickle ornament. You have to first make a long-ish bubble, then use a mold to make a ridge pattern around the sides, which is surprisingly difficult to do since the glass cools off very quickly in the mold. Then you blow out the bubble more to thin it and make it larger and snip into the ridges at various points to make the bumpy surface of the pickle. Finally, the hanging loop is added and the piece is complete.
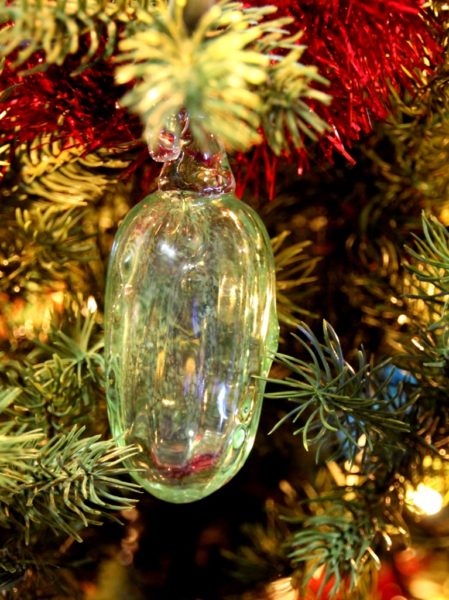
I admit, my pickle is not the greatest: it’s small and heavy and doesn’t have the best ‘pickle’ shape. I’m sure I could buy a much better looking pickle ornament in a store. But I made it myself after only a few weeks of classes. I’m proud of my ugly little pickle. And it looks great on the tree!
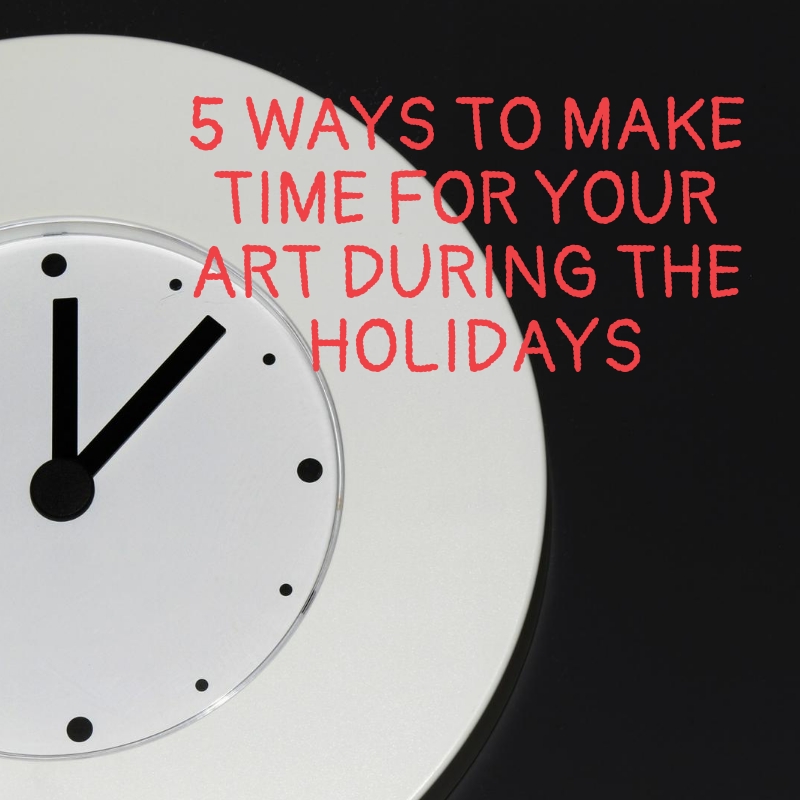
5 Ways to Make Time for Your Art During the Holidays
With the holidays right around the corner, everything seems to go into overdrive this time of year. Unfortunately, when schedules fill up, it often seems like there’s no time for creating art. While it’s undoubtedly important—one could say necessary, even—time for creating artwork can get pushed aside by obligations to others. I’m guilty of this, and I’m sure many of you are as well. So, how can you make time for art amid the chaos and obligations of the season?
1. Schedule it
One way of making time for art is simply to schedule it. Block off that time and guard it vigilantly.
2. Keep a sketchbook with you
Okay, I get it. Not everyone can manage to block off a specific time slot. Everyone’s situation is different, and that’s okay. There are other options. You can also fit your art into whatever time you do have available. There’s nothing that says you need to devote a half hour, an hour, or even longer at a stretch. But what about that 5 or 10 minutes while you’re wait for something to cook, or for a meeting to begin or an appointment? Keep a sketchbook with you. That way when you have those 5 or 10 minutes, you’re prepared. There’s nothing to stop you from making your art!

3. Start an art journal
What if a sketchbook isn’t your thing? That’s fine too. I personally am not much of a sketcher. I do have a sketchbook, but it’s used more for recording rough, note-like sketches of ideas than for producing “good” artwork.
But why not try art journaling? Get yourself a sketchbook, or a notebook, or even just a stack of paper, and some art materials and start a journal. It can take as little as
5 or 10 minutes a day; there’s no reason you need to spend hours.
Got a few minutes first thing in the morning when you’re preparing for your day? How about a few minutes to reflect on your day as you get ready for bed? Jot down your thoughts and feelings. Find some inspiring quotes. Add whatever images you want, however you want. It’s all up to you. Journaling is a good way to relax, reduce stress, and sort out your thoughts and feelings.
4. Join (or create) an online art challenge
What if you need a little more inspiration or structure? How about an art challenge? There are a number that can be found online that you can join or you can even create your own. An art challenge not only provides guidance and structure, with a set topic for each day, but can also provide a sense of accountability that can help in prioritizing and scheduling your time. This is much like having a workout partner for the gym–if you’re expected to actually show someone something (such as posting it on social media), it’s easier to fit it in to your schedule.
A quick Google search should bring up a listing of art challenges. I’ve included a couple links that I found below:
www.deviantart.com/alwaysforeverhailey/journal/Art-Challenges-Mega-List-638643796
www.kickinthecreatives.com/all-creative-challenges/
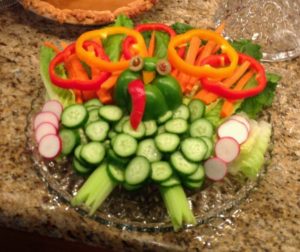
5. Play with your food
Another option is to fit your art and creativity into your normal, everyday tasks. If you’re preparing food for a party, why not get a little creative? There’s no need for that veggie tray to be boring! I have a friend who makes breakfast for his daughters every Saturday and he comes up with the most creative presentations! I’ve seen him come up with apple swans, turkeys made from pears with bacon ‘tails,’ and flowers out of every imaginable breakfast food. Sometimes all you need is to squeeze a tiny little bit art into your everyday routine.
What ways have you found to fit art into your busy schedule?