Posts in Category: Tips and Advice

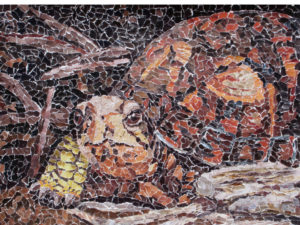
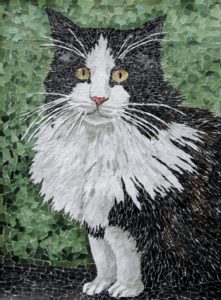
Torn Paper Collage FAQs
1. Why do you make your collages on paper?
There are several reasons. One is just personal preference—I like the way the portraits look when matted and framed. It gives them a clean, professional, and elegant look. The primary reason, however, is related to my training as a museum conservator: paper-on-paper avoids any mismatch in the physical properties, such as response to humidity changes that can occur when there are layers of different materials in contact with each other, and this can help prolong the life of the artwork.

2. Why don’t you apply a varnish or clear topcoat?
Again, this is related to my training as a museum conservator. All varnishes or other materials that can be used as a topcoat will yellow over time and due to the nature of the artwork, the topcoat cannot be removed. This is very different from varnishing an oil painting, for instance. Oil painting varnish also yellows and darkens over time, but it is designed to be removed and replaced without damaging the underlying painting.
While many of the modern acrylic varnishes do have good longevity, I feel it is better for the artwork over the long term to not add any materials that I know can never be removed and will eventually cause yellowing or other visual changes to the piece.
3. How do I care for my torn paper collage artwork?
The greatest danger is light, which will cause fading of the inks used in the magazines and catalogs that were used to create the piece. Please avoid exposure to direct sunlight or prolonged exposure to fluorescent lighting.
Due to the delicate surface texture, your torn paper collage artwork is best displayed framed under UV filtering glass with archival quality mats.
Keep your artwork in conditions that feel comfortable to you—avoid storing the artwork in very hot places, such as an attic or garage. Also avoid very damp areas, like basements, which can lead to mold growth.

4. How long does it take?
Torn paper collage is not a quick process! Each paper fragment is hand torn and individually glued in place. Because of this, your custom portrait can take up to 4-6 weeks, depending on the size and the complexity of the subject.
5. Do you only do dog portraits? What other animals can I get a custom portrait of?
I can make custom portraits of any pet and am happy to do so! Dogs, cats, birds, reptiles, horses, farm animals—you name it. You can check out some of my wildlife torn paper collages here to see some of the other animals I’ve worked with.
6. How do I order a custom pet portrait?
When you place your order, I will require high-quality digital images of your pet. Try to provide photos that really capture the personality of your pet.
I require full payment to start work on your pet portrait. I accept payment via PayPal, Venmo, cashier’s (bank) check or money order. You can also place your order directly in my website shop, here.
Once I receive your order and photos, we can clarify any remaining details of the portrait: subject(s), size, colors, etc. I can also give you an estimate of when the portrait will be completed. Portraits can take 4-6 weeks to complete, but if you have a specific occasion or timetable you need the portrait for, please let me know.
Before I ship the completed piece, I will email you a digital image for your approval.
Feel free to contact me via email at tamara@tamarajaeger.com or by filling out the request form on my website, here.
7. I have professional photos of my pet. Can you use those?
No, it’s a violation of the photographer’s copyright. It’s much simpler and easier for me to use photos that you took yourself. They don’t have to be professional looking—they just have to clearly show your pet and, ideally, give me a good feel for their personality.
The only situation where I would consider using professional photos is where it is not possible to take new photos of your pet and professional photos are the only ones that exist (i.e. for a memorial portrait of a deceased pet). In this case I would require written permission from the photographer before I could use their images as reference photos for your custom pet portrait.
8. I still have questions!
Feel free to contact me by filling out this form or by email at tamara@tamarajaeger.com. I’m happy to answer any other questions you have!
Want to keep updated and see more of what I’m working on? Sign up for my mailing list here and get a totally FREE digital download of a tiger linocut print. (I promise not to be spammy with my emails—I hate that too!)


Life and Tips: Working in a Series
When I was in college, one of my art professors suggested that it would be good to start working on pieces that were in a series. Before that point I, like most art students, was focused on individual projects and pieces, with no attempt at creating an over-arching theme or connection between pieces. Now partly this is simply due to being a student. You take classes and your professors dictate what you should be working on to a large extent. And that’s fine, up to a certain level. But eventually you reach the point where you need to take your art further than just developing proficiency in a technique or medium. That is when working in a series comes in.
Why work in a series?
One of the main benefits to working in a series is that it gives you a chance to fully explore a subject, thinking about it deeply and fully. With a deeper understanding of your subject, you can express it on a deeper, more meaningful and insightful level than if you just create one or two pieces. For the viewer, a series provides a cumulative effect– multiple related pieces craft a deeper understanding of the artist and their work. Working in a series also creates a cohesive body of work that can, for example, be used for showing in galleries or exhibitions.
How to create a series
When working in a series, the first step is to choose your subject. Now, I’m using “subject” loosely—it doesn’t have to be a specific item or physical object, though it certainly can be. There’s absolutely no reason your subject can’t be flowers or old barns or cats or whatever else you want! But your subject can also be more abstract. It can be a technique or pattern or color. It can be a certain texture or design or even an emotion that you are exploring. Basically, your subject is the overall unifying theme for the pieces in your series.
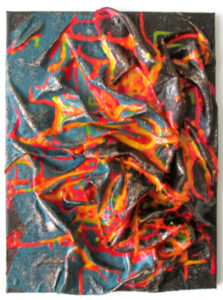
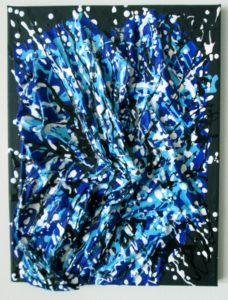


As an example, I created my “Elementals” series to explore the four elements of fire, water, air, and earth. I also have a series—“Below the Surface”—that was inspired by a trip to a rock and mineral show. The subject for that series was geological features.
Once you’ve chosen your subject, the next step is to define what your series will consist of. Brainstorm your possibilities. I find it helpful to do a series of quick sketches to lay out my ideas. These are mostly just rough, gestural sketches—not detailed, specific images—which help me to visualize the series and the connections between the pieces. Detailed sketches can come later, when you’re ready to start creating. Set your series specifications. How many pieces will be in the series? What size or sizes will they be? Consider your sketches and ideas with the focus of seeing how these pieces will form a cohesive set.

For my “Elementals” series, I knew that I wanted to have three pieces for each element and all the pieces were going to be on the same size canvas. I wanted to explore color and texture, and having the same canvas size helped to create a sense of unity for the pieces. “Below the Surface” was a little different. Each piece was wildly different in size, shape, color and texture. The unifying feature here is primarily the subject itself. This is also a series where I had many more ideas than made it into reality. Of course, there’s no reason I can’t go back and add to the series. All it takes is a trip back through my sketchbook to remind myself of the ideas and then set myself to bringing them to life.

Now that you’ve got your theme and know what pieces will be in your series, it’s time to get to work and make art!
What about you? Do you work in series? If not, why? If so, what things do you consider when developing your series? Tell me in the comments!
Life and Tips: Art Challenges
Lately I’ve been feeling… less than inspired in my art. It happens to everyone at some point. While I’ve been working on (and completing!) pieces, they’ve frequently been pretty slow going. So I got to thinking about how I can shake things up a bit and get myself back into my enthusiastic, inspired art mindset.
Back in December I wrote a blog post about ways to make time for your art during the holidays and in it, one of the suggestions I made was joining an art challenge. Now, I’ve never actually participated in an art challenge before and I still didn’t really feel like joining an established, current art challenge. I guess I didn’t want the pressure of following what I perceived to be a rigid, predefined challenge (sure, I realize they’re probably Not actually rigid and intimidating—it’s art, after all!).
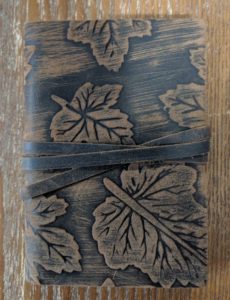
But when I was digging around in my studio, I ran across a small leather sketchbook that I had forgotten about. It’s about 3”x4” with a cute, tooled leaf pattern on the cover. So I thought, why not make up my own art challenge?
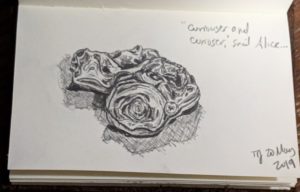
I confess, I’m not actually fond of sketching and drawing (I’m pretty sure that’s some sort of art sacrilege!). I do have a sketchbook, but I primarily use it to jot down/sketch out rough ideas for future pieces or to work out details of composition. But my sketchbook is definitely not like the ones you see everywhere that are full of gorgeous artwork! And that’s okay—there’s no rule that says you need to draw intricately detailed artwork in your sketchbook.
So, in need of a bit of a change and looking at this cute little leather sketchbook, I decided that I would actually use the sketchbook to… (*gasp*) sketch! It’s tiny, so it’s not intimidating—there are no large, blank pages staring at me, taunting me to put pencil to paper. And I decided that I would use one page per day—just one. If I feel some crazy desire to do more drawing, I’ve always got my regular sketchbook, with its sad, empty pages just waiting for me to show it some love.
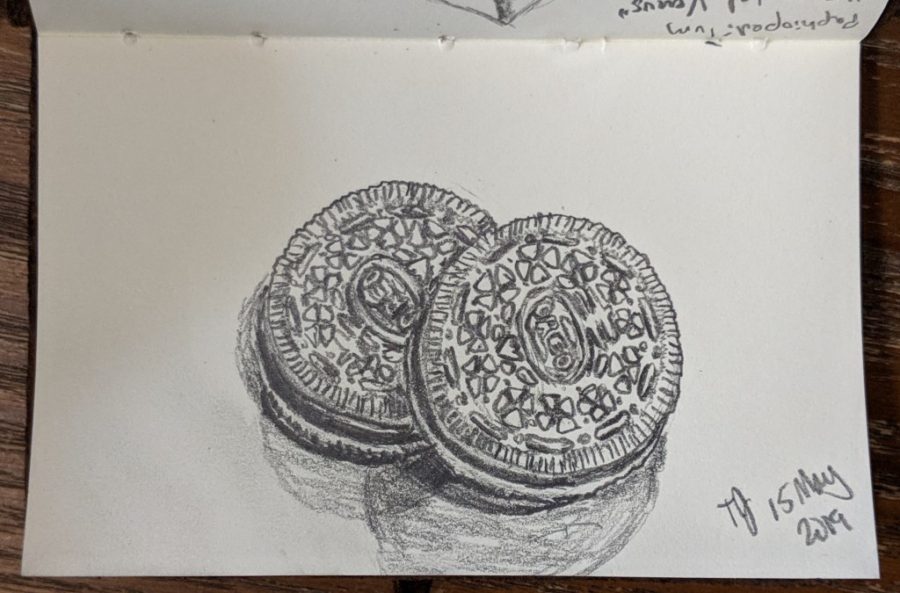
To keep myself accountable, I also decided to post each day’s page on my Instagram account, regardless of whether or not I actually like how the sketch turned out. I’ve included a few of my pages here. Go ahead and follow me on Instagram if you’re curious to see how it progresses (@tamarajaegerfineart).

We’ll see how it goes, and hopefully the challenge of working in a medium I don’t particularly enjoy will help me to look at things in a different way.
What about you? Have you ever joined or invented your own art challenge? How did it go? What other methods do you use to keep or renew your enthusiasm for your art?

3 ways to price your artwork
One of the perennial questions that artist ask is “How do I price my artwork?” A quick Google search gives all kinds of suggestions. You want to keep in mind that your buyers need to be able to understand why a piece is priced the way it is. It helps to have a standard pricing method, so you can explain clearly to potential buyers why a piece costs what is does. In addition, having a standardized pricing scheme helps take the emotion out of pricing your work, preventing you from pricing some pieces higher than others based purely on how you feel about the piece. This type of pricing is very difficult to justify to your buyers—they don’t care that a certain piece reminds you of your childhood friend or a favorite vacation spot.

Here, I will present three methods that can be used to price your work for sale. And remember, you can always adapt any pricing method to fit your needs.
1. Materials and time
This is one of the standard methods of pricing artwork. First, you add up the cost of all the materials you used to create a piece of artwork. Then you take whatever hourly wage you assign to yourself and multiply that by the time it took to create the piece. It’s a reasonably straightforward method of pricing and works well for pieces that have a significant materials cost and is probably one of the better methods for pricing three-dimensional work. However, I find this method lacking for artwork like my torn paper collages, which have a minimal materials cost.
2. Square inches
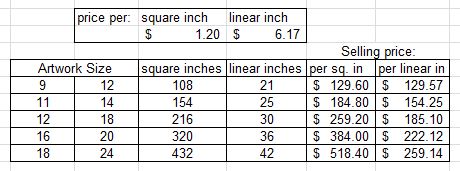
This is another very common pricing method. You multiply the length by the width of your piece to get the size in square inches. You then multiply the number of square inches by a set cost per square inch to get the selling price. One of the potential drawbacks is that as the size of the piece increases, the selling price increases very rapidly. It can be difficult to justify to buyers why a piece that’s only a little larger than another one costs so much more. While it works best for two-dimensional pieces, it can also be modified for use with three-dimensional work by adding in the height of the piece and using cubic inches (length x width x height).
3. Linear inches
This is a modification of the previous method which attempts to minimize the increase in price with size that occurs using the square inch method. Like the square inch method, you take the length and width of your piece but then you add them together instead of multiply to get the size in linear inches. You then multiply by your set price per linear inch to get your selling price. Note that you will probably want to use a higher price per linear inch than your price per square inch to keep the overall price of the piece reasonable. This is the method I currently use when pricing most of my own artwork for sale.
In the example below, you can see a comparison of the last two pricing methods. Notice how the price increases much more rapidly for the square inch pricing than for the linear inch pricing. This is not necessarily a bad thing—in the end it’s Your artwork and you should price it in a way that you are comfortable with.
The thing everyone seems to agree on when pricing your artwork is to not undervalue yourself! Don’t fall into the mindset of pricing based on what you would be willing to pay—you want to price according to what others are willing to pay. Your work has value and if you want people to respect it, it needs to be priced accordingly. It’s difficult at first, especially if you’ve never sold your work before so you have nothing to go on as a starting price. Try researching what other artists are charging for similar work and start there. But always make sure that it is priced in a way that feels fair to you. Make sure you selling price covers the cost of your materials and that you are ‘paying’ yourself a reasonable wage. You want to come away feeling happy once you’ve sold your piece, not feel like you’ve been cheated because the selling price was too low.
How do you go about pricing your work? Do you use one of these methods or something different?
5 Ways to Make Time for Your Art During the Holidays
With the holidays right around the corner, everything seems to go into overdrive this time of year. Unfortunately, when schedules fill up, it often seems like there’s no time for creating art. While it’s undoubtedly important—one could say necessary, even—time for creating artwork can get pushed aside by obligations to others. I’m guilty of this, and I’m sure many of you are as well. So, how can you make time for art amid the chaos and obligations of the season?
1. Schedule it
One way of making time for art is simply to schedule it. Block off that time and guard it vigilantly.
2. Keep a sketchbook with you
Okay, I get it. Not everyone can manage to block off a specific time slot. Everyone’s situation is different, and that’s okay. There are other options. You can also fit your art into whatever time you do have available. There’s nothing that says you need to devote a half hour, an hour, or even longer at a stretch. But what about that 5 or 10 minutes while you’re wait for something to cook, or for a meeting to begin or an appointment? Keep a sketchbook with you. That way when you have those 5 or 10 minutes, you’re prepared. There’s nothing to stop you from making your art!

3. Start an art journal
What if a sketchbook isn’t your thing? That’s fine too. I personally am not much of a sketcher. I do have a sketchbook, but it’s used more for recording rough, note-like sketches of ideas than for producing “good” artwork.
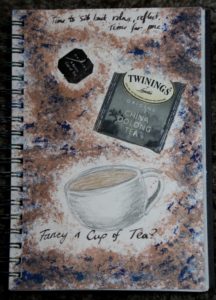
But why not try art journaling? Get yourself a sketchbook, or a notebook, or even just a stack of paper, and some art materials and start a journal. It can take as little as
5 or 10 minutes a day; there’s no reason you need to spend hours.
Got a few minutes first thing in the morning when you’re preparing for your day? How about a few minutes to reflect on your day as you get ready for bed? Jot down your thoughts and feelings. Find some inspiring quotes. Add whatever images you want, however you want. It’s all up to you. Journaling is a good way to relax, reduce stress, and sort out your thoughts and feelings.
4. Join (or create) an online art challenge
What if you need a little more inspiration or structure? How about an art challenge? There are a number that can be found online that you can join or you can even create your own. An art challenge not only provides guidance and structure, with a set topic for each day, but can also provide a sense of accountability that can help in prioritizing and scheduling your time. This is much like having a workout partner for the gym–if you’re expected to actually show someone something (such as posting it on social media), it’s easier to fit it in to your schedule.
A quick Google search should bring up a listing of art challenges. I’ve included a couple links that I found below:
www.deviantart.com/alwaysforeverhailey/journal/Art-Challenges-Mega-List-638643796
www.kickinthecreatives.com/all-creative-challenges/
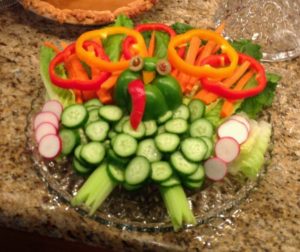
5. Play with your food
Another option is to fit your art and creativity into your normal, everyday tasks. If you’re preparing food for a party, why not get a little creative? There’s no need for that veggie tray to be boring! I have a friend who makes breakfast for his daughters every Saturday and he comes up with the most creative presentations! I’ve seen him come up with apple swans, turkeys made from pears with bacon ‘tails,’ and flowers out of every imaginable breakfast food. Sometimes all you need is to squeeze a tiny little bit art into your everyday routine.
What ways have you found to fit art into your busy schedule?