Posts Tagged: torn paper collage
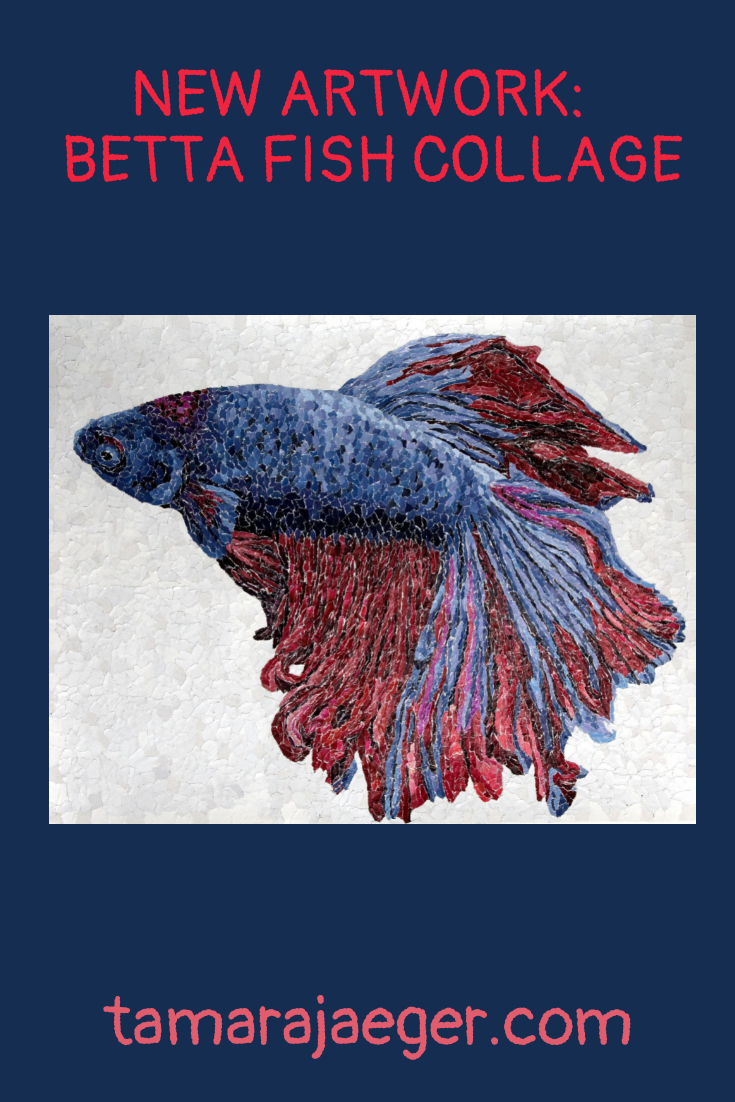
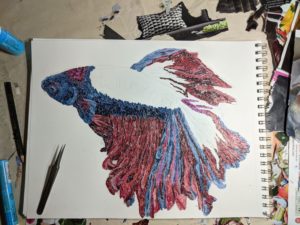
New Artwork: Betta Fish Torn Paper Collage
Wow, I guess I have a lot of pieces to update you on! This one is titled “Paradise.” Technically, it’s a pet portrait (I do more than just dogs and cats! Anything goes, really). Paradise is a Betta fish and this piece is a little larger, at 11” x 14”. I quite like working in the larger sizes since I can get a lot more detailed. I wonder how large I can go? I get this mental image of creating a piece that takes up the entire wall of a room… I… kind of want to try it.
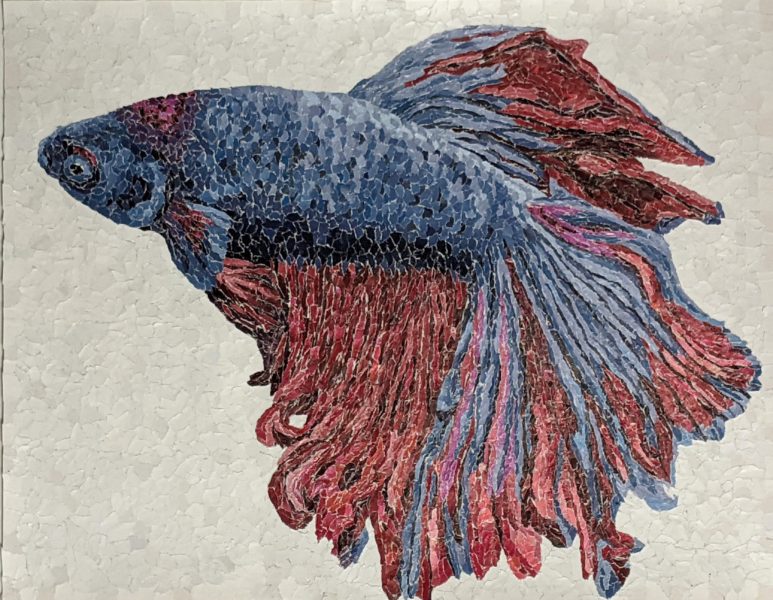
Anyway, “Paradise” is a more ‘typical’ torn paper collage. I tear tiny pieces of paper from catalogs and magazines and attach them to a piece of paper using scrapbooking glue. The ZIG or EK Tools brand 2-Way glue is my preferred adhesive. I’m not too particular about the paper I use. Any good-quality artist’s drawing paper is fine. Recently I’ve been using Strathmore paper, which can be found in pretty much any store that carries art supplies.
I enjoyed working with some brighter colors for a change. Most of the animals I make are various shades of neutral earth tones. Nothing wrong with that—I enjoy the challenge of getting the subtle color graduations right. But sometimes, it’s fun to play with color a bit. Color’s a bit harder in some ways, since the pieces often require large amounts of the same color. Flower catalogs are good, as are some clothing catalogs, but they typically have smaller sections of color, so it can be difficult to find enough of the same (or similar) color for a large piece like this.
What’s your preference, bright colors like this or subtle earth tones?
Want to stay up to date and see more of what I’m working on? Sign up for my mailing list here and get a FREE digital download of an exclusive tiger linocut print. (I promise not to be spammy with my emails—I hate that too!)
* Please note that this post contains affiliate links and any sales made through such links will reward me a small commission – at no extra cost for you.
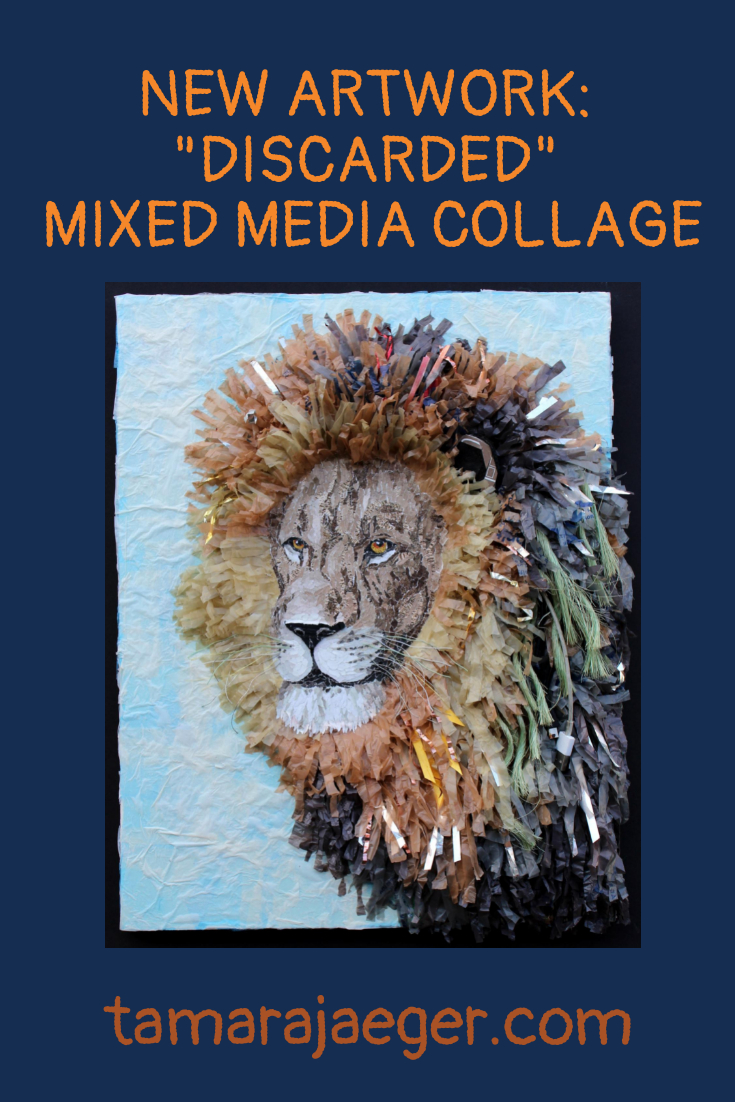
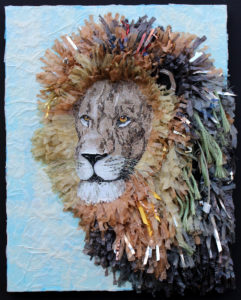
New Artwork: “Discarded” Lion Found Object Collage
I participated in the America SCORES Cleveland “Inspired Art” charity auction. America SCORES is a program that involves soccer, writing workshops, and community service projects for elementary school children in urban (and economically-disadvantaged) areas to improve their academics, physical fitness, and teamwork skills and feel empowered to lead their communities. You can learn more about America SCORES Cleveland here.
For the Inspired Art fundraiser, artists select a poem written by the students and use it as inspiration to create a piece of art. I chose the poem “Pollution” by the Mound Stem School CORE Boys team.

I was inspired by the parts where it talks about trash on the ground and in the ocean. I thought about all the trash I see everywhere around the neighborhood. So, I collected a bunch of trash that I found while walking my dog and used it as material to create a piece of art.

I chose a lion as the subject because I felt that it fit the edgy and defiant feel to the poem.
In “Discarded,” I combined my normal torn paper collage with pieces of plastic bottles, plastic bags, USB cables, rope, ribbon, bus passes, and even part of a Starbucks travel mug! However, I wanted the trash to blend in rather than being the emphasis, much like how I use catalogs in my regular torn paper collages. I wanted the piece primarily to look like “art,” rather than an assemblage of trash.
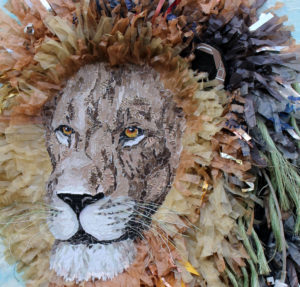
Because it uses a variety of materials, I created it on a gessoed wooden panel instead of my normal paper substrate. I also varnished most of the piece using Winsor & Newton Acrylic Satin Varnish to help protect them from dust and moisture. I left the plastic bag ‘mane’ unvarnished since all my tests turned out poorly! I had wanted to varnish that part as well, but I tried several different methods and varnishes and the fringes tended to clump and mat together and generally just didn’t look good.
I think “Discarded” turned out great and it was a lot of fun to take things in a slightly different direction. I’m considering expanding it into a series of pieces that are created with trash. What do you think? What animals would work well with this technique?

Want to stay up to date and see more of what I’m working on? Sign up for my mailing list here and get a FREE digital download of an exclusive tiger linocut print. (I promise not to be spammy with my emails—I hate that too!)
* Please note that this post contains affiliate links and any sales made through such links will reward me a small commission – at no extra cost for you.
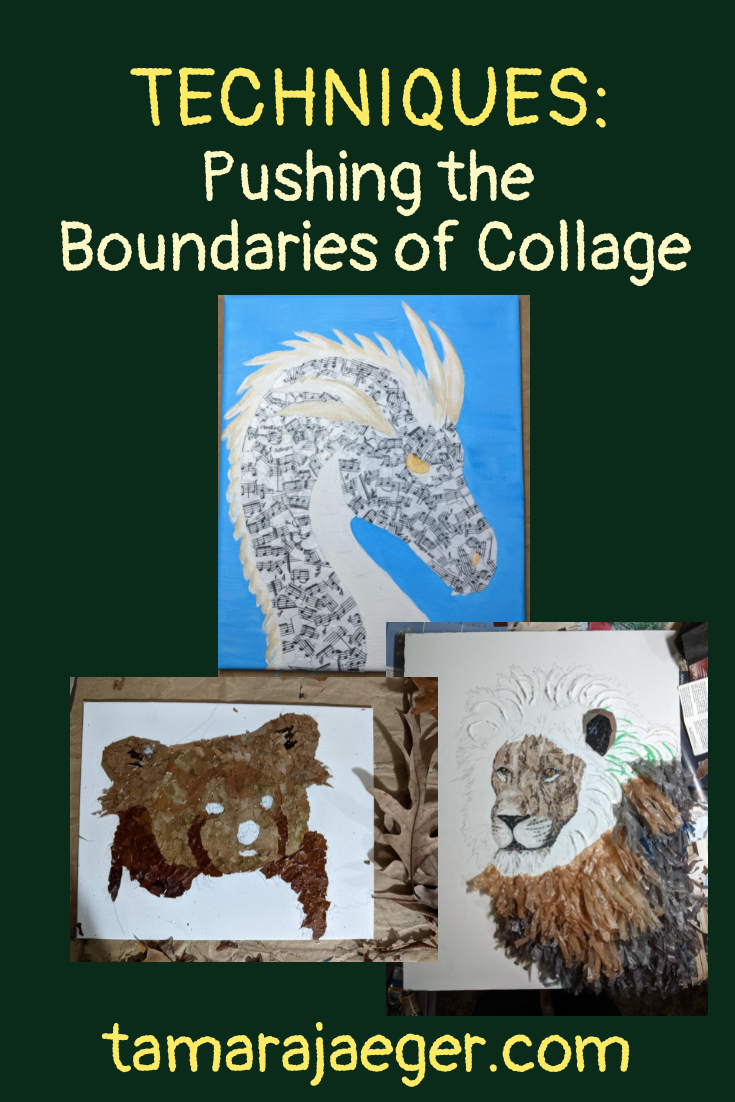
Pushing the Boundaries of Collage
I’ve been working on a lot of pieces lately that combine other materials and techniques with my ‘normal’ torn paper collage. Part of it is just to see how far I can push things. I’ve gotten my torn paper collage technique quite well-refined, to the point that the paper pieces function more like paint or another traditional medium than as collage. There’s certainly nothing wrong with the traditional collage look, but that’s not where my journey has taken me!
Part of it is a natural progression. A lot of my ‘paintings’ have shifted to be more abstract, mixed-media pieces that are increasingly three-dimensional or other wise not contained to a single, flat plane. There are pieces that are formed from multiple canvases and pieces where the ‘image’ doesn’t stay within the rectangular boundary of the canvas. It makes sense that my collages would evolve too, I suppose.
The Inspired Art piece I talked about here was definitely a jumping-off point. There’s still some of my usual torn paper collage, but it also includes a lot of non-standard materials. “Trash,” used as an art medium. The little test collage of a Red Panda I made out of leaves (you can read more about it here) was another interesting side branch and one that I think I’ll explore further. I suspect there are definite limits to what can be accomplished with leaves as an art material. But I really want to see what those limits are!

All this experimentation and exploration means that I’ve needed to adjust the materials and techniques I use, however. Normally, I use artist’s drawing paper and scrapbooking glue to attach paper fragments torn from catalogs and magazines. I intentionally use paper as a substrate, since it will respond the same way the collaged paper fragments will to changes in temperature and humidity. It’s the conservator in me! I also don’t varnish my paper collages, since the varnish is not removable and even archival-quality varnishes will yellow over time.
With the pieces that contain other materials, there are different concerns. The variety of materials means that there will always be a potential issue with how the different parts of the piece respond to changes in environment. I use a sturdier substrate, like a wooden panel, since the materials can sometimes be quite heavy, relatively-speaking, so they need more support. I use different materials as the adhesive, since scrapbooking glue isn’t strong enough or ‘bulky’ enough to hold the different materials firmly.
I also tend to use varnish more often, either on the entire piece or just on parts of it. This is to help protect the materials themselves, either from humidity changes or from the other materials. I coat the metal pieces to keep them from rusting, for example, which could damage parts of the piece that are in contact with it. The varnish also helps to give the surface a more uniform; something that’s not really an issue when I working just with paper.
Some of the materials I’ve been using in my mixed-media collages are listed below, if you are interested in my go-to products.
- Golden Soft Gel Medium
- Golden Light Molding Paste
- Winsor & Newton Galeria Acrylic Satin Varnish
- ZIG or EK Tools 2-Way Glue
- Strathmore Drawing Paper
Want to stay up to date and see more of what I’m working on? Sign up for my mailing list here and get a FREE digital download of an exclusive tiger linocut print. (I promise not to be spammy with my emails—I hate that too!)
* Please note that this post contains affiliate links and any sales made through such links will reward me a small commission – at no extra cost for you.
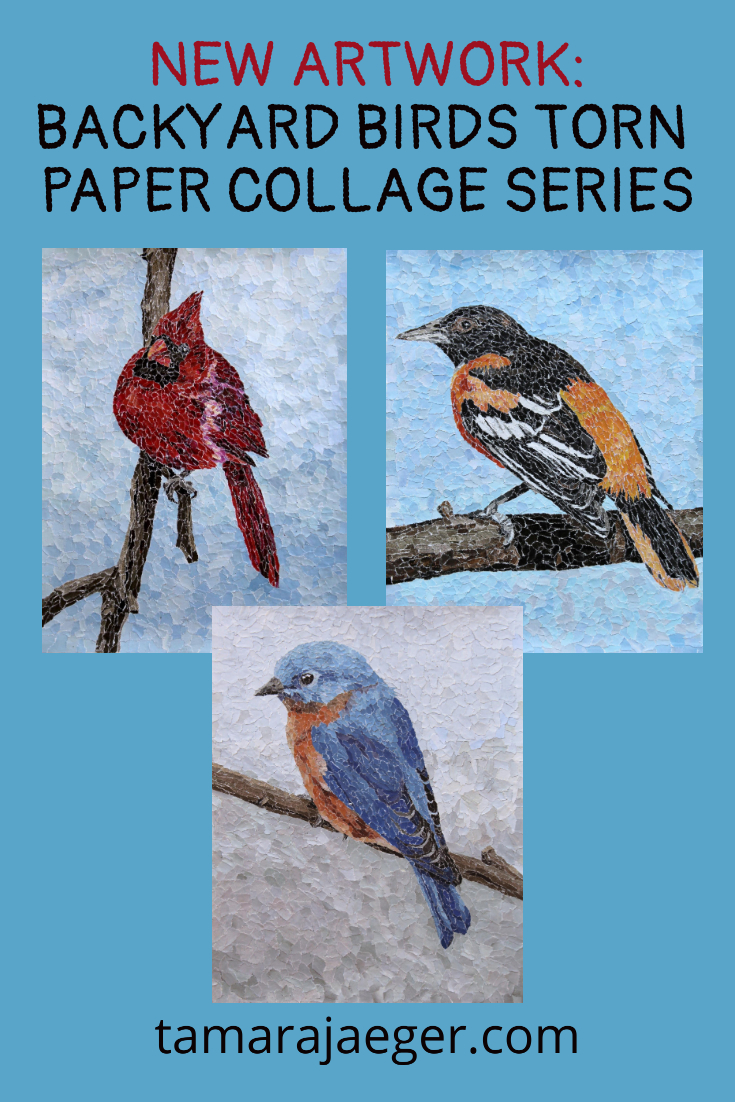
New Artwork: Backyard Birds Torn Paper Collage Series
This lovely little bluebird is finally finished! Just in time for spring. Hopefully… He’s been sitting in my studio for a little while, almost done, just missing the background. I’ve been working on a new linocut series, but I finally took some time out to finish him up.
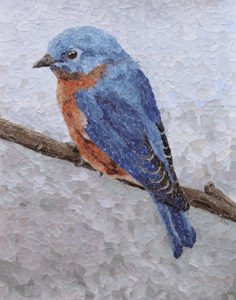
I’m thinking of expanding into a backyard birds torn paper collage series. I have three already, so why not more? I don’t think I’ve shared the other two here yet, so I’ll add them to this post too! We’ll make this a Backyard Birds series post.
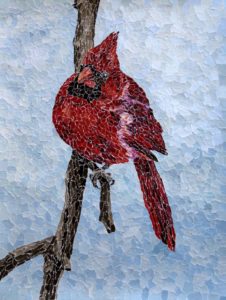
First, I have this lovely Cardinal. I used him on my Christmas cards last year. Maybe I should add a line of greeting cards to my Etsy shop. What do you think?
I also have this Baltimore Oriole. They have such striking colors.

Now I just need to decide which other birds I want to add to the series! So far I’ve done northeast/midwestern US birds, since that’s where I’m living currently. I suppose I could add some of the birds I saw when I lived in the UK. Maybe make a second series of backyard birds!
What are your favorite backyard birds? Tell me in the comments.
Want to stay up to date and see more of what I’m working on? Sign up for my mailing list here and get a FREE collection care resource guide. (I promise not to be spammy with my emails—I hate that too!)
Collection Care Series Throwback Thursday: Fox Collage
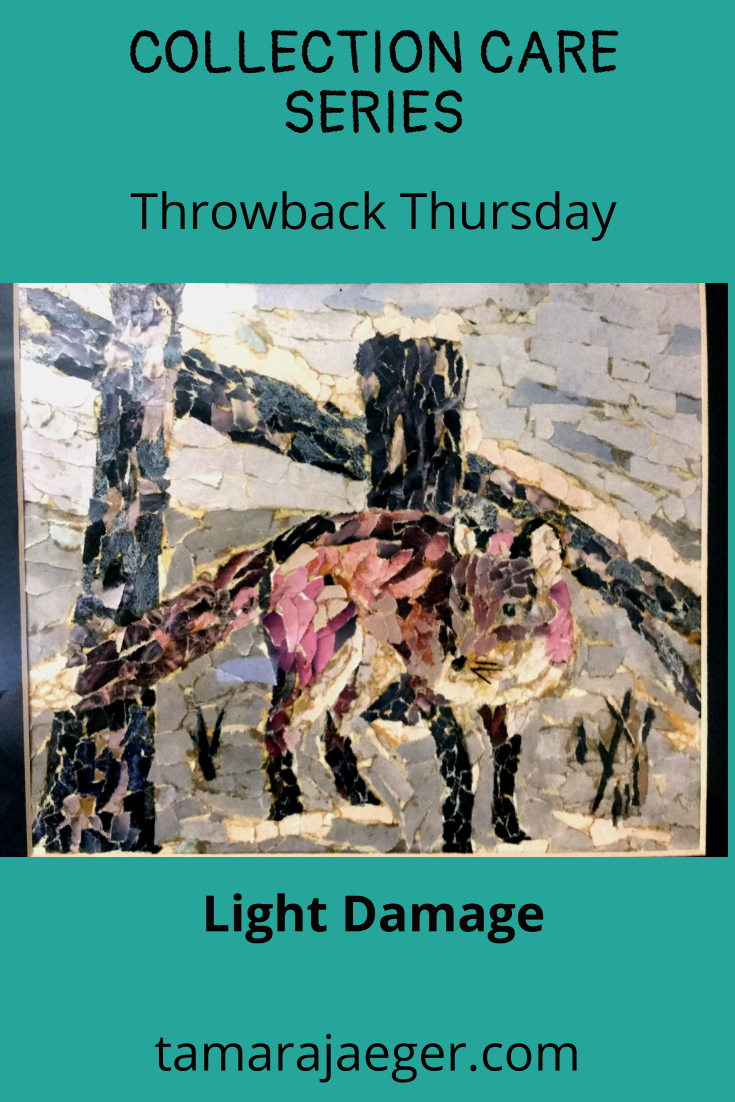
Last week we talked about light damage. So as an example, I wanted to share with you one of my earliest torn paper collages. Now, as far as preservation goes, it’s had a rough life. It was displayed for over 20 years right next to a window in an office. It got a Lot of light, and you can definitely see the effects of that.
Unfortunately, I don’t have a photo of what it looked like when it was first made, but you can still see the fading and discoloration. Some of the discoloration is of the adhesive used to attach the magazine pieces to the paper—that’s likely a combination of light damage and the acidic nature of the adhesive (rubber cement, in this case).
Overall, considering the amount of light it got, it’s in surprisingly good shape. The colors have shifted, the blues in particular have faded a lot, but it’s still apparent what the subject is. At least it provided a lot of enjoyment over its lifetime!

Do you have any examples of light damaged artwork? Feel free to share in the comments!
Missed the first post? Start at the beginning of the collection care series here.
Check out the next collection care post on moisture here.
Want to stay up to date and see more of what I’m working on? Sign up for my mailing list here and get a FREE collection care resource guide. (I promise not to be spammy with my emails—I hate that too!)
Custom Pet Portrait Progression: Grendel
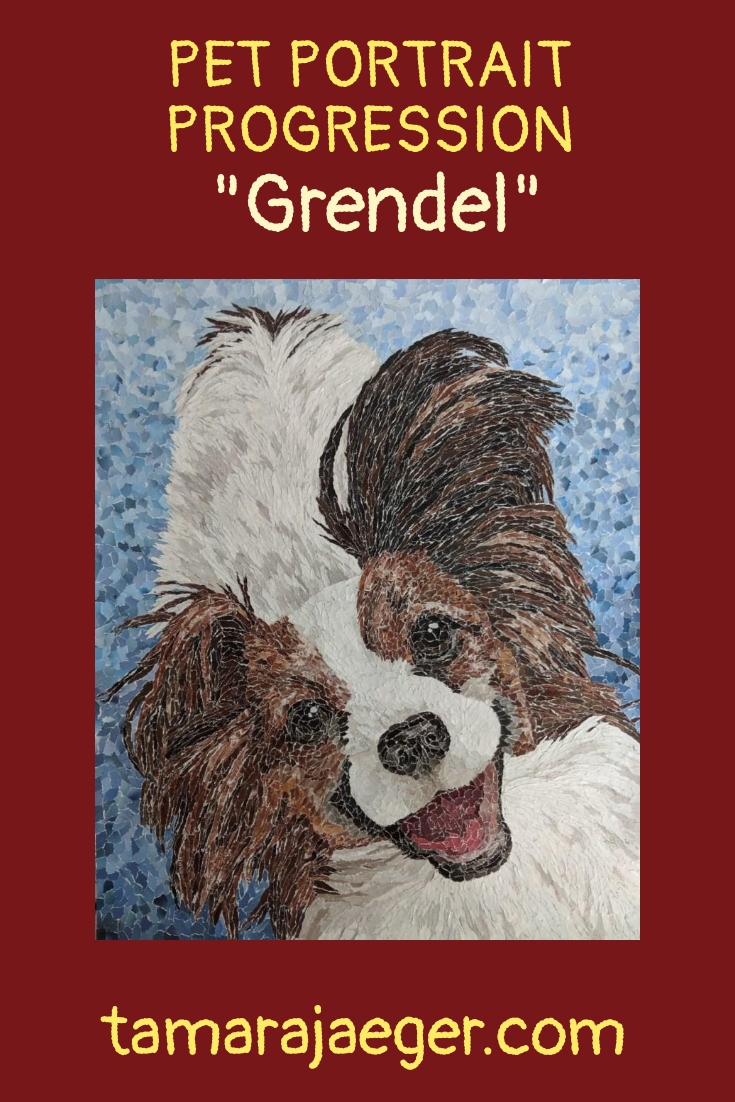
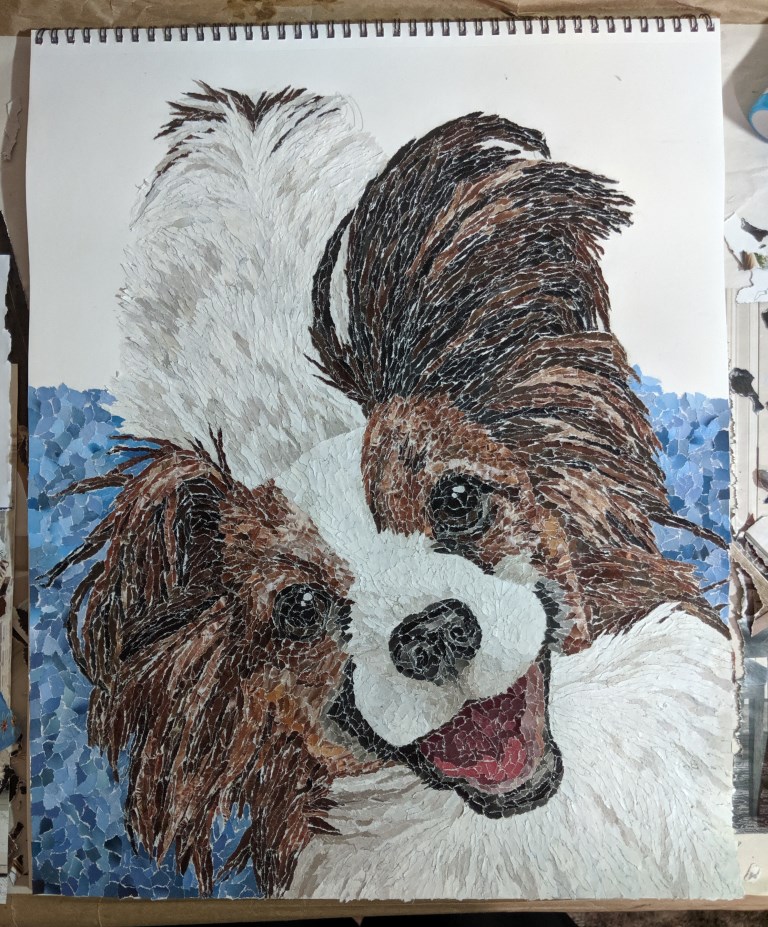
I thought it might be interesting to put together a series of images to show the progression of my recent portrait of my Papillon, Grendel, so you can get a behind-the-scenes look at the process of creating a custom pet portrait.
This post is a little on the long side, but don’t worry–it’s mostly pictures!
This is the reference photo I as working from.

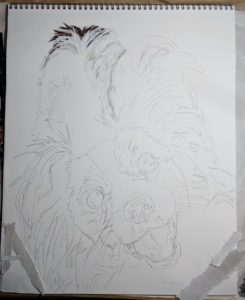
And here’s the initial drawing, all ready to go.

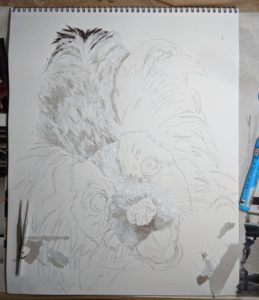
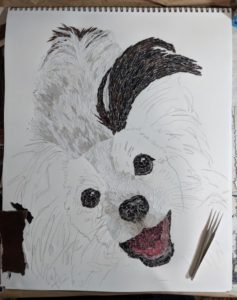
I started with Grendel’s tail and worked up his back toward his head, so I could work with the way the fur overlaps.
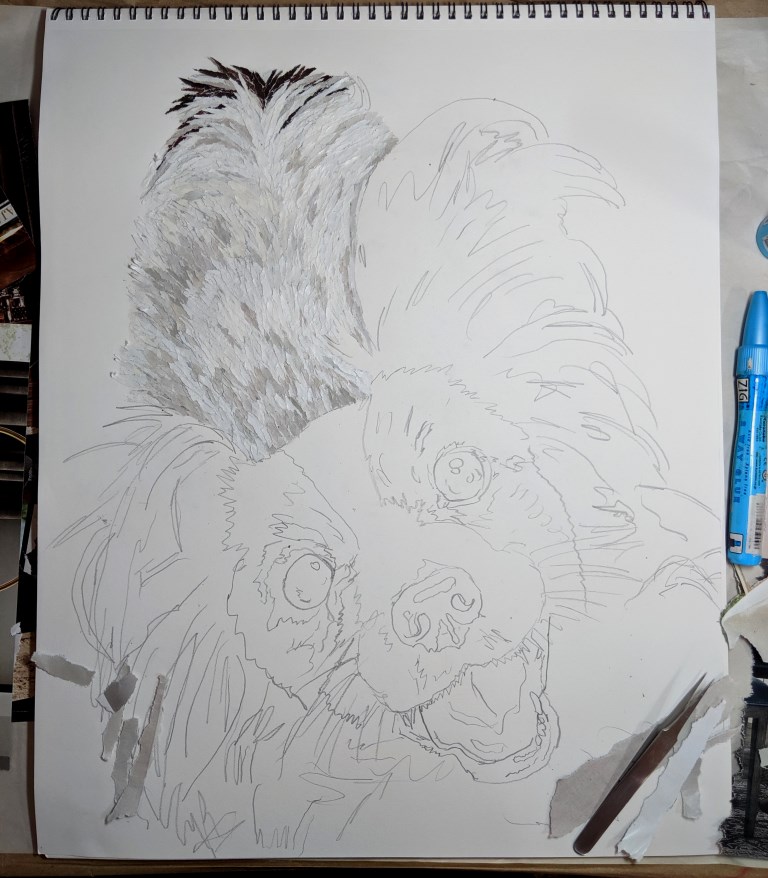
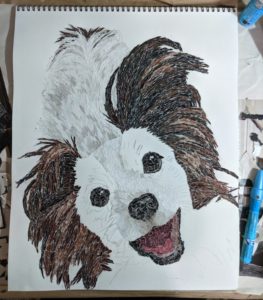
Then I worked on the white part of his face and filled in his eyes and nose.

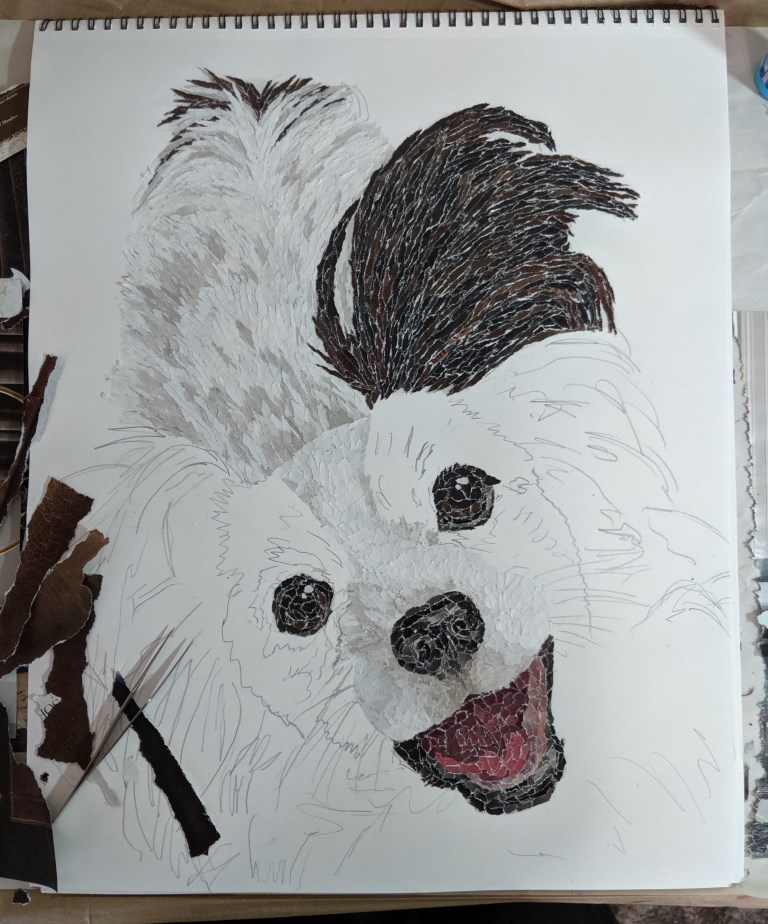
I didn’t like how the darker area under his nose looked, so I lightened it up then moved on to the mouth.
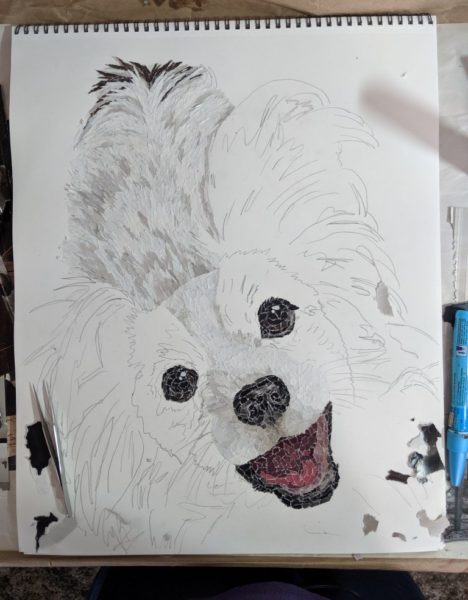
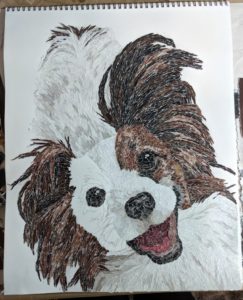
Working on the ears. This little guy has a lot of ear!
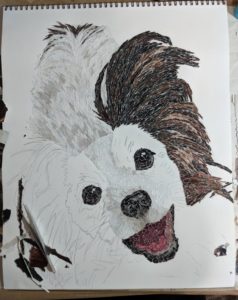
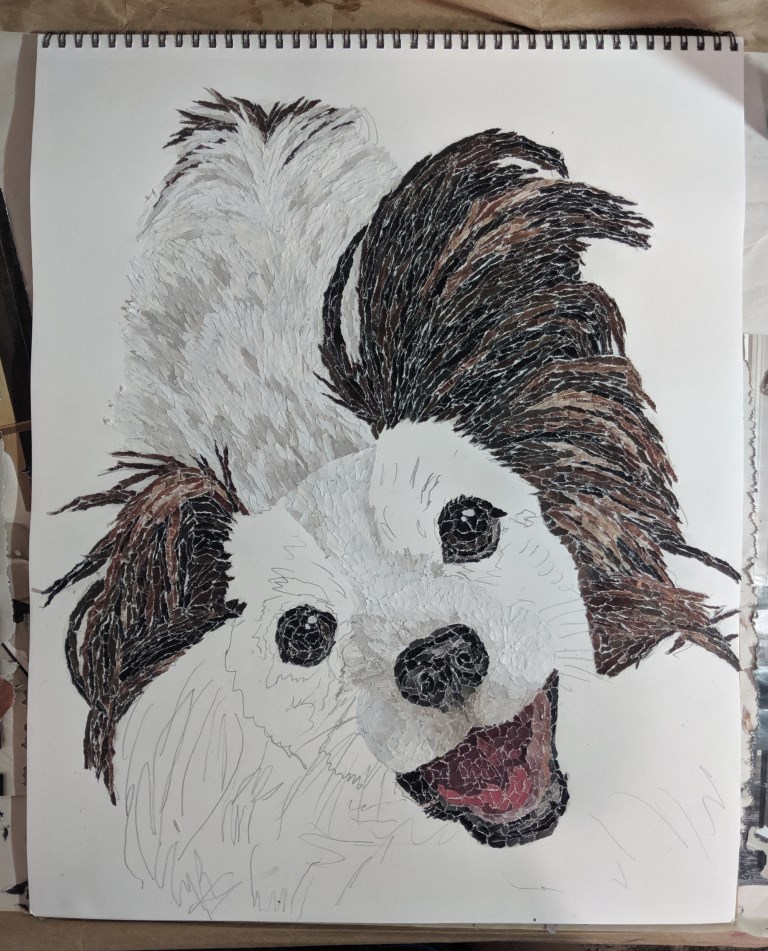
Filling in the brown areas of his face. Now it’s really looking like Grendel!
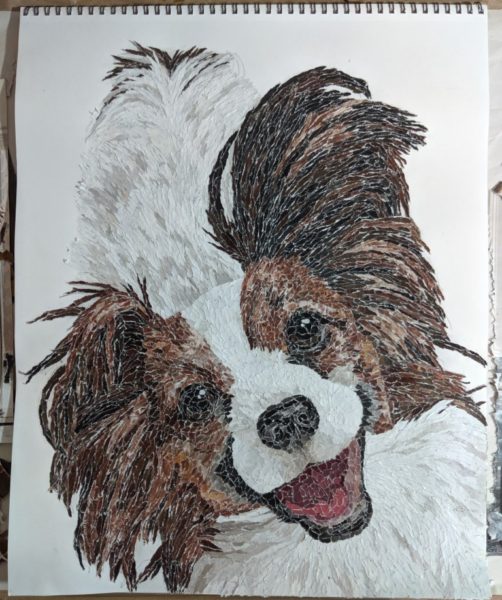
He’s almost done. Now it’s time to start on the background.
Building up the background. I find green and blue make good background colors for many of my portraits. They provide a nice color contrast that allows the pet to show up well and look natural.
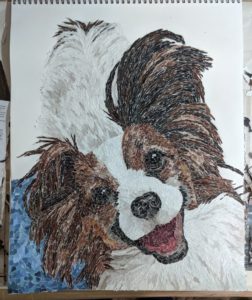
I didn’t like the unevenness in the background color between the left and right side, so I tweaked it. One of the great things about this medium is that you can always add another layer on top.

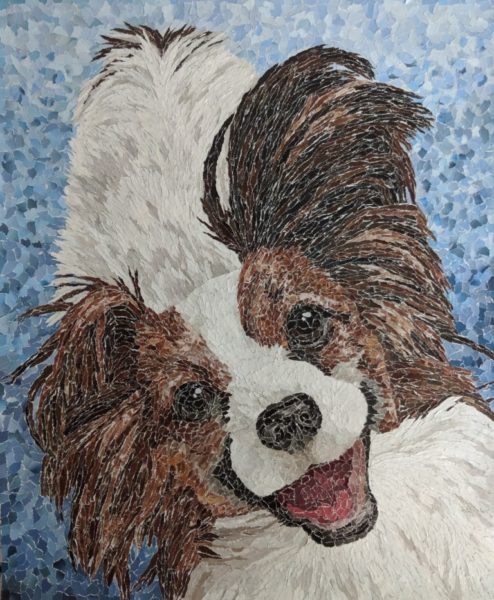
All done, and it looks fantastic!
Would you like a custom portrait of your own pet? You can check out the process here or email me at tamara@tamarajaeger.com with any questions!
Want to keep updated and see more of what I’m working on? Sign up for my mailing list here and get a totally FREE digital download of a tiger linocut print. (I promise not to be spammy with my emails—I hate that too!)
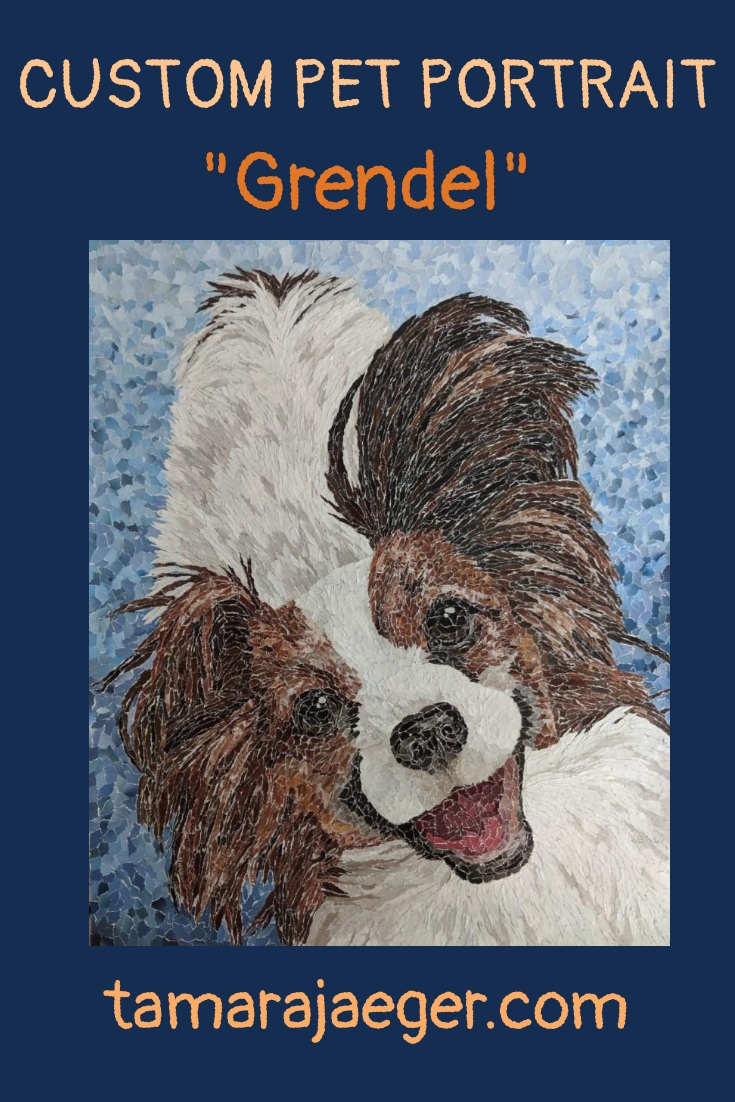
New Artwork: “Grendel” Custom Dog Portrait
I took advantage of having a bit of time in my schedule to make a custom portrait of my own dog! Generally, I spend my working on artwork for other people but I decided that I wanted a portrait for myself too!
This piece is actually considerably larger than the portraits I usually make—it’s 17”x14”—so it took quite a bit longer to complete! The nice thing about the larger size is that it makes it easier to get finer detail than in the smaller sizes.
I’m really pleased with how it turned out—it really captures the energy and enthusiasm that Grendel gives to everything!

Would you like a custom portrait of your own pet? You can check out the process here or email me at tamara@tamarajaeger.com with any questions!
Want to keep updated and see more of what I’m working on? Sign up for my mailing list here and get a totally FREE digital download of a tiger linocut print. (I promise not to be spammy with my emails—I hate that too!)
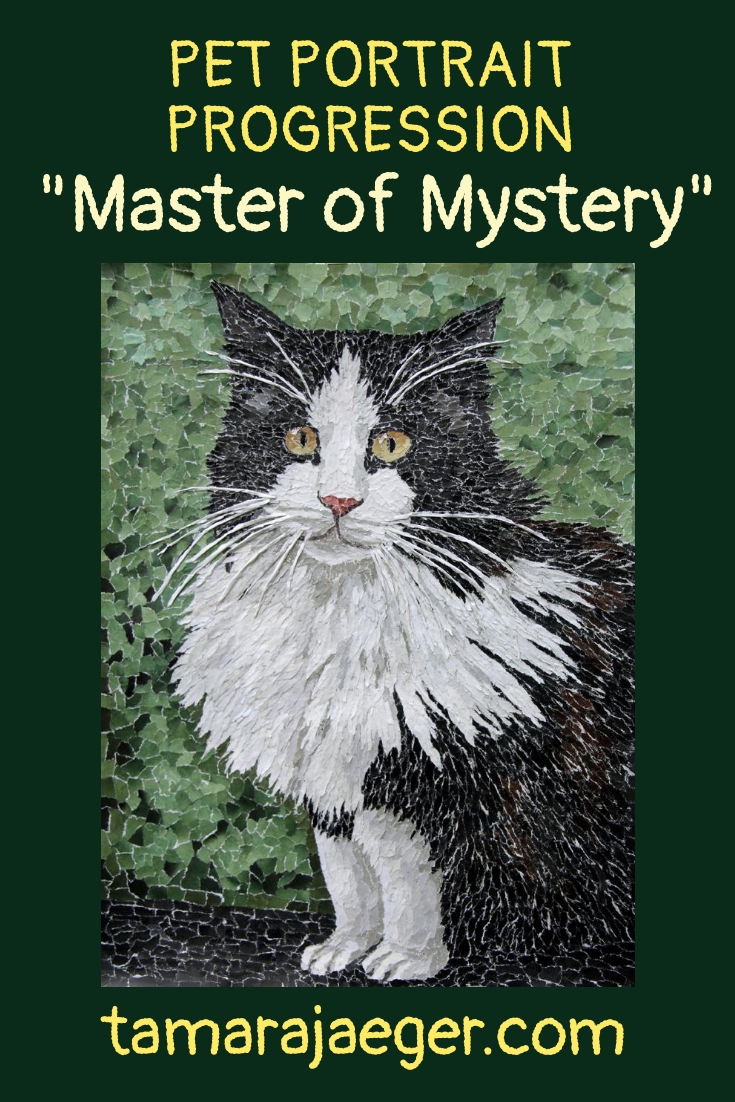
Custom Pet Portrait Progression: Master of Mystery
Several weeks ago, I wrote about my portrait of Harry, here, though this portrait is actually titled “Master of Mystery.” Like with my portrait of Hope, I thought it might be interesting to put together a series of images to show the progression of the piece, so you can get a behind-the-scenes look at the process of creating a custom pet portrait.
This post is a little on the long side, but don’t worry–it’s mostly pictures!
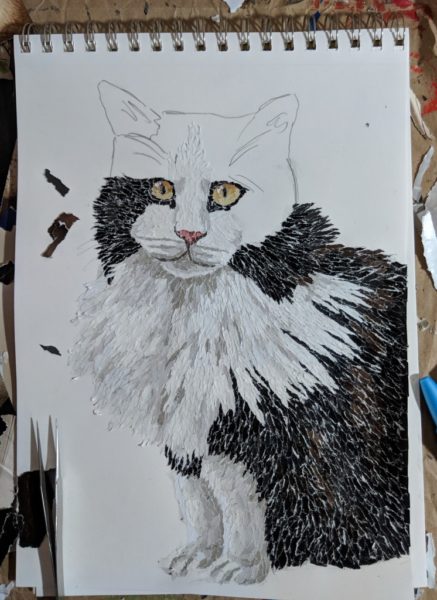
I remembered to take a photo of just the drawing before I started working on the collage! Some pieces require a more detailed drawing; others need less. It’s mostly about blocking in the shapes and colors and getting the proportions right.

I find that I don’t really start in the same spot for my collages. For Harry, I started with his nose and face.

Then I added in the eyes and started on his legs. The reference photo I was using didn’t show his feet, but the portrait worked better with them visible, so I had to use a different photo to get the feet!

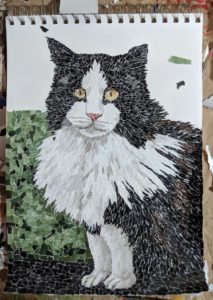
Working on the black part of his body. Both black and white animals are never really just solid black or solid white. There are subtle color variations that often need to be emphasized a little more in a portrait to give a sense of depth and three-dimensionality.


It’s helpful to work on areas in the order of how the fur lies so that the pieces overlap in a way that looks more realistic and fur-like.


After I finished his chest, I went back and worked on his head.
Now it’s actually starting to look like Harry!

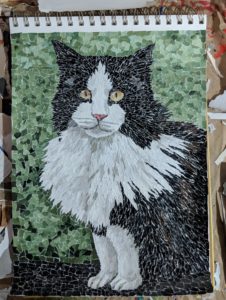
He’s almost done. Now it’s time to start on the background.


Building up the background. I find green and blue make good background colors for many of my portraits. They provide a nice color contrast that allows the pet to show up well and look natural.

Now to add in the whiskers. Whiskers are tricky to make out of torn paper! They can be too overpowering for some pieces and I often leave them out unless they’re a necessary part of the animal’s ‘look.’ In Harry’s case (and with most cats, really), they’re definitely necessary.
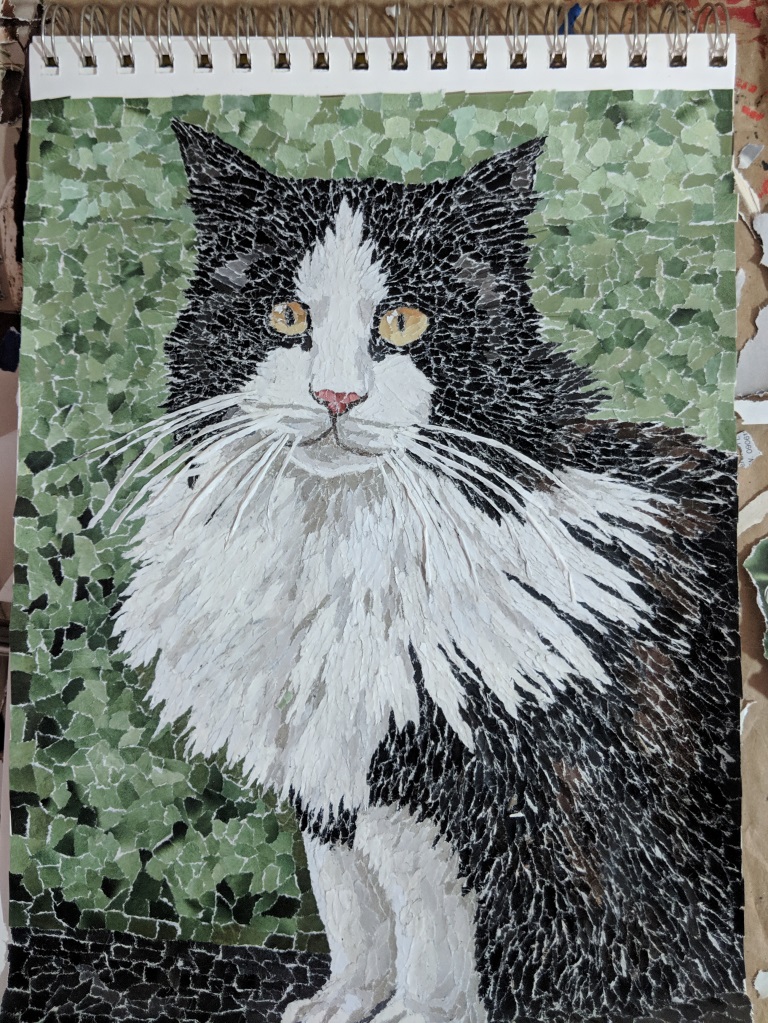
All done, and it looks fantastic!

And finally, here’s a bonus photo of Harry, begging for food at the door.
Would you like a custom portrait of your own pet? You can check out the process here or email me at tamara@tamarajaeger.com with any questions!
Want to keep updated and see more of what I’m working on? Sign up for my mailing list here and get a totally FREE digital download of a tiger linocut print. (I promise not to be spammy with my emails—I hate that too!)
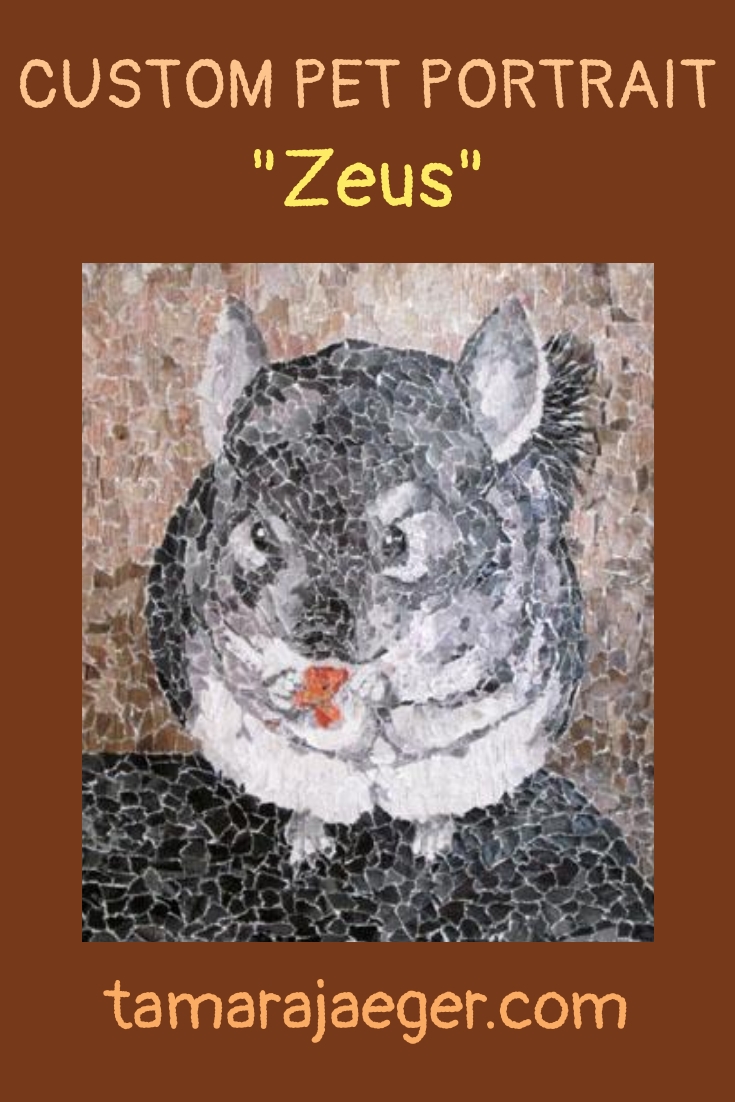
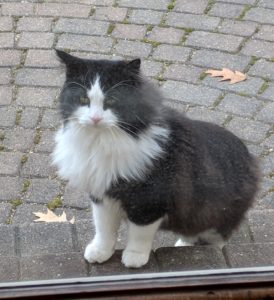
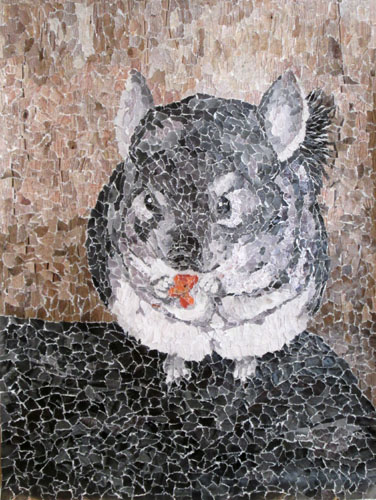
Zeus: Custom Chinchilla Pet Portrait
This little guy is named Zeus and he’s pictured here enjoying a piece of carrot—one of his favorite treats! He’s one of my earlier pet portraits, but not nearly as early as the fox picture I wrote about last week!
Zeus, like most chinchillas, is an active little critter. Chinchillas are actually a lot of fun as pets—we had them when I was a kid. They’re not really the best for young children, since they don’t often sit still or like to held for long periods of time (guinea pigs, on the other hand, make a great pet for younger children). But for older children (and adults!) they can be a great choice.
Would you like a custom portrait of your own pet? You can check out the process here or email me at tamara@tamarajaeger.com with any questions!
Want to keep updated and see more of what I’m working on? Sign up for my mailing list here and get a totally FREE digital download of a tiger linocut print. (I promise not to be spammy with my emails—I hate that too!)
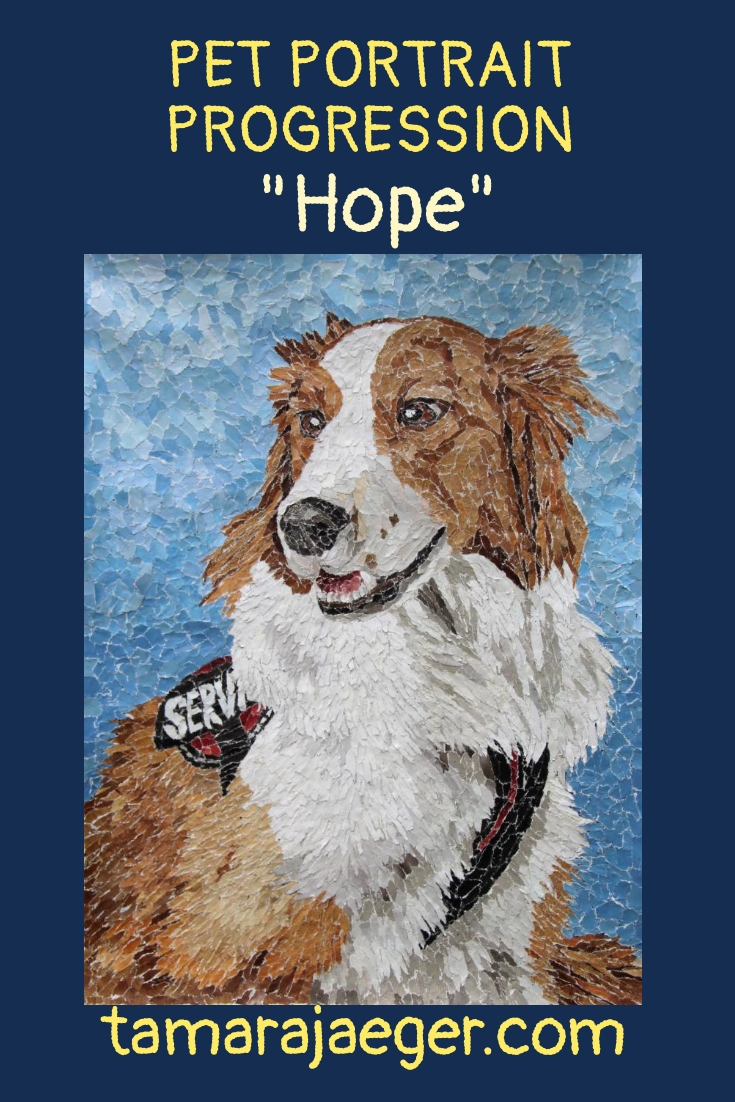
Custom Pet Portrait Progression: Hope
Several weeks ago, I wrote about my custom pet portrait of Hope, here. I thought it might be interesting to put together a series of images to show the progression of the piece, so you can get a feel for how a portrait evolves as I work on it.
This post is a little on the long side, but don’t worry–it’s mostly pictures!
I didn’t remember to take a photo of just the drawing before I started working on the collage. I guess I was too excited to get started!
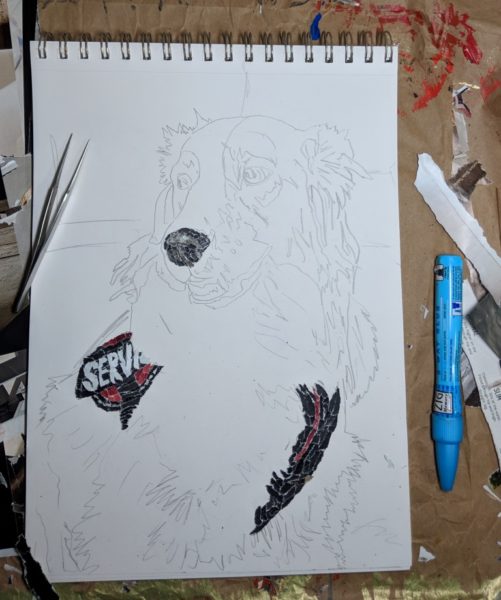
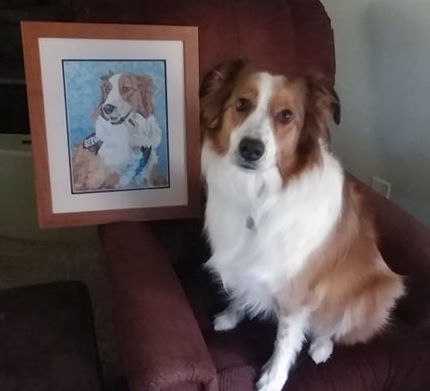
I find that I don’t really start in the same spot for my collages. For Hope, I actually started with her Service Dog vest.
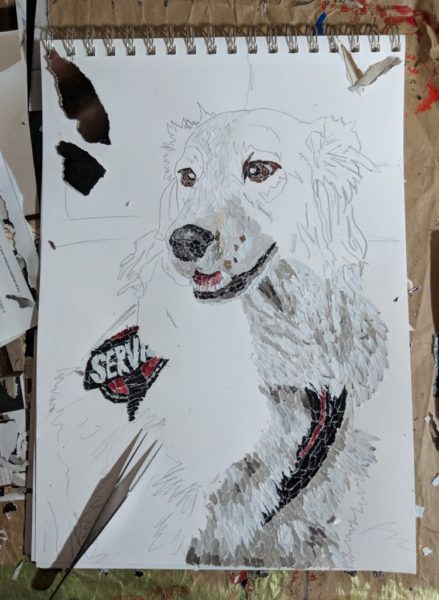
I then worked on her face and started on the chest.

It’s helpful to work on areas in the order of how the fur lies so that the pieces overlap in a way that looks more realistic and fur-like.

After I finished her chest, I went back and worked on her head.

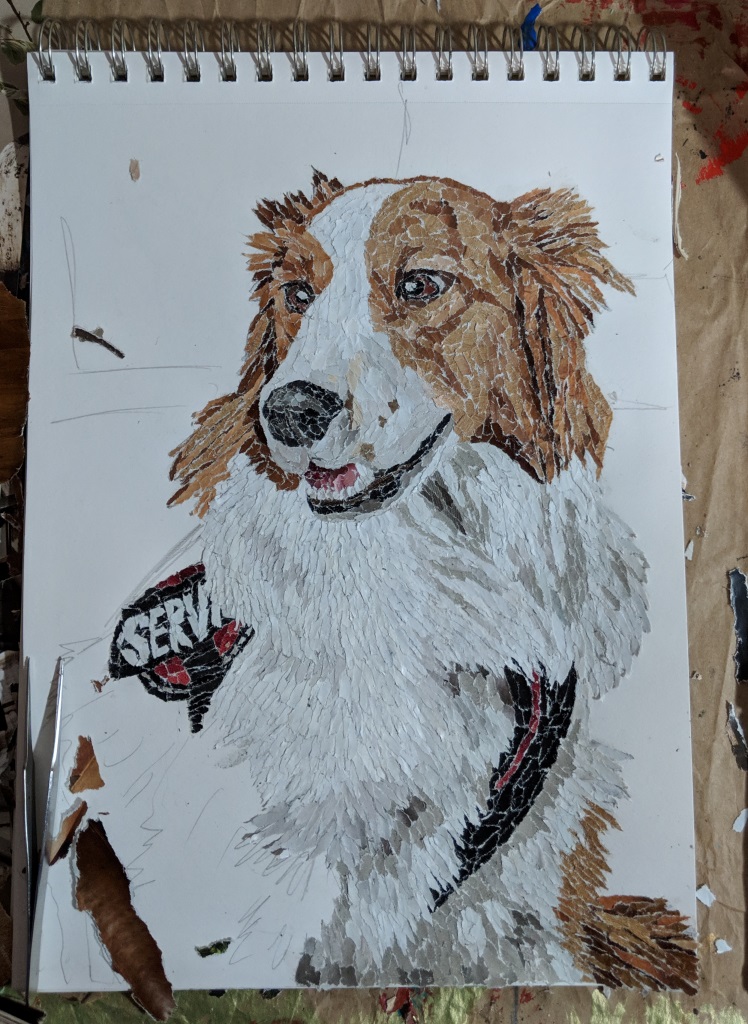
Filling in the rest of the body.
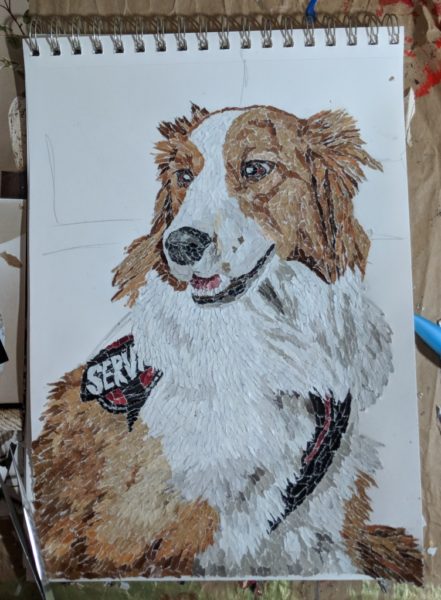
Starting in on the background.


I find it helpful to take progress photos because it makes it easier to spot areas that don’t look quite right. I decided that didn’t like the darker blue flecks here so I covered them up.

Then I decided I didn’t like the contrast between the dark and light blue. Sometimes the background is the hardest part of the piece!
All done, and it looks fantastic!

And finally, here’s Hope posing with her portrait.
Would you like a custom portrait of your own pet? You can check out the process here or email me at tamara@tamarajaeger.com with any questions!
Want to keep updated and see more of what I’m working on? Sign up for my mailing list here and get a totally FREE digital download of a tiger linocut print. (I promise not to be spammy with my emails—I hate that too!)