Posts Tagged: art materials
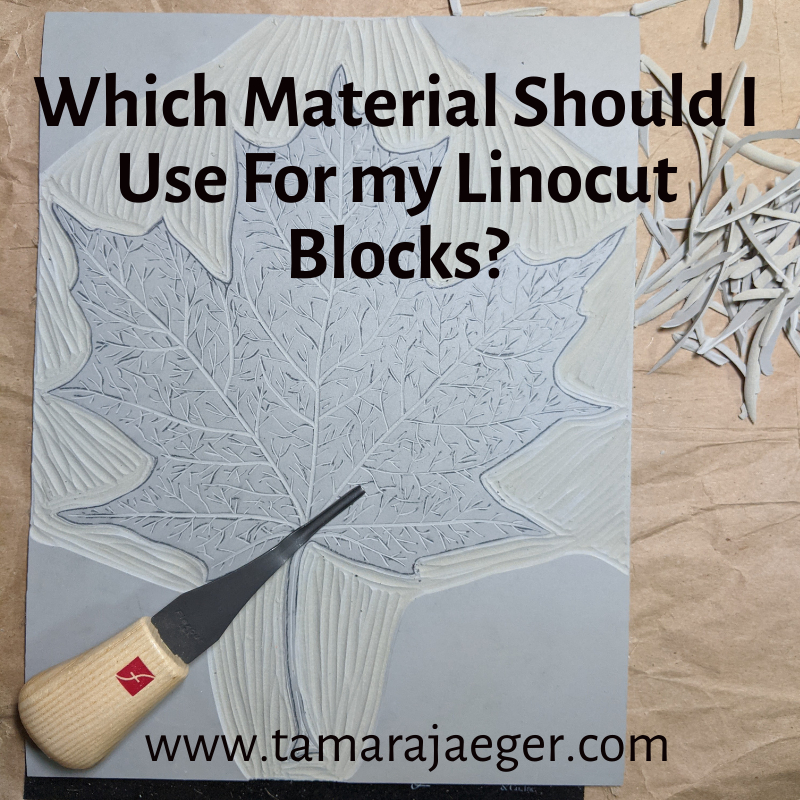

Which Material Should I Use For my Linocut Blocks?
Linocut is a printmaking technique similar to woodcut that uses a carved linoleum block to create an image. The block is inked and then pressed onto paper to create the print. You can use a variety of different materials for linocut blocks but like any material, each has advantages and disadvantages.

Linocut printing block materials: Speedy Carve, battleship grey lino, golden lino, Speedy-Cut
Traditional Linoleum: Traditional lino is made from a burlap-backed grey linoleum. This is the most common type of linocut block material and the one you’re most likely familiar with if you’ve done any linocut printmaking in school. It’s relatively inexpensive and easy to carve and produces sharp, detailed prints. However, traditional linoleum can become brittle with age and can crack if it is not handled carefully.
There’s also a version of traditional linoleum that is tan or golden in color rather than grey. This material is generally a bit softer and easier to carve than the grey version and doesn’t become as brittle over time but still produces sharp details.
You can get traditional linoleum that is mounted on wooden blocks or unmounted. Mounted lino is sturdier and less likely to curl or warp, because it is supported by the wooden block, but thicker, which can make positioning the paper a little more difficult.
I typically use unmounted lino because when I print, I place the block on the table first, then lay the paper down over it and apply pressure with a baren on the paper. You can place also the paper on the table, then place the inked block face-down on the paper and apply pressure to the back of the block. This method typically works better for the thicker mounted blocks and printing using a press rather than hand printing.
Vinyl Linoleum: Vinyl lino is a newer type of linocut block material that is made from a synthetic material. It is more expensive than traditional lino but is more durable and less likely to crack. The most common vinyl lino is Japanese vinyl, which has a blue side and a green side along with a black center. Either or both sides of the block can be carved. It’s a little softer than traditional lino but still produces sharp, detailed prints though it can be a little difficult to transfer the design to the block.
Softcut Lino: Softcut lino is made from a softer, more flexible rubber-like material. It’s easier to carve than traditional lino, especially for intricate designs, and is also less likely to crack. However, Softcut lino is more expensive than traditional lino and it can be difficult to produce really sharp prints.
Rubber: Rubber is another popular material for linocut blocks. It is more flexible, less likely to crack, and easier to carve than linoleum, making it a good choice for beginners. Its flexibility also means it can be used to print on curved surfaces. However, rubber can be more expensive than linoleum and can distort under pressure, making the prints less clear. Speed Ball Speedy-Carve is a common brand.
Foam: Foam is another material that is becoming increasingly popular for linocut blocks. It is inexpensive, very easy to carve, and produces soft lines. However, foam is not as durable as linoleum or rubber and can easily be damaged.
The best material for you will depend on your individual needs and preferences. If you are looking for a traditional material that is easy to carve and produces sharp lines, then traditional linoleum—either the battleship grey or the golden version—is a good choice. If you are looking for a material that is more flexible and less likely to crack, then rubber or vinyl are good options. If you are looking for a material that is easy to carve and inexpensive, then foam may be a good choice.

Carved linocut blocks
Want to stay up to date and see more of what I’m working on? Sign up for my mailing list here and get a FREE digital download of an exclusive tiger linocut print. (I promise not to be spammy with my emails—I hate that too!)
* Please note that this post contains affiliate links and any sales made through such links will reward me a small commission – at no extra cost for you.

Favorite Art Materials: Water-Mixable Oil Paints
I enjoy painting with oils. They’re my favorite of the painting mediums, by far, though I actually use acrylics more often, since they dry faster and work better for the abstract style I’ve been painting in recently. Another major drawback with oil paints is the solvents necessary for thinning and clean up. When I was in college, that wasn’t a big issue since I mostly painted in the art building. But once I graduated I no longer had a separate space for painting. I didn’t want the solvents and their fumes I my apartment!
For a while, I tried working with acrylics and with water colors, but I just didn’t enjoy them as much. I really dislike working in watercolor, for some reason. I have very few watercolor pieces floating around out there, though there are a few. Eventually, I broke down and got a small set of water-mixable oil paints to try out.
I didn’t have very high expectations, I admit, but I was pleasantly surprised. They worked well enough, though the color range was a little limited in the brand I was using. I started with Winsor & Newton Artisan Water Mixable Oil Colors, since it was readily available in the major arts and crafts stores like Michaels and JoAnn’s. I’ve since found some other brands and have expanded the range of colors I have on hand. I’m definitely not loyal to one brand over another—I have quite a mix of brands in my box of paints!

I love that they still smell like oil paints—I love that linseed oil smell. But what I Really love is that I can clean up with soap and water. No harsh, unhealthy solvents needed. You can thin them to an extent with water, though I typically don’t unless I’m applying a thin color wash over the canvas to tone down the bright white color before I start painting. I don’t like the texture of the paints when they’re thinned with water so I typically use linseed oil to thin them if needed. Definitely make sure you’re using one of the linseed oils that are specifically made for water-mixable oil paints though.
I haven’t tried out too many of the mediums that go with the water-mixable oils. I use the linseed oil, certainly and I’ve tried the Winsor and Newton Fast Drying Medium (I HATED it, by the way. It’s like thick, sticky honey and made the paints impossible for me to work with. You may have a different experience though, so give it a try if you’re interested). I’m not really much of a medium user with oil paints. Acrylics, on the other hand…
I’ve also noticed that some brands work better in different colors—like, brand X has better blues but brand Y has better reds. I’ll try to do a post sometime soon comparing some of the colors from different brands. Some brands also have a texture I like better than another brand. Again, this tends to vary a bit by color. For instance, I really dislike the texture of Winsor and Newton’s Titanium White. I’m still trying whites from other brands, but so far the Lucas Berlin white is working well for me.

Some people don’t like that some of the pigments used in water-mixable oils tend to be considered lower or student-grade pigments. Not that the quality is bad; quite the opposite, in my experience. But they typically use ‘hues’ like cadmium red hue, instead of true cadmium red. Granted, I’d rather not use cadmium-based paints anyway. All in all, I’ll take the safer, non-toxic version, thanks!
I haven’t been able to find out how exactly the paints have been modified so that water can be used with them. I’m a bit of nerd, so that would be super interesting information to me! Mostly I just find a one sentence explanation about how the oil has been “modified” to be compatible with water. Not nearly enough information to satisfy me. I want to know details! Chemical structures, that sort of thing. Granted, I might be the only one who wants to know that level of detail…
The manufacturers claim that once the water has evaporated off, which happens very quickly, the paints cure and age just like traditional oil paints. I haven’t noticed any difference in the traditional oil versus water-mixable oil paintings I’ve done, but I don’t have any really long term data—my traditional oil paintings are only about 20 years or so old and the water-mixable oil ones are even younger. I guess I’ll have to wait and see.
Overall, I really like water-mixable oil paints. They’re safer and easier to clean up than traditional oils paints. I have no problem using them inside my home and they still have that ‘oil paint’ smell. There’s a bit of variation between brands as far as the colors and the textures, so some experimentation is necessary to find your ideal paints. I’d also like more technical details about the paints and how they were modified. I suppose that might be proprietary information; I don’t know.
Have you tried water-mixable oils? What did you think? Do you like them? What do you see as their strengths and weaknesses? If you haven’t tried them, why not?
* Please note that this post contains affiliate links and any sales made through such links will reward me a small commission – at no extra cost for you.

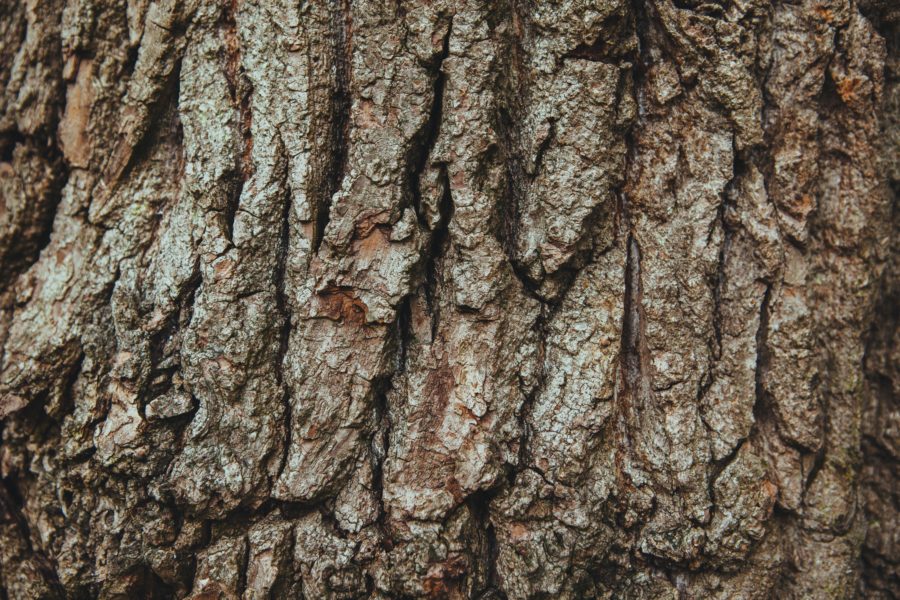
Inspiring Your Art: Wood
Today I’d like you to think about wood as an inspiration for your artwork. There are many facets of “wood” that you can explore: the colors or the textures, how the bark differs from the inner wood. What about wood as a material? It can be cut into pieces and assembled as a mosaic or carved into a sculpture or even used as a substrate, like in wood panel paintings. It can be painted or you can make use of its natural colors and patterns.
I often use natural materials like wood in my abstract, sculptural “paintings.” It can help to provide depth and structure as well as texture or even color. I like to use texture in my artwork, and wood has so many possibilities!
As a fun challenge, I’d like you to choose an aspect of wood and see how you can work that into your art. Will you work with the colors? The textures? Are you going to modify it in some way? Perhaps a series of pieces, each focused on a different aspect of wood? How about contrasting the wood with another material?

What will you choose? I’d love to see what you come up with. Feel free to share your thoughts in the comments.
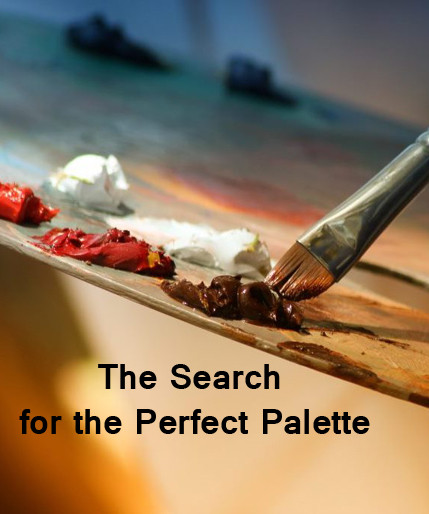
The Search for the Perfect Palette
In a painting class I took in college we had these wooden carts with glass tops for storing our supplies. The glass top acted as your palette, so you could sit or stand and work and didn’t have to hold your palette in your hand. I’ve never personally been a fan of hand-held palettes. Partially because so many of them are cut to hold in your left hand, so the angle is wrong for a lefty like me to use it with your right hand but also because I tend to get pretty… involved in my painting. At times, I even forgo brushes and use my fingers to get just the right effect (I guess I never quite grew out of the whole childhood finger painting thing?). So I find it awkward and difficult to use a handheld palette. I Loved those glass-topped carts. They were old and ratty from years of abuse by art students, but the glass still worked great.

Photo by Lisa Fotios from Pexels
Once I was out “in the real world” I realized just how poorly the typical artist’s palettes worked for me. They were the wrong size or the wrong shape. They never had quite enough room. They were impossible to clean. I needed something better. I missed those carts with their glass tops.
Aha! A quest! After a great deal of searching, I discovered the perfect solution: Amaco Classic Glass Palettes. It’s a rectangular glass palette, just like the tops of those carts, but I could put it anywhere I wanted. No bulky cabinet attached! It comes in two sizes of rectangular palette as well as a more traditional oval hand held style. I got the smaller size, since at the time I was living in an apartment without a dedicated studio space. My kitchen breakfast nook served multiple roles: kitchen table, computer desk, art workspace. I needed something that wouldn’t overhang the edges of the tabletop and was small enough to stash somewhere else after a painting session. Recently, I’ve been considering getting the larger size, since I now have a dedicated studio space. It never hurts to have more room for mixing colors!
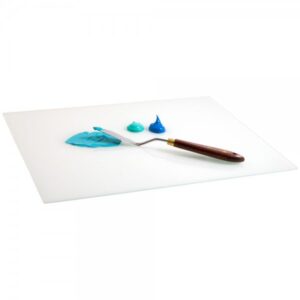
Anyway, this thing is great. It has a nice, smooth surface that’s perfect for mixing paints. It’s not absorbent so it doesn’t stain or discolor and cleans up easily. I use it solely with oils, though acrylics are supposed to peel off easily. Wet oil paint just wipes off and dried paint can be scraped off with a razor blade. On the downside, it Is glass, so it’s heavy and fragile. Since I paint indoors in my studio, that’s not really an issue for me, though caution is warranted. It’s best to keep it out of reach of pets, small children, or clumsy roommates!
What about you–have you found Your perfect palette?