
Collection Care Series: Enemy #6: The Gang
This week, we’ll be talking about our next enemy, which is really a collection of enemies. I call it: The Gang.
There’s nobody really new here. I just wanted to emphasize that you can get multiple enemies working together, and this type of situation will destroy your treasures even more quickly!
Some dangerous combinations you frequently find are light and heat, humidity/moisture and heat, moisture and insects, and moisture and mold. Or if you’re really unlucky, you can even get moisture, heat, insects, And mold all together! That’s…not a situation you want to find yourself in.

In general terms, for the types of vulnerable materials we’ve been talking about over the last few weeks—like paintings, papers, photos and negatives, wooden items, musical instruments, plastics—you want to avoid bright, direct light, such as sunlight or fluorescent lights. Keep the humidity and temperature moderate—if it’s uncomfortable for you, it’s probably uncomfortable for your treasures.

Avoid really warm areas like attics and garages. Cold is generally okay, but you want to avoid rapid fluctuations in temperature, which can cause rapid humidity fluctuations. Keeping the temperature and humidity stable is also generally more important than maintaining a specific number. Of course, you don’t want the humidity to go over about 70% since that leaves your items susceptible to mold and insect infestations.
For storage, you want to use acid-free, archival materials. Food-grade plastic storage boxes and food storage bags are good choices. Avoid cardboard and newspaper! Don’t store your treasures in areas that aren’t climate controlled—like attics and garages, or in basements where they can get flooded. If you do need to store things in a basement, use plastic storage boxes and try to raise them at least a few inches off the floor.
If you’ve missed any of the previous posts, you can go back and check them out here.
What storage and display concerns have you identified over the last few weeks? Tell me in the comments.
Missed the previous posts? Start at the beginning of the collection care series here.
Want to stay up to date and see more of what I’m working on? Sign up for my mailing list here and get a FREE collection care resource guide. (I promise not to be spammy with my emails—I hate that too!)
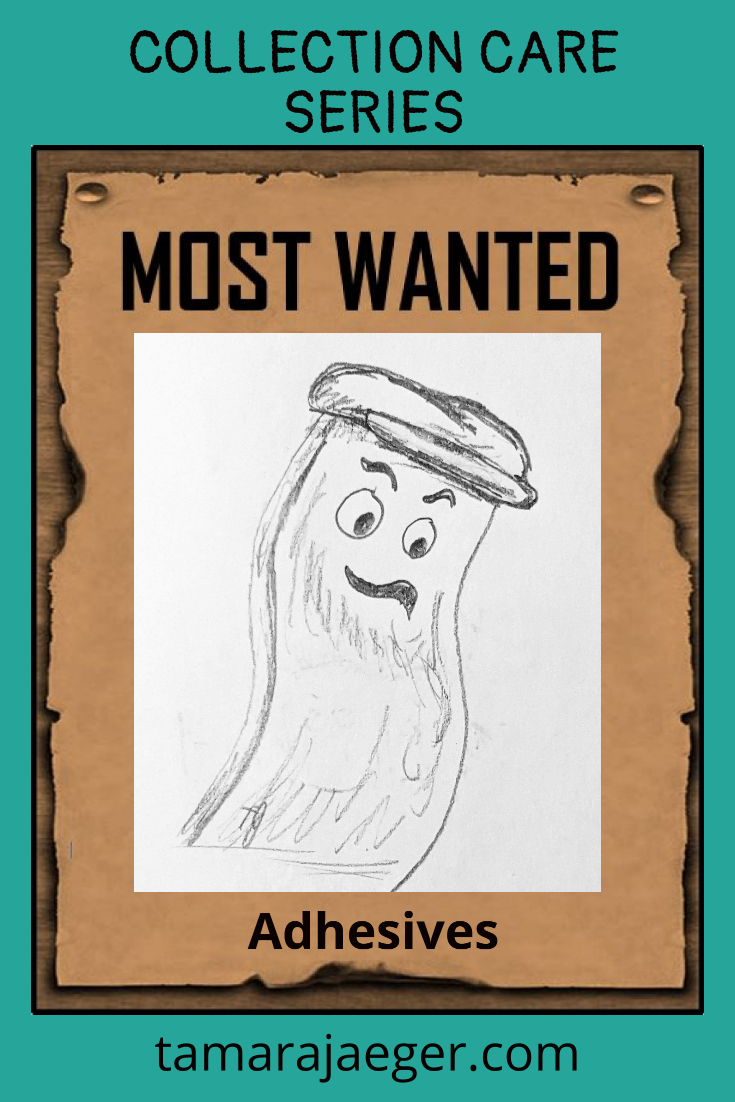
Collection Care Series: Enemy #5: Adhesives
This week, we’ll be talking about our next enemy: Adhesives.
Adhesives, and particularly adhesive tape, can be a sticky subject when it comes to collections care. (Sorry, I couldn’t help myself! I’ll try to refrain from making any more bad puns. I can see your eyes rolling there!) There are several issues when it comes to adhesives.

First, there’s the adhesive itself, which can leave a sticky residue that can be very hard to remove without damaging your items. Old tape that’s left in place can leave the aged adhesive behind even after its stickiness is gone. Masking tape is terrible for this—you’re left with a hard, crusty, yellow material wherever the tape was.
Secondly, unless it’s specifically formulated to be acid-free and archival, your adhesive is probably acidic, which will damage vulnerable materials, just like non-archival, acidic packing materials like cardboard and newspaper. The acid in the adhesive will cause yellowing and discoloration of paper items and photographs, and will eventually cause even greater damage, like holes in the paper!
Avoid using non-acid-free adhesives on things you want to keep long term—masking tape, rubber cement, duct tape, etc. There are a Lot of different acid-free, archival adhesives that are easily available these days. The scrapbook craze has been a great thing for object conservation! My personal favorite, which I use for making my torn paper collages, is the Zig/EK Tools 2-way glue. It changes color as it dries and provides the option of a permanent bond (when it’s first applied and blue) or a removable bond (after it’s dried and clear).
Another place you’re likely to find acidic adhesives is, ironically, in older photo albums. I don’t mean the really old ones where the photos are held in place with those paper corner tabs, though those albums could possibly be made from acidic paper, so be aware. I’m talking about the ones that were popular in the 1970s and 1980s that had the slightly sticky lines across each page to hold the photos in place underneath a clear plastic sheet. My mother has Piles of this type of album, since that’s what was commonly available when my siblings and I were kids. By now, that adhesive is probably not even sticky anymore and is likely starting to cause damage, so if you have any of those albums, I’d recommend replacing them with newer, archivally-safe albums.
Paper and photographs are the most commonly-affected materials when it comes to damage from acidic adhesives. I’ve also had to deal with removing old masking tape adhesive residue from wooden objects, which was not a lot of fun—you can’t really use solvents, since they can damage the finish on the wood or cause the adhesive residue to sink into the wood where you’ll Never be able to get it out!
Another thing you should be aware of as far as acidic materials goes is metal items like staples and paperclips. If you have boxes of papers, documents, or photos, there’s a good chance there are some staples or paperclips in there somewhere. If so—get rid of them! The metal will rust over time (especially if they’ve been stored somewhere that gets pretty humid), and that red-orange iron staining it leaves behind? That’s Very acidic. It will quickly eat holes in your papers or photos.
Do you have any suspicious storage materials housing your old photos? Tell me in the comments!
Missed the previous posts? Start at the beginning of the collection care series here.
Want to stay up to date and see more of what I’m working on? Sign up for my mailing list here and get a FREE collection care resource guide. (I promise not to be spammy with my emails—I hate that too!)

New Artwork: Backyard Birds Torn Paper Collage Series
This lovely little bluebird is finally finished! Just in time for spring. Hopefully… He’s been sitting in my studio for a little while, almost done, just missing the background. I’ve been working on a new linocut series, but I finally took some time out to finish him up.
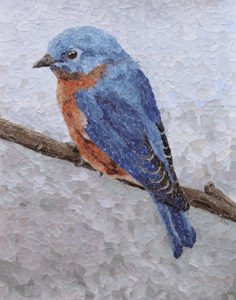
I’m thinking of expanding into a backyard birds torn paper collage series. I have three already, so why not more? I don’t think I’ve shared the other two here yet, so I’ll add them to this post too! We’ll make this a Backyard Birds series post.
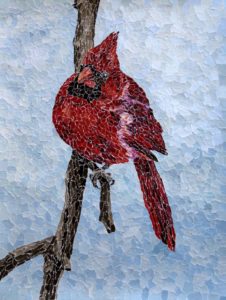
First, I have this lovely Cardinal. I used him on my Christmas cards last year. Maybe I should add a line of greeting cards to my Etsy shop. What do you think?
I also have this Baltimore Oriole. They have such striking colors.

Now I just need to decide which other birds I want to add to the series! So far I’ve done northeast/midwestern US birds, since that’s where I’m living currently. I suppose I could add some of the birds I saw when I lived in the UK. Maybe make a second series of backyard birds!
What are your favorite backyard birds? Tell me in the comments.
Want to stay up to date and see more of what I’m working on? Sign up for my mailing list here and get a FREE collection care resource guide. (I promise not to be spammy with my emails—I hate that too!)

Collection Care Series: Enemy #4: Insects
This week, we’ll be talking about our next enemy: Insects.
Nobody wants a bug infestation. Those little buggers can be Such a pain and they can cause a Lot of damage. I’m not going to go in detail about the different types of insect pests that can attack your treasures (though if there’s enough interest, I can do a separate blog post on it later—let me know if that’s something you’d be interested in). Today we’re just going to cover some general information and storage recommendations.
Your organic materials are the ones that are at risk from insect damage. Namely paintings, paper, photos, wood, and wooden musical instruments. Materials like leather, textiles/fabrics, and horn are also prime insect buffets. You want to avoid insect problems if you can—treating infestations after they occur is a multi-faceted and potentially frustrating process.
There are two main things you want to keep in mind in preventing insect infestations. First is general housekeeping. Keeping your home and/storage areas clean helps avoid attracting insects in the first place. Vacuum, dust, don’t leave open food or crumbs lying around. If there’s nothing enticing, they’ll just keep going and settle somewhere else! Second is humidity levels—if you missed it, we talked about that here. In particular, you want to avoid areas of high humidity, which many bugs need in order to thrive. If your basement is damp, try a dehumidifier. You want to make your space as unappealing to bugs as possible.
For items you are storing, as opposed to having out on display, you’ll want to store them in something that isn’t seen as food by insects—avoid paper or cardboard boxes. You also want something that will help block the scent of your tasty treasures! Sealed plastic storage boxes are a great option. The high-quality food-grade ones like Tupperware and Rubbermaid are acid-free and frequently used by museums. As a side-benefit, they also provide more physical protection from crushing and other impact as well as protection from flooding and water damage.
If you do end up with an insect infestation, you’ll want to contact a professional conservator. There are several different treatments, and they’re not all suitable for every type of material. And while your treasures are getting treated, you’ll need to address the environmental conditions that allowed the bugs to take over in the first place. Again, a conservator can assist you with that.
How do you store your vulnerable treasures? Tell me in the comments.
Missed the previous posts? Start at the beginning of the collection care series here.
Want to stay up to date and see more of what I’m working on? Sign up for my mailing list here and get a FREE collection care resource guide. (I promise not to be spammy with my emails—I hate that too!)
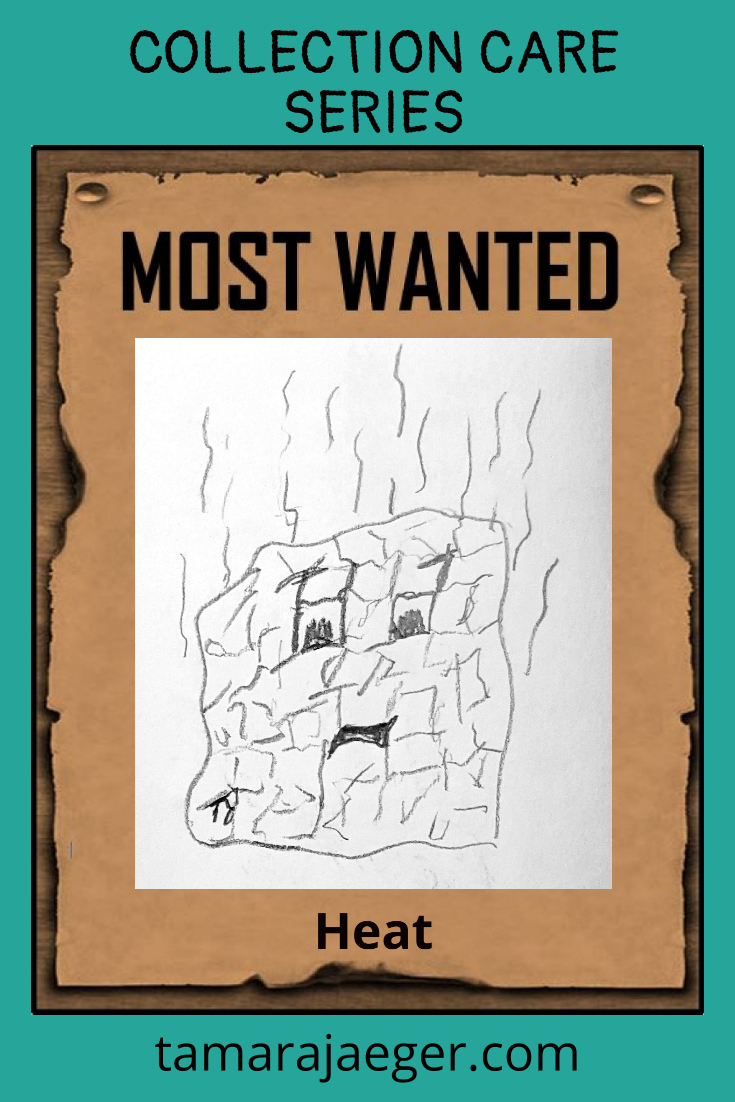
Collection Care Series: Enemy #3: Heat
This week, we’ll be talking about our next enemy: Heat.
There are two issues with heat as far as your collections go. First, we have a bit of a chemistry-based issue. Higher temperatures increase chemical reaction rates and many deterioration processes are due to chemical reactions. So storing your item somewhere hot will cause it to deteriorate faster, even in the absence of other risk factors, such as light, which we talked about here. Secondly, higher temperatures usually result in lower relative humidity levels. If you missed it, we discussed problems related to humidity here.

Some items that can be damaged by heat include plastics, photos and negatives, paintings, and musical instruments. For these materials, avoid rapid changes in temperature, which can cause rapid humidity fluctuations. Plastics and photographic negatives are particularly susceptible to chemical degradation, which is accelerated at high temperatures. Avoid storing them in areas that can get very warm, such as attics or garages. You also want to keep in mind that when very cold, plastics get brittle and are vulnerable to damage from dropping or crushing. Again, don’t store them in places like attics and garages, since these areas tend to experience extremes and rapid changes in temperature and humidity levels.
Where do you store your vulnerable treasures? Tell me in the comments.
Check out the next post in the collection care series here.
Missed the previous posts? Start at the beginning of the collection care series here.
Want to stay up to date and see more of what I’m working on? Sign up for my mailing list here and get a FREE collection care resource guide. (I promise not to be spammy with my emails—I hate that too!)
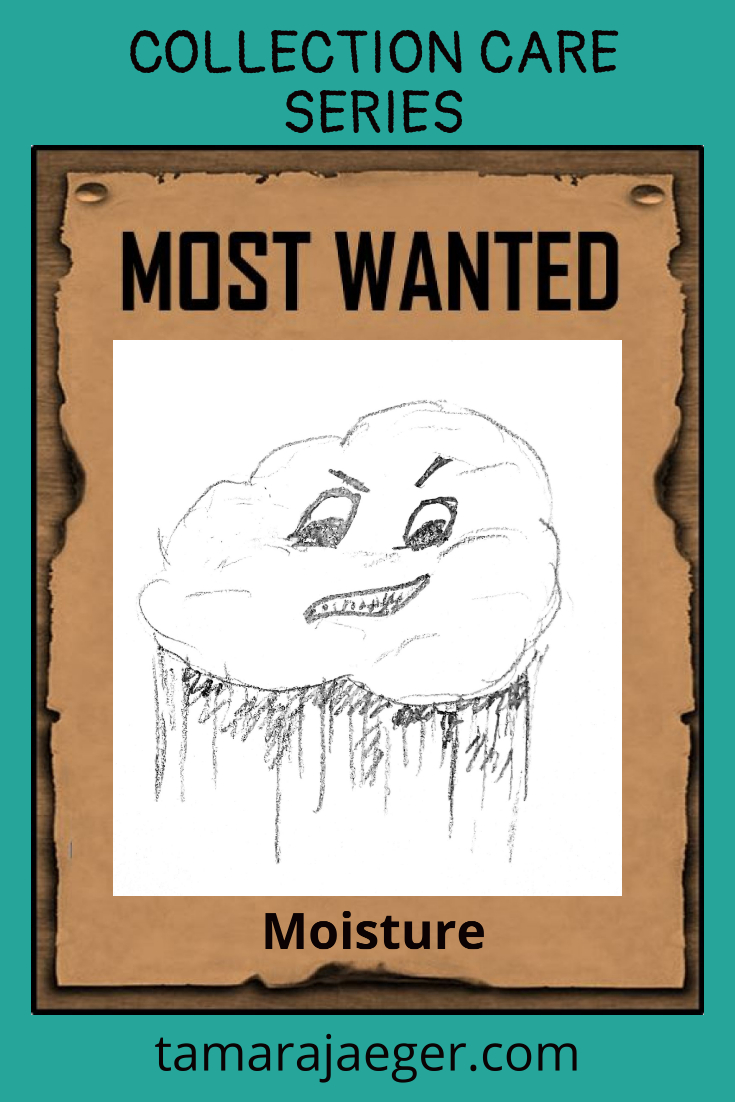
Collection Care Series: Enemy #2: Moisture
This week, we’ll be talking about our next enemy: Moisture.
Moisture, in particular humidity, is a tricky matter. If it’s too high, bad things happen. If it’s too low, bad things can also happen! The humidity level that’s best for your treasure depends on what material it’s made from as well as what environment it’s used to.
Obviously, you want to avoid getting your items really wet—floods can do a Lot of damage. Fun fact: I spent over three and a half years conserving a huge archaeological collection that was damaged by flooding from a hurricane. But with some materials—primarily organic materials like wood, paper, leather, etc, you also want to keep them from getting too dry. Organic materials shrink and swell with changes in humidity. This physical action itself can cause problems over time—the repeated fluctuating and bending can weaken the material and cause cracks and breaks.
Items that are made of two or more materials that respond to humidity differently are even more vulnerable, since the different responses cause increased stresses within the object itself. This can cause breakage where, for example, a metal knife blade inserts into a wooden handle or where leather is wrapped around something moisture-resistant like metal or stone. You can also get damage where humidity fluctuations cause paint to crack and detach from the substrate.
Wood really doesn’t like being very dry—it shrinks and cracks along the grain. Wooden musical instruments are very susceptible to this this. They are also often made of multiple incompatible materials—stringed instruments like violins are a prime example. There’s a reason they sell so many different types of humidifiers for instrument cases. And if you live in a dry area (or have cold winters, with low indoor humidity from your heating system) and have a violin or similar instrument and you don’t have some sort of humidification system (and a hygrometer to measure humidity levels), please get one! They don’t have to be high tech or super expensive, but they can prevent a lot of damage.
On the other end of the humidity spectrum, you don’t want your items exposed to very high levels of humidity for extended periods of time either. Wood and other organic materials will swell and can crack or stick, paper can buckle. And if your relative humidity level goes (and stays) about 60%, you can get…Mold!
Mold can be a real pain. And it brings with it some health risks, particularly for sensitive people. Everyone’s heard about the deadly black mold, that makes people so sick, right? Well, most of the time, when you get mold it’s not going to be that type, so you can relax a bit. But you still don’t want it on your treasures! Mold can cause discoloration on paintings, papers, and photos. And it can be a difficult to get rid of—try and prevent it if you can. Your life will be so much easier!
If you do have some minor mold on one of your treasures, manual removal (a soft brush works well), preferably outdoors or using a HEPA filtered vacuum and a dust mask (you need one with an N95 rating—it will filter out mold spores) works well. If you have large amounts mold, discoloration from mold, or many items with mold (flooded basement, anyone?), your best option is to contact a professional conservator for treatment.
Like with light damage, it’s best to prevent moisture damage from occurring in the first place. If you have susceptible materials, store them in an area where humidity doesn’t get too high or too low. Avoid storing susceptible items, like paper, paintings, wood, photos, and musical instruments in places like attics or basements. You should also keep in mind the environment your object is used to. For example, if you have a violin that’s spent its entire life in a very dry environment, you don’t want to suddenly raise the humidity to 60% or something. That will just cause problems. If it’s happy and accustomed to a certain environment, there’s no need to change it. What you really want to avoid is sudden or short-term humidity fluctuations.
What treasures do you have that could be damaged by moisture issues? Have you had any water disasters, like a flooded basement? Tell me in the comments!
Check out the next post in the series here.
Missed the previous posts? Start at the beginning of the collection care series here.
Want to stay up to date and see more of what I’m working on? Sign up for my mailing list here and get a FREE collection care resource guide. (I promise not to be spammy with my emails—I hate that too!)
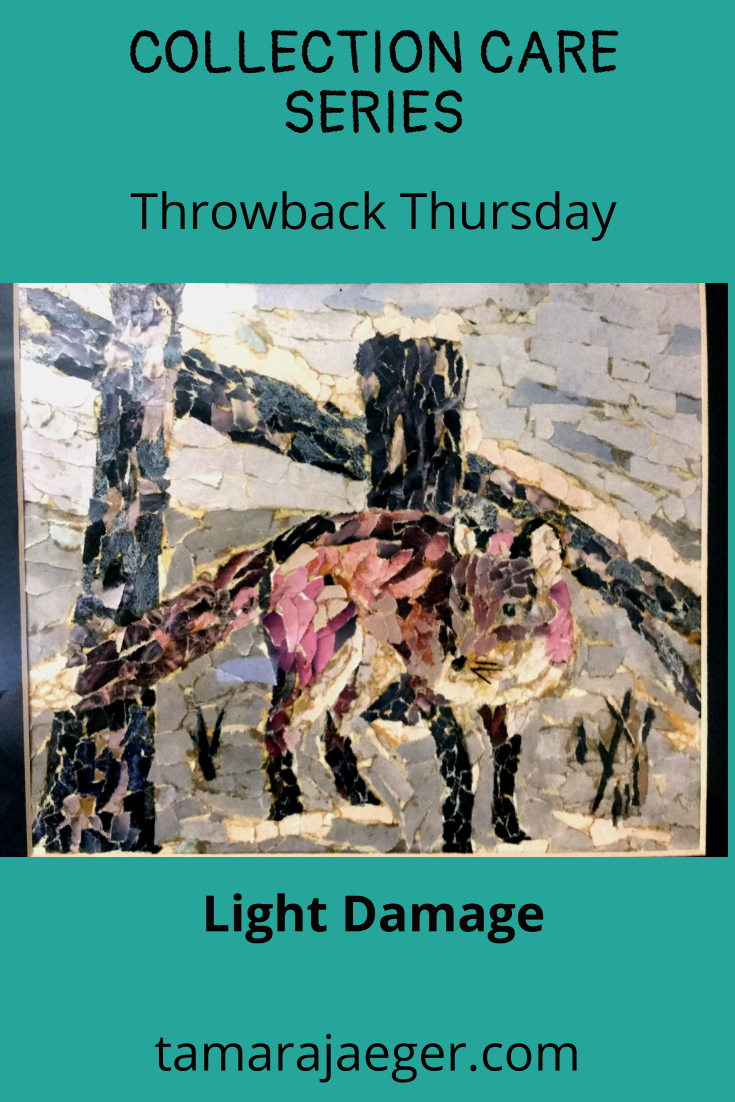
Collection Care Series Throwback Thursday: Fox Collage
Last week we talked about light damage. So as an example, I wanted to share with you one of my earliest torn paper collages. Now, as far as preservation goes, it’s had a rough life. It was displayed for over 20 years right next to a window in an office. It got a Lot of light, and you can definitely see the effects of that.
Unfortunately, I don’t have a photo of what it looked like when it was first made, but you can still see the fading and discoloration. Some of the discoloration is of the adhesive used to attach the magazine pieces to the paper—that’s likely a combination of light damage and the acidic nature of the adhesive (rubber cement, in this case).
Overall, considering the amount of light it got, it’s in surprisingly good shape. The colors have shifted, the blues in particular have faded a lot, but it’s still apparent what the subject is. At least it provided a lot of enjoyment over its lifetime!

Do you have any examples of light damaged artwork? Feel free to share in the comments!
Missed the first post? Start at the beginning of the collection care series here.
Check out the next collection care post on moisture here.
Want to stay up to date and see more of what I’m working on? Sign up for my mailing list here and get a FREE collection care resource guide. (I promise not to be spammy with my emails—I hate that too!)
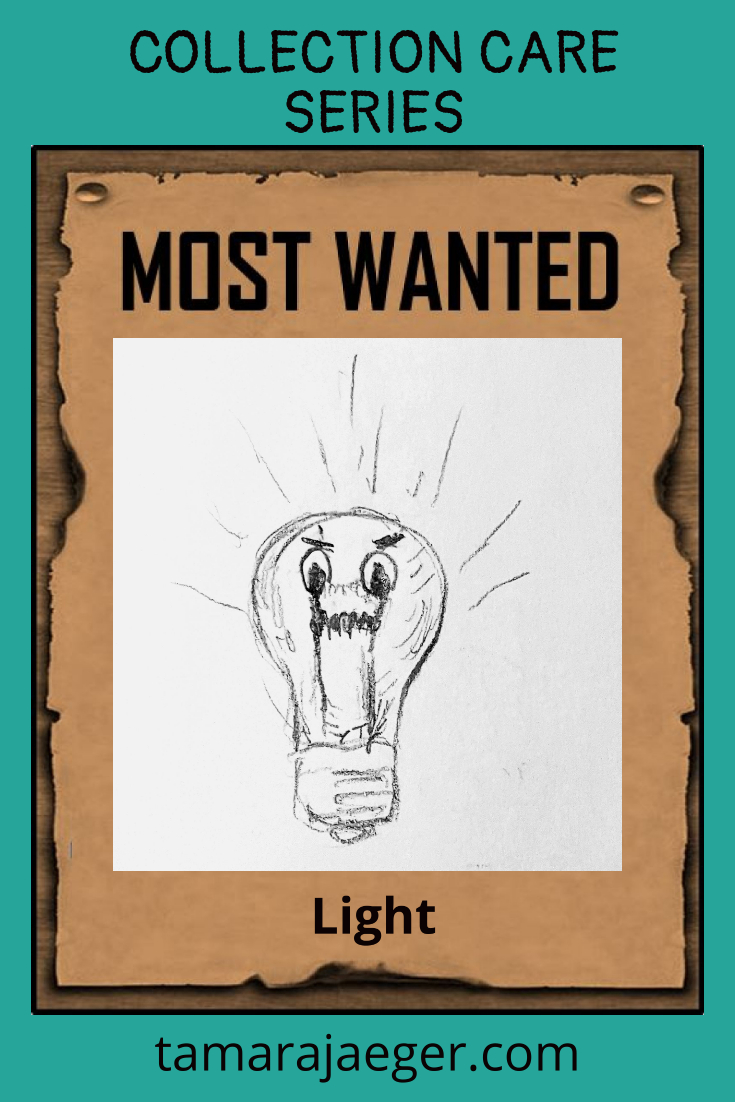
Collection Care Series: Enemy #1: Light
Fun fact: I actually trained and worked as a museum conservator for a number of years. I specialized in archaeological and ethnographic materials, but also covered the basics of conservation of most traditional fine art and decorative art materials—you never know what you’re going to encounter, particularly with ethnographic objects!
Everyone has their ‘treasures’ that they want to preserve for as long as possible, right? Maybe it’s a crayon drawing from your first child. Maybe it’s something you inherited from your grandparents. Or maybe it’s a piece of art you got at a fair and just really enjoy. Whatever it is, you want it to last, so I thought it might be helpful to go over basic care information for some of the more common materials found in peoples’ houses. We’ll do this as a multi-part series, where I’ll focus on a different collection risk factor each week and which materials are most at risk. As a bonus, I put together a short guide covering some common items with simple recommendations for storage or display as well as a list of resources where you can get more information or professional conservation services. You can get it here.
Enemy #1: Light
This week, we’ll be talking about the first ‘enemy,’ Light.

Light can cause a lot of damage, particularly UV light. I’m not going to go into the chemistry involved in light damage (I mean, I totally could, but I don’t want to bore everyone to tears!), so just keep in mind that sunlight and fluorescent lights can be particularly damaging.
Some common items that can be damaged by light include paintings, paper, photos and negatives, and plastics. Plastics are actually becoming increasingly common in museum collections and despite all the press about them never breaking down, plastics can degrade quite badly and pose a lot of problems for preservation. So, you know those plastic dinosaurs or toy horses you had as a kid that you want to hang on to? They need a little TLC to keep them in good shape.
On of the main signs of light damage is fading and discoloration. Along with discoloration, many materials will also become quite brittle. Both are signs of the underlying chemical deterioration that is taking place. Places you’ll see light damage are with paintings, particularly things like watercolors, and prints on paper, as well as photos and negatives. You may notice that artwork that was displayed near a window has faded or discolored. Also, some colors are affected more than others, so the overall color of the print will have shifted. Reds and blues are often the first victims of light damage. Plastics will discolor and, if originally colored, will fade as well, often getting a hazy, whitish film on the surface. You see this sometimes on older plastic playground equipment, since it’s exposed to the sunlight all the time.
Now, unfortunately, light damage is cumulative and permanent. If you have something that’s faded or discolored from light, there’s no fixing it. But you can help prevent further damage by limiting the amount of light it’s exposed to in the future. If your treasure hasn’t been damaged by light yet, fantastic! Let’s keep it that way so you can enjoy it for years to come.
As far as preventing light damage, it’s really quite simple: don’t expose your item to a lot of light. I don’t mean you have to keep everything in complete darkness all the time (though that’s the best way to prevent light damage). After all, you still want to enjoy your treasures, otherwise what’s the point? Just keep them away from bright light. Don’t hang them near windows or under fluorescent lights. If you have something like a really old photo you want to display but don’t want to damage (or damage further), consider getting it reprinted on modern photo paper and displaying that. You can then keep the original stored away from light entirely to preserve it as long as possible.
There’s a peculiarity you should know about with oil paintings, however. You should avoid storing oil paintings in complete darkness as this will cause the linseed oil in the paint to darken or yellow. This color change is different from the light damage we’ve been talking about, however, and actually can be reversed by placing the painting in natural light for a few days.
Do you have any treasures that you think are vulnerable to light damage? Let me know in the comments!
Check out the next post in the collection care series here.
Want to stay up to date and see more of what I’m working on? Sign up for my mailing list here and get a FREE collection care resource guide. (I promise not to be spammy with my emails—I hate that too!)
Product Review: Flexcut Micro Palm Carving Tools
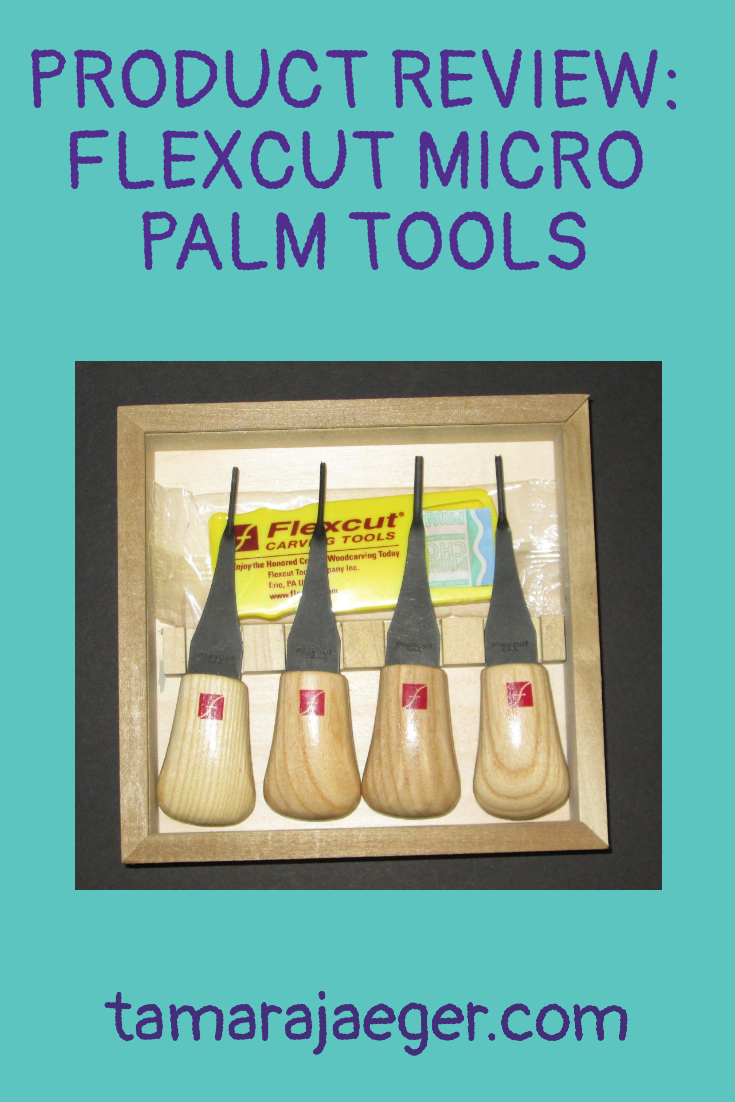
In a previous post, I talked about my experience with Flexcut Lino and Relief printing carving tools here. Now, I didn’t like those tools At All. But I decided to give Flexcut another try. My main problem with the Lino carving set was the length and shape of the handle, and Flexcut has a much larger line of “Palm” tools, which looked to have a much shorter handle that fits easily into your palm.
I do a lot of fine detail work in my linoleum prints, so I decided to try the Micro Palm Carving tool set. You can also get a “Beginner’s” set to start out with. The Micro set comes with four different, very tiny U- and V-shaped tools. They’re not cheap though. I was pretty nervous about the investment, especially considering how much I disliked the (cheaper) lino carving set. What if I also hated these and wasted so much more money?
So, I tried them out and I love, love, LOVE these tools! It was a totally different experience than with the lino carving set. The right shape and size of tool makes all the difference! I’m going to have to get a few more of the sets, I think. What I really need now is a wide gouge to carve out large areas of the block—I had to switch back to my Speedball cutter for that and it made me sad.
The Palm carving tools cut through linoleum like butter. I’ve always been a bit skeptical of that particular phrase, but it absolutely fits here! They seem much sharper than the Speedball cutters and seem to hold an edge much better than the lino carving set does too. They carve smoothly and easily, with minimal pressure and essentially no slippage. They’re a delight to use. I did need to hone them occasionally so keep them razor sharp, but that’s to be expected. I used the wooden strop and polishing compound that came with my lino carving set, but that (or something similar) can be purchased separately. The smallest micro tools can be difficult to sharpen due to their very tiny size, so I may need to invest in a different sharpening tool for those.

So if you prefer a palm-style carving tool, I absolutely recommend the Flexcut Palm tool line. They’re a bit pricey, but absolutely worth it. Quality-wise I do expect these tools to last for a long time.
Have you tried out and of Flexcut’s carving tools? What style and brand of cutters do you like? Tell me in the comments.
Want to keep updated and see more of what I’m working on? Sign up for my mailing list here and get a totally FREE digital download of a tiger linocut print. (I promise not to be spammy with my emails—I hate that too!)
* Please note that this post contains affiliate links and any sales made through such links will reward me a small commission – at no extra cost for you.
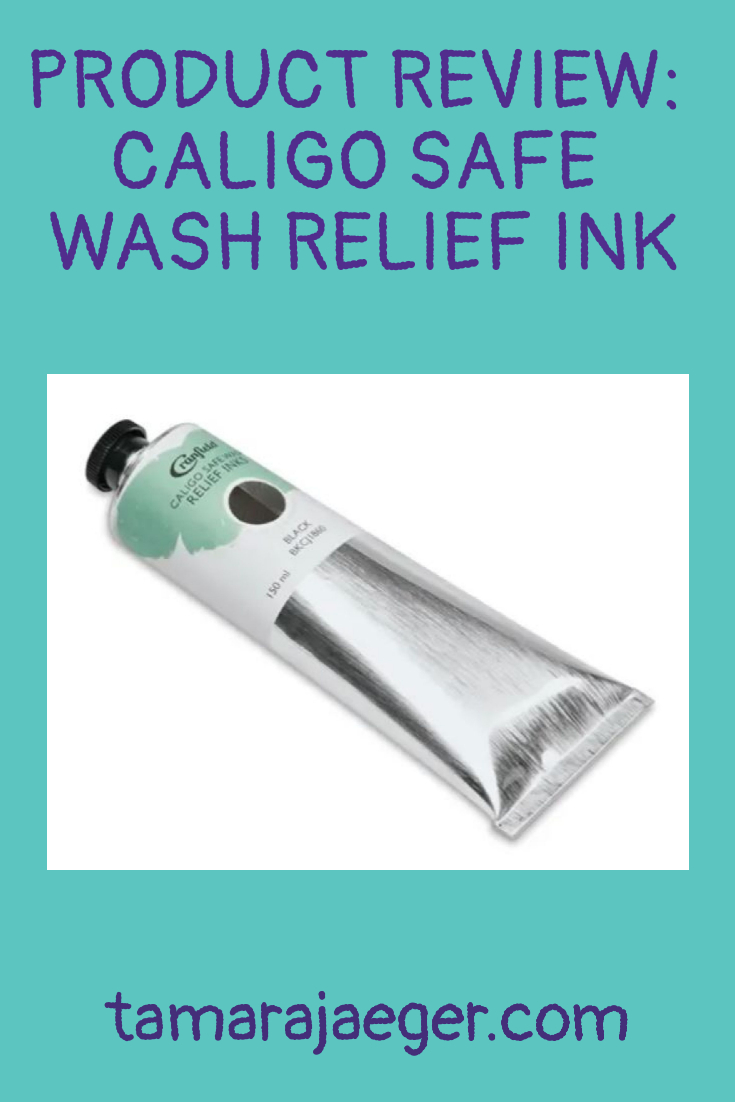
Product Review: Caligo Safe Wash Relief Inks
I haven’t been really happy with the water-based printing inks I’ve been using. They’re way better than traditional oil-based inks. They’re non-toxic, much easier to clean up and you don’t need to use solvents, which makes them much safer, particularly in a home-based studio.
Water-based inks can be difficult to work with, however, since they dry very quickly. This can be a benefit—oil-based inks can take a long time to dry! But it’s also a drawback, particularly in less-humid seasons. Working time can be Very short and it can be difficult to get an even print because the ink sometimes dries before I can get the whole piece printed. They do make mediums and additives to help extend the working time a bit, but it’s still quite short.
Since I don’t want to use hazardous solvents in my home (or at all, really!), I decided to look into some of the newer water-soluble oil-based printmaking inks. I’ve gotten great results with the water-mixable oil paints and Really like them a lot, so why give the inks a try?
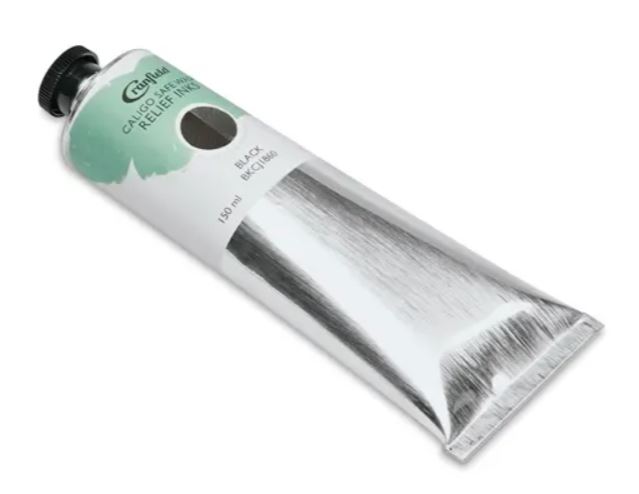
I got a tube of the black Caligo Safe Wash Relief Ink by Cranfield Colors and I’m a complete convert. I Love this stuff! It works much like traditional oil-based ink, since it Is an oil-based ink. It rolls smoothly and gives a nice, rich black print. No worries about it drying out halfway through a print. It does bleed through thin paper a bit more than the water-based ink does, but I just put a piece of tracing paper over the printmaking paper when I’m printing by hand and it’s all good.
But what I love the most is the cleanup. It’s not quite as easy as a water-based ink and you do have to follow the instructions. You apply soap—I use a natural dish soap, and work it into the ink-covered areas Before adding water. I use a cheap bristle paintbrush to work the soap in. Then you wash it with water and the ink comes right off! I sometimes need to repeat the process a couple times, depending on how much ink was built up in the crevices, but it’s still super easy, if a bit messy.
One thing to keep in mind is that if you use unmounted linoleum, like I do, you want to limit how much water comes in contact with the reverse of the linoleum since it can cause warping. I just try to keep the back as dry as possible when I’m washing it, then I dry the block off well and let it dry between paper towels under pressure.
I’ve also seen some cautions about using oil-based inks on the newer, rubbery linoleum alternative materials, like the pink ‘Speedy Carve’ by Speedball. I’ve used Caligo Safe Wash ink on a Speedy Carve block a couple times though and so far, the block seems fine. I don’t know if the oil in the ink will cause damage to the Speedy Carve block over the long term, or if cleaning it really well after use is enough. We’ll have to wait and see, I suppose. To be cautious, you might want to stick to water-based inks if you’re using the rubbery materials. Or not—be daring and live a little, right?
Anyway, I highly recommend Caligo Safe Wash Relief inks. They’re a fantastic alternative to traditional oil-based inks as far as safety and clean up goes, and superior to water-based inks in their working properties. The only thing I Really wish for is for Cranfield to add some metallics to their Caligo Safe Wash line. They have a gorgeous oil-based gold ink in their traditional oil-based line and I’d love to be able to get it in a water clean-up version.
What are your thoughts on the water-soluble inks and oil-paints? Have you tried any of them? Tell me below in the comments!
Want to keep updated and see more of what I’m working on? Sign up for my mailing list here and get a totally FREE digital download of a tiger linocut print. (I promise not to be spammy with my emails—I hate that too!)
* Please note that this post contains affiliate links and any sales made through such links will reward me a small commission – at no extra cost for you.