Posts Tagged: glass

Collection Care Series: Fragile but Strong
This week we’re going to take a slightly different approach. There’s no new enemy this week. Instead, I’d like to talk about materials that appear to be resistant and strong, and go over their vulnerabilities. We’ve been focusing primarily on organic materials in this series, because those are the ones that are most at risk from environmental conditions.
What I’m going to talk about today are the inorganic materials. Inorganic materials, like glass, ceramic, metal, and stone, aren’t really all that picky about their storage conditions. These are the guys you can get away with storing in places like attics and garages. They won’t mind.
What you want to watch out for with inorganic materials in general is physical damage. They’re strong, but typically brittle. You don’t want to drop them, bump them, play frisbee with them—you get the idea. As far as storage, you want boxes or containers that protect from impact. You want sturdy boxes—preferably plastic, but you can get away with sturdy cardboard ones in most cases, and plenty of padding.
There are a few material-specific concerns you should be aware of, however, and I’ll comment on them below.

Glass: Glass is pretty inert. However, glass containers with tight-fitting lids, such as decanters, can be damaged by moisture trapped inside the container. This appears as a haze or cloudy look to the interior glass surface. Make sure glass containers are absolutely dry before storage or leave the lid or stopper off.

Ceramic: Ceramics with decorative designs or gilding can be easily damaged. Avoid scrubbing or scouring decorative glazes and gilt edges. Also, many decorative ceramic glazes and gilding contain metals are not microwave safe! You’ll also want to wash these items by hand.
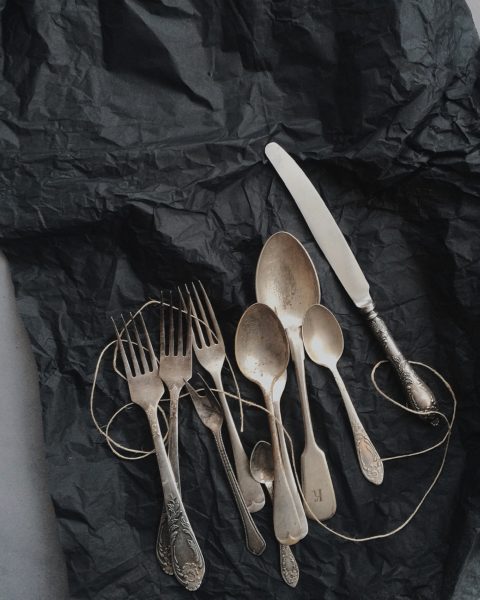
Metal: Moisture and high humidity can cause corrosion, rusting, and discoloration of vulnerable metal items. Store them in a dry area. Avoid direct contact with acidic storage materials, like newspaper or cardboard, or storing metal items in sealed containers such as plastic storage boxes or sealed plastic bags with acidic materials to prevent tarnish. Minimize polishing of metals such as silver—polishing removes a very thin layer of the metal each time it is done. Store these items with a tarnish-inhibitor made for silverware or jewelry if possible.
Are there any materials that I didn’t discuss that you have questions about? Let me know in the comments!
Missed the previous posts? Start at the beginning of the collection care series here.
Want to stay up to date and see more of what I’m working on? Sign up for my mailing list here and get a FREE collection care resource guide. (I promise not to be spammy with my emails—I hate that too!)
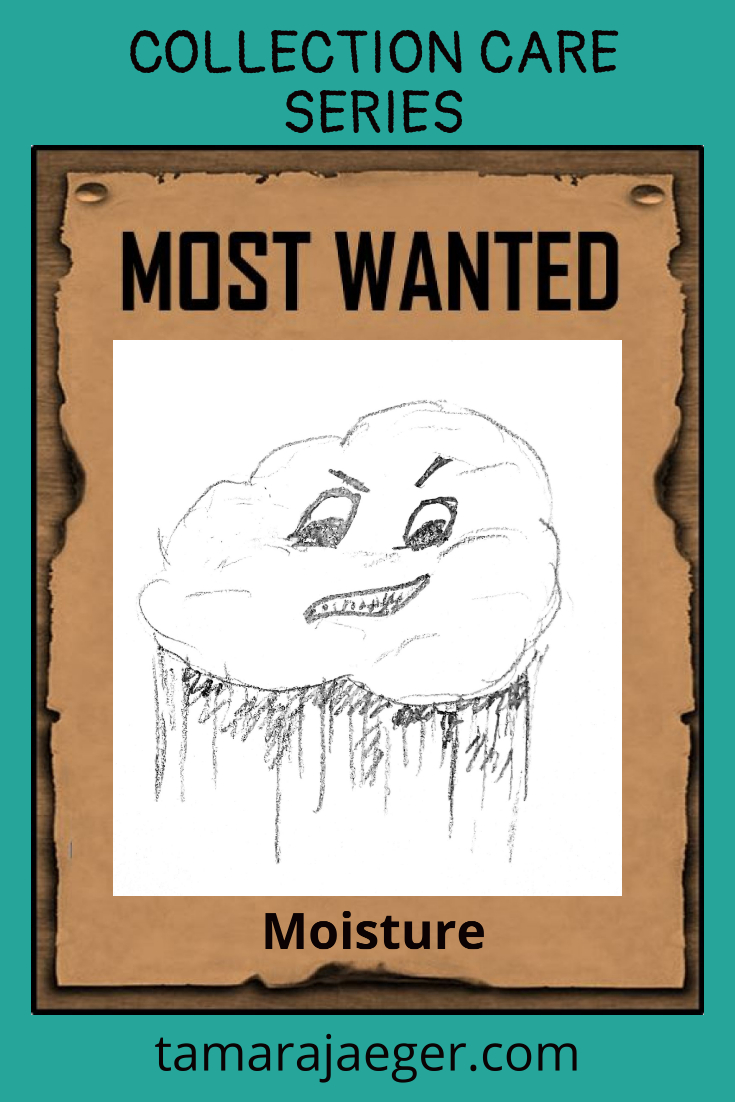
Collection Care Series: Enemy #2: Moisture
This week, we’ll be talking about our next enemy: Moisture.
Moisture, in particular humidity, is a tricky matter. If it’s too high, bad things happen. If it’s too low, bad things can also happen! The humidity level that’s best for your treasure depends on what material it’s made from as well as what environment it’s used to.

Obviously, you want to avoid getting your items really wet—floods can do a Lot of damage. Fun fact: I spent over three and a half years conserving a huge archaeological collection that was damaged by flooding from a hurricane. But with some materials—primarily organic materials like wood, paper, leather, etc, you also want to keep them from getting too dry. Organic materials shrink and swell with changes in humidity. This physical action itself can cause problems over time—the repeated fluctuating and bending can weaken the material and cause cracks and breaks.
Items that are made of two or more materials that respond to humidity differently are even more vulnerable, since the different responses cause increased stresses within the object itself. This can cause breakage where, for example, a metal knife blade inserts into a wooden handle or where leather is wrapped around something moisture-resistant like metal or stone. You can also get damage where humidity fluctuations cause paint to crack and detach from the substrate.
Wood really doesn’t like being very dry—it shrinks and cracks along the grain. Wooden musical instruments are very susceptible to this this. They are also often made of multiple incompatible materials—stringed instruments like violins are a prime example. There’s a reason they sell so many different types of humidifiers for instrument cases. And if you live in a dry area (or have cold winters, with low indoor humidity from your heating system) and have a violin or similar instrument and you don’t have some sort of humidification system (and a hygrometer to measure humidity levels), please get one! They don’t have to be high tech or super expensive, but they can prevent a lot of damage.
On the other end of the humidity spectrum, you don’t want your items exposed to very high levels of humidity for extended periods of time either. Wood and other organic materials will swell and can crack or stick, paper can buckle. And if your relative humidity level goes (and stays) about 60%, you can get…Mold!

Mold can be a real pain. And it brings with it some health risks, particularly for sensitive people. Everyone’s heard about the deadly black mold, that makes people so sick, right? Well, most of the time, when you get mold it’s not going to be that type, so you can relax a bit. But you still don’t want it on your treasures! Mold can cause discoloration on paintings, papers, and photos. And it can be a difficult to get rid of—try and prevent it if you can. Your life will be so much easier!
If you do have some minor mold on one of your treasures, manual removal (a soft brush works well), preferably outdoors or using a HEPA filtered vacuum and a dust mask (you need one with an N95 rating—it will filter out mold spores) works well. If you have large amounts mold, discoloration from mold, or many items with mold (flooded basement, anyone?), your best option is to contact a professional conservator for treatment.
Like with light damage, it’s best to prevent moisture damage from occurring in the first place. If you have susceptible materials, store them in an area where humidity doesn’t get too high or too low. Avoid storing susceptible items, like paper, paintings, wood, photos, and musical instruments in places like attics or basements. You should also keep in mind the environment your object is used to. For example, if you have a violin that’s spent its entire life in a very dry environment, you don’t want to suddenly raise the humidity to 60% or something. That will just cause problems. If it’s happy and accustomed to a certain environment, there’s no need to change it. What you really want to avoid is sudden or short-term humidity fluctuations.
What treasures do you have that could be damaged by moisture issues? Have you had any water disasters, like a flooded basement? Tell me in the comments!
Check out the next post in the series here.
Missed the previous posts? Start at the beginning of the collection care series here.
Want to stay up to date and see more of what I’m working on? Sign up for my mailing list here and get a FREE collection care resource guide. (I promise not to be spammy with my emails—I hate that too!)
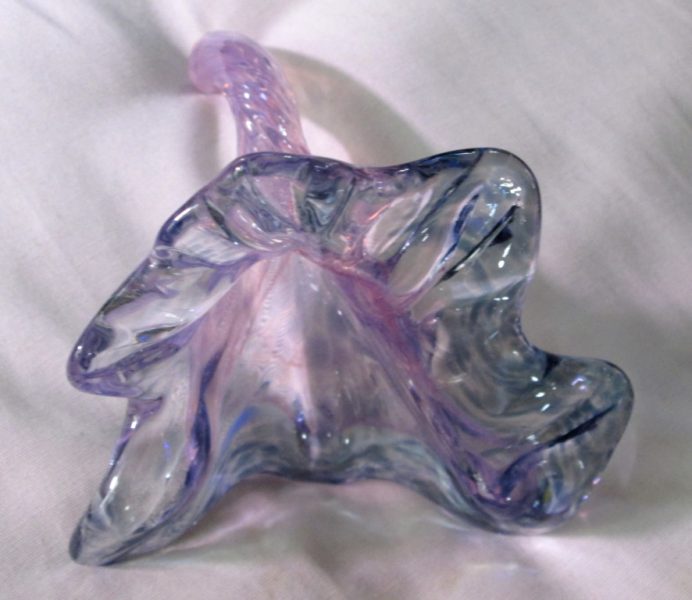
Throwback Thursday: Glass Flowers
Several years ago I took some glassblowing classes. It was something I had wanted to try for a long time, but it’s difficult to find somewhere that offers classes. Glassblowing studios are expensive to set up and maintain and beginning glassblowers are, I’m told, Very hard on the equipment! Most places, you’re lucky to get a short workshop, where you get only the slightest chance to actually work with the glass. But I got lucky—there was a glassblowing studio near where I lived that offered Actual classes! So I took the plunge and signed up for an 8-week course (Afterward, I continued for a second 8-week session).
Glassblowing was…like nothing I’d ever tried before. The closest thing is probably ceramics, which I did extensively in college and thoroughly enjoyed. But the two are so Very different. With ceramics, you get deep and dirty and hands on with the clay, then you stick it in the kiln and heat it to insanely high temperatures. Glassblowing is almost the opposite. You start with your insanely hot, molten glass and then have to try and coax it into doing what you desire, while not being able to directly touch it (trust me, you Don’t want to directly touch it. Ask me how I know!).
I found not being able to touch the glass the most difficult part, really. Sure, there was a lot of learning involved with gathering the molten glass and adjusting and maintaining the temperature while working on the piece. It was so very different from any other art mediums I’d tried. It was also challenging in that the glassworking benches are all set up for right-handed people, so as a lefty, I had to learn to do all the fine manipulation using the tools in my right hand. Some tools, like the jacks or the wooden paddles and blocks, were relatively easy. Others were not! The tweezers and shears were my biggest challenges. I’m not sure why the shears were so hard—I actually use right-handed scissors with my right hand all the time without any issues.

So one of the goals I set myself was gaining more proficiency with the tweezers. After the jacks, they’re one of the primary tools used in manipulating the glass. So every class, I’d start out by making a few glass flowers. They’re one of the more simple items to create and we were introduced to them in the first couple classes. Most of the students never made another flower after those first classes. But I was determined to master the tweezers! (spoiler alert: I’m nowhere close to being a tweezer-master. It’s something that takes years, rather than the months that I had)
Now, like I said, a glass flower is a relatively simple item to make, though admittedly it’s not simple to do Well! You gather your glass from the flaming hot hell-mouth (i.e. the furnace), roll it in the colors you want, heat it up again, then grab your tweezers and start pulling on the glass. Very carefully and precisely. So that hopefully you end up with something that looks flower-like and not like some sort of weird deformed blob.
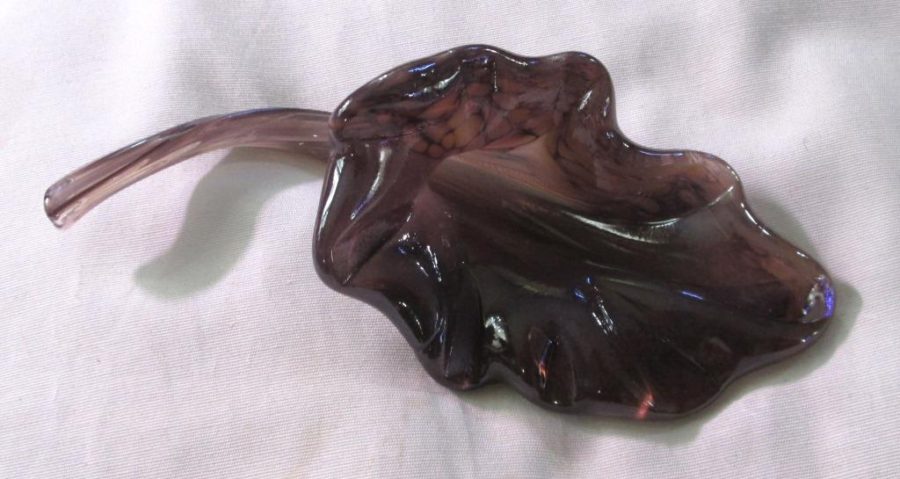
But, flowers were a quick, fun way for me to work on my tweezer prowess. I made a lot of flowers. Some of them even turned out well. I think if I had had more time (I moved to a different state to go back to grad school), I would have liked to continue with glassblowing classes. It was frustrating, but also fun and there was definitely a sense of satisfaction when I got to pick up my pieces and take them home after they had been annealed and cooled. I could See the progress I was making from week to week. I still prefer ceramics and really miss working with clay, but glassblowing gave me a completely different experience and way of looking at how to create things.
And if you’re in the Plymouth, Michigan area and are looking to try out glassblowing, check out Acorn Glassworks. They’re fantastic people, fantastic glassblowers, and fantastic teachers.
Are there any art techniques or mediums you’ve been longing to try? Tell me below!