Posts in Category: Art Materials
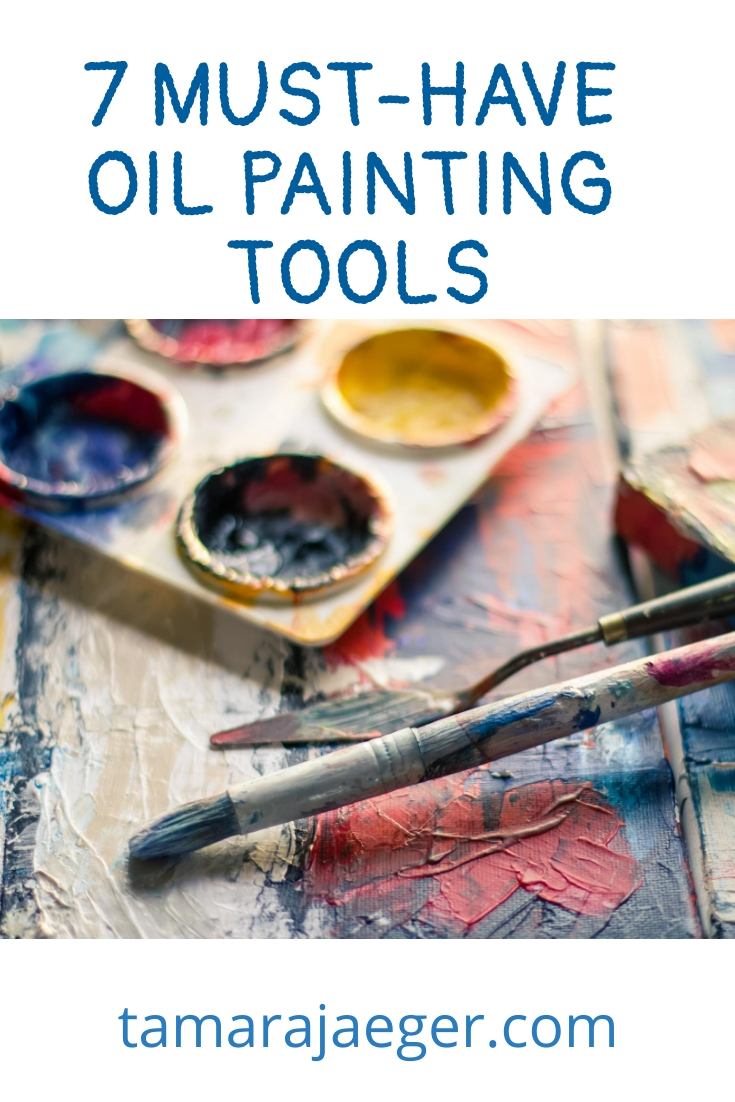
7 Must-Have Oil Painting Tools
Today I’d like to give a quick round-up of the tools I find indispensable when painting in oils. My must-have tools for acrylics are somewhat different, due to the different types of paintings I create with the different mediums. I’ll do a post on my favorite tools for acrylic painting at some point soon!
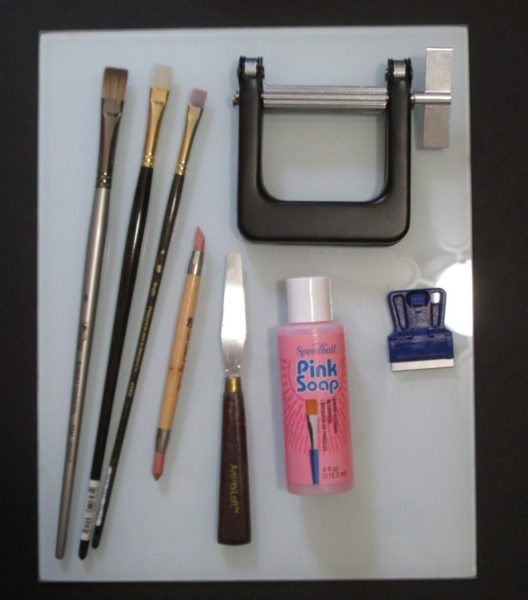
1. Tube wringer

I love this thing. It’s fantastically sturdy and heavy duty. It squeezes even the largest tubes with ease and doesn’t slip on the tube during use like some of the less expensive ones do. It does a fantastic job of squeezing out the last bits of paint from the tube, so you don’t waste any.

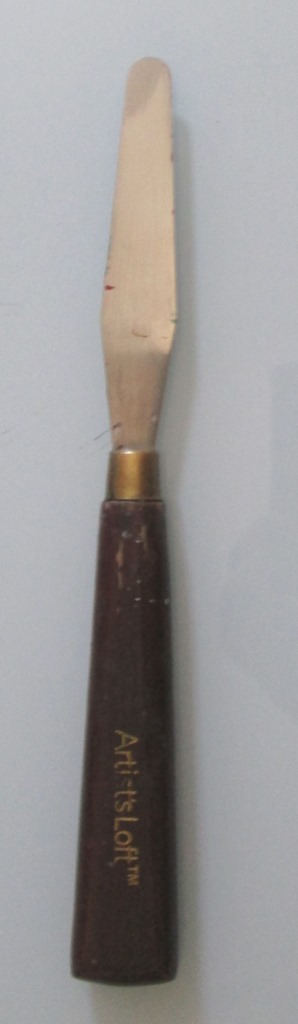
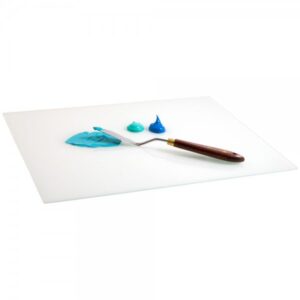
I use this primarily to mix paints on my palette. I have a whole set of various palette and painting knives, but mostly I just use this one. (In case you were wondering, a palette knife has a straight or very slightly bent handle while a painting knife has a large bend in the shaft between the handle and blade)
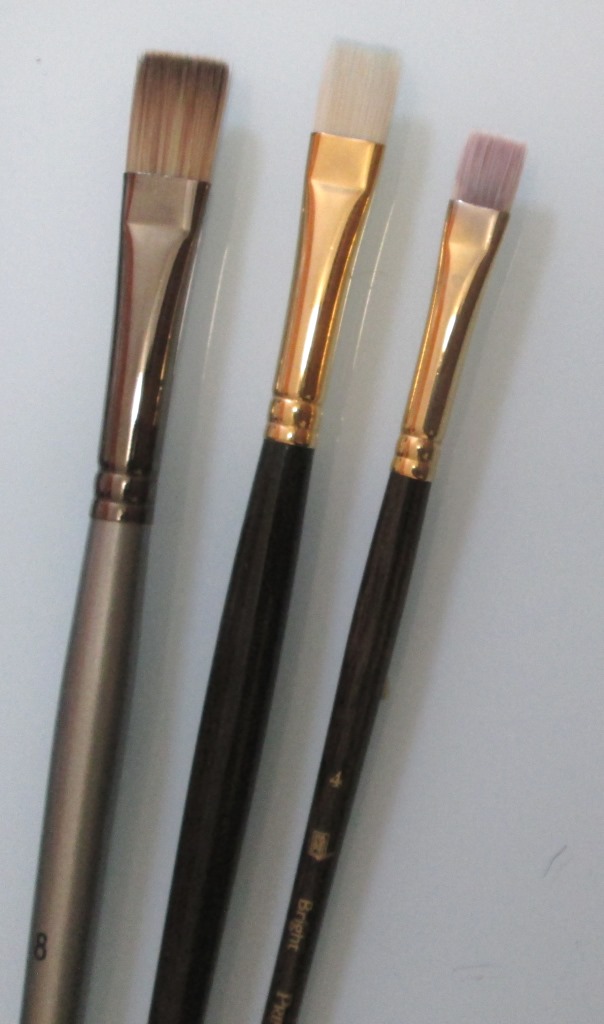
My favorite brush is the ‘bright.’ It’s a shorter version of the square-shaped ‘flat’ brush. I use these in a variety of sizes and tend to have multiples of each size so I don’t have to clean them off when I switch colors during a painting session. I also prefer the softer synthetic bristle brushes to the traditional bristle brushes.
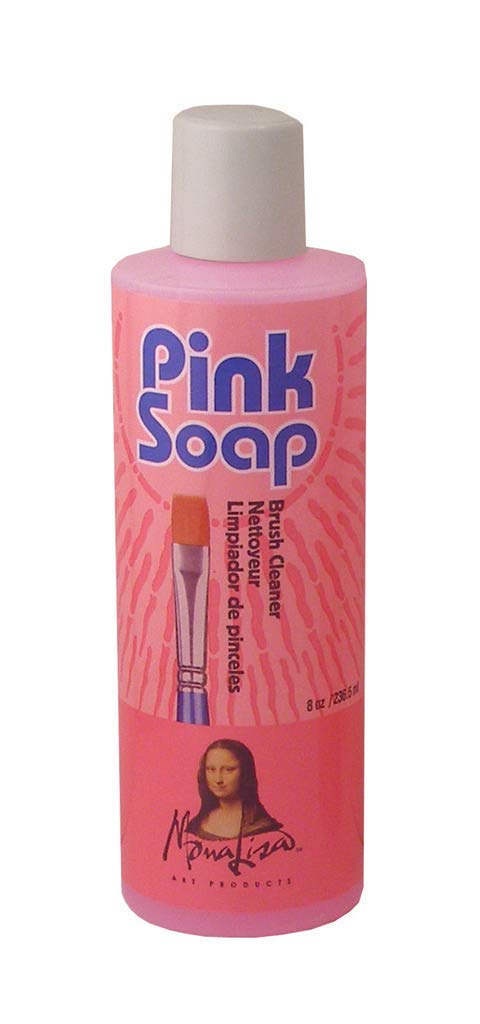
This stuff is amazing. I first discovered it during college when I was taking a painting class, though it was my mother, who worked at Michaels at the time, who introduced me to it. It does a great job of removing paint residue from brushes (and clothes, I’ve been told, though I haven’t tried it for that myself) and hands. The scent is pleasant and not overpowering and it works very well for cleaning up both acrylic and water-mixable oils. I also used it to finish cleaning my brushes after cleaning them with turpentine/turpenoid when I was using traditional oils. They seem to have changed the name recently, as my newest bottle calls it Speedball Pink Soap.
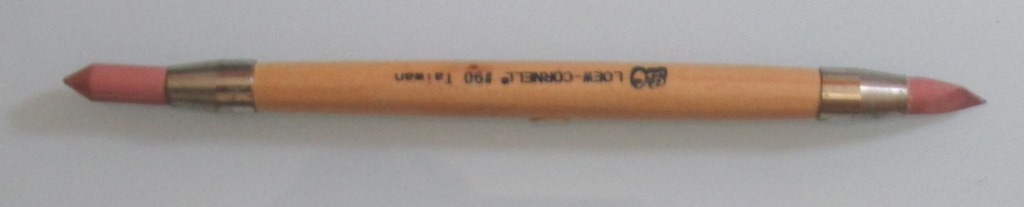
Another fantastic invention. My mother gave me one as a gift once and I wish I had found it sooner. It’s great for tidying up edges and removing slight mistakes when your paint is still wet. There are two ends—a pointed, cylindrical one and a straight-edged wedge end. I use the wedge end almost exclusively.
My all-time favorite palette. I searched long and hard for something like we used in my painting class, which were glass-topped cabinets on wheels. I like to have my palette on the table next to me when I paint rather than holding it in my hand. I love how easy it is to clean off the palette too. Which brings me to the last item in my list:
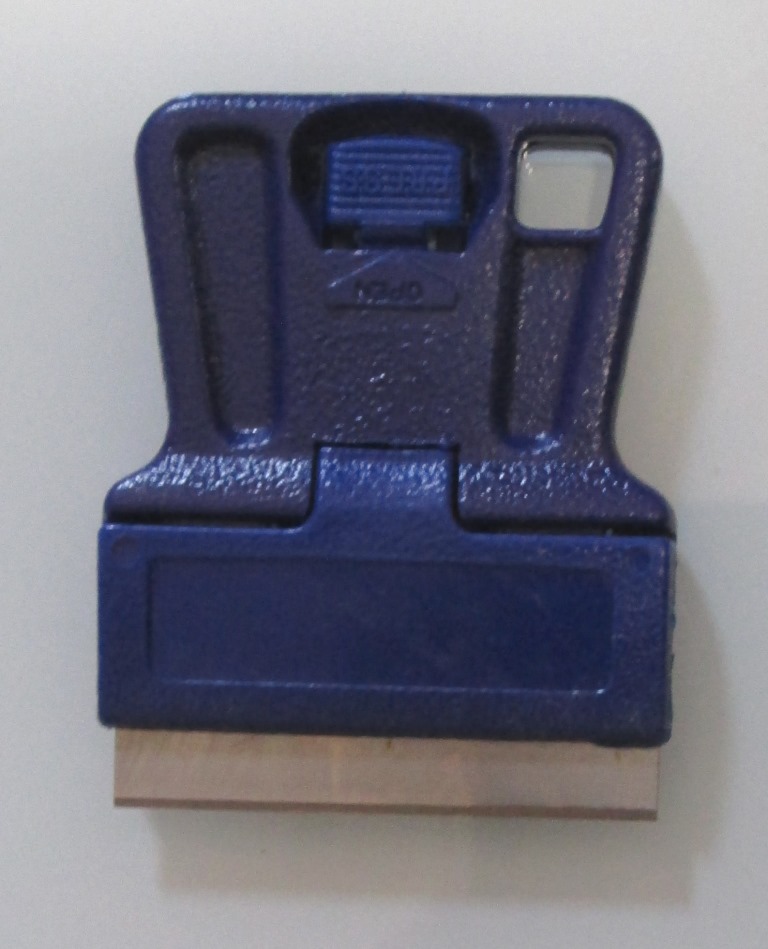
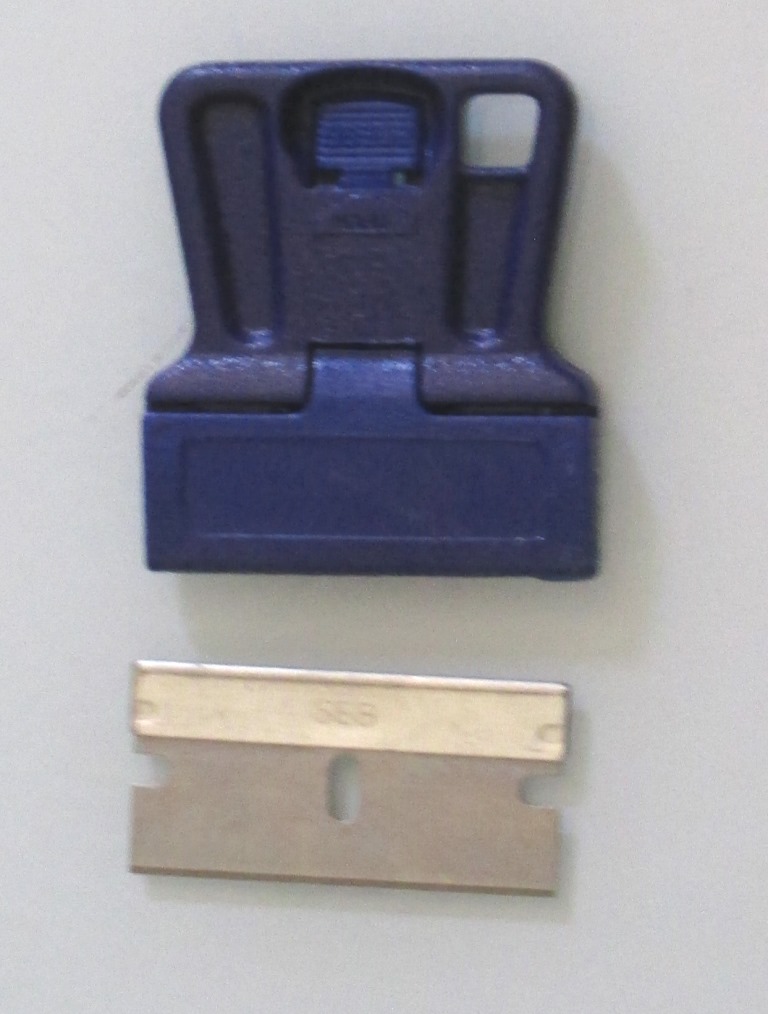
I use this to clean off my glass palette. Once the paint dries, all you have to do is gently scrape the palette and all the paint comes right off. You do have to take care with the angle of the blade while you’re scraping, to prevent scratching the glass. The scraper takes a standard razor blade which you can reverse so the sharp end is inside the handle for storage. I found mine in a small, local art supply store in Connecticut but I’ve also seen them in the paint departments in stores like Home Depot and Lowes. They’re inexpensive and so worth it!
What are your favorite painting tools? Tell me in the comments below.
* Please note that this post contains affiliate links and any sales made through such links will reward me a small commission – at no extra cost for you.

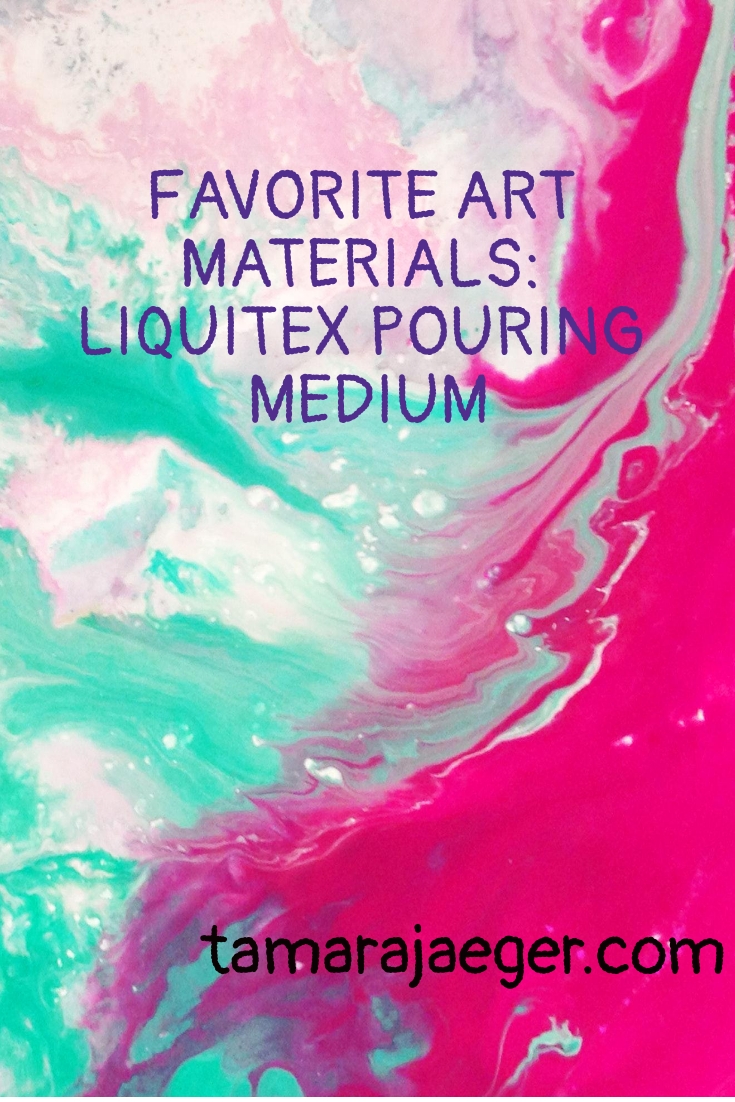
Favorite Art Materials: Liquitex Acrylic Pouring Medium
I talked about acrylic pouring last week and in that post, I mentioned one of my current favorite art materials: Liquitex Pouring Medium . I thought for today’s post I would expand on that a bit. I really (really!) like this stuff and I go through a shockingly large amount of it when I’m working on abstract pieces. It’s super satisfying, the way the paint mixes and flows when this medium is mixed in.

Pouring mediums dilute the paint to make it more fluid while retaining the color and binding properties of the undiluted paint. It also helps to prevent cracking and crazing of the thinned paint. Liquitex does warn that cracking and crazing can occur “when flow heights are very uneven” and they recommend that your poured surface is kept level as it dries. But I’ve never personally experienced and cracking and my poured surfaces are frequently Very unlevel!
The amount of paint versus pouring medium depends on the consistency of the paint you are using, but you typically don’t need a lot of paint to get a good, intense color. I just add some paint to a cup or container (I find the single-serve yogurt containers work well), then squeeze in some pouring medium and stir it gently. If it’s not fluid enough, I continue adding pouring medium until I get the consistency I want. Super easy and it’s very forgiving of the paint-to-medium ratio. I’ve honestly never had a mixture fail or cause any issues, and I’m definitely not at all precise in measuring (“Yeah, that looks good enough”).
As far as working with the mixed and thinned paint, I’ve used in with wet-on-wet layers and wet-on-dry layers on a flat surface as well as wet-on-wet pouring in drips and drops and streams all over some highly uneven surfaces. You can obtain a wide range of effects depending on how you apply it. I like pouring it in thin streams along the high points of my abstract pieces and allowing it to pool in the lower areas. Tilting and rotating the canvas allows the colors to mix and swirl in interesting and unpredictable ways. I used this particular technique in many of the pieces in my “Elementals” series.
Have you tried Liquitex Pouring Medium? What did you think? Have you tried any other types of pouring mediums? Tell me in the comments.
* Please note that this post contains affiliate links and any sales made through such links will reward me a small commission – at no extra cost for you.

Favorite Art Materials: Water-Mixable Oil Paints
I enjoy painting with oils. They’re my favorite of the painting mediums, by far, though I actually use acrylics more often, since they dry faster and work better for the abstract style I’ve been painting in recently. Another major drawback with oil paints is the solvents necessary for thinning and clean up. When I was in college, that wasn’t a big issue since I mostly painted in the art building. But once I graduated I no longer had a separate space for painting. I didn’t want the solvents and their fumes I my apartment!
For a while, I tried working with acrylics and with water colors, but I just didn’t enjoy them as much. I really dislike working in watercolor, for some reason. I have very few watercolor pieces floating around out there, though there are a few. Eventually, I broke down and got a small set of water-mixable oil paints to try out.
I didn’t have very high expectations, I admit, but I was pleasantly surprised. They worked well enough, though the color range was a little limited in the brand I was using. I started with Winsor & Newton Artisan Water Mixable Oil Colors, since it was readily available in the major arts and crafts stores like Michaels and JoAnn’s. I’ve since found some other brands and have expanded the range of colors I have on hand. I’m definitely not loyal to one brand over another—I have quite a mix of brands in my box of paints!

I love that they still smell like oil paints—I love that linseed oil smell. But what I Really love is that I can clean up with soap and water. No harsh, unhealthy solvents needed. You can thin them to an extent with water, though I typically don’t unless I’m applying a thin color wash over the canvas to tone down the bright white color before I start painting. I don’t like the texture of the paints when they’re thinned with water so I typically use linseed oil to thin them if needed. Definitely make sure you’re using one of the linseed oils that are specifically made for water-mixable oil paints though.
I haven’t tried out too many of the mediums that go with the water-mixable oils. I use the linseed oil, certainly and I’ve tried the Winsor and Newton Fast Drying Medium (I HATED it, by the way. It’s like thick, sticky honey and made the paints impossible for me to work with. You may have a different experience though, so give it a try if you’re interested). I’m not really much of a medium user with oil paints. Acrylics, on the other hand…
I’ve also noticed that some brands work better in different colors—like, brand X has better blues but brand Y has better reds. I’ll try to do a post sometime soon comparing some of the colors from different brands. Some brands also have a texture I like better than another brand. Again, this tends to vary a bit by color. For instance, I really dislike the texture of Winsor and Newton’s Titanium White. I’m still trying whites from other brands, but so far the Lucas Berlin white is working well for me.

Some people don’t like that some of the pigments used in water-mixable oils tend to be considered lower or student-grade pigments. Not that the quality is bad; quite the opposite, in my experience. But they typically use ‘hues’ like cadmium red hue, instead of true cadmium red. Granted, I’d rather not use cadmium-based paints anyway. All in all, I’ll take the safer, non-toxic version, thanks!
I haven’t been able to find out how exactly the paints have been modified so that water can be used with them. I’m a bit of nerd, so that would be super interesting information to me! Mostly I just find a one sentence explanation about how the oil has been “modified” to be compatible with water. Not nearly enough information to satisfy me. I want to know details! Chemical structures, that sort of thing. Granted, I might be the only one who wants to know that level of detail…
The manufacturers claim that once the water has evaporated off, which happens very quickly, the paints cure and age just like traditional oil paints. I haven’t noticed any difference in the traditional oil versus water-mixable oil paintings I’ve done, but I don’t have any really long term data—my traditional oil paintings are only about 20 years or so old and the water-mixable oil ones are even younger. I guess I’ll have to wait and see.
Overall, I really like water-mixable oil paints. They’re safer and easier to clean up than traditional oils paints. I have no problem using them inside my home and they still have that ‘oil paint’ smell. There’s a bit of variation between brands as far as the colors and the textures, so some experimentation is necessary to find your ideal paints. I’d also like more technical details about the paints and how they were modified. I suppose that might be proprietary information; I don’t know.
Have you tried water-mixable oils? What did you think? Do you like them? What do you see as their strengths and weaknesses? If you haven’t tried them, why not?
* Please note that this post contains affiliate links and any sales made through such links will reward me a small commission – at no extra cost for you.
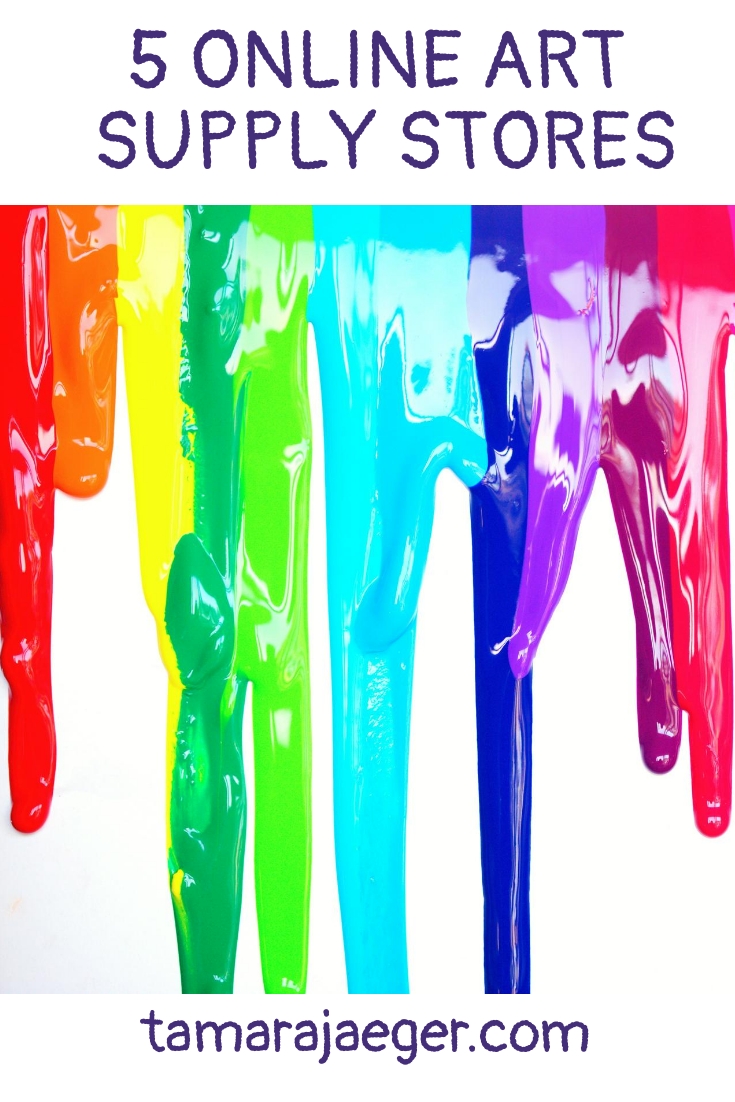
5 Online Art Supply Stores
So, you’re looking for that one item you that you Need to complete the piece you’re working on but you can’t find it in any of the stores nearby. Sound familiar? Happens to everyone, I suspect, no matter how well-prepared. Sadly, not everyone is lucky enough to live near a ‘real’ art supply store. I currently don’t have any nearby, and certainly miss the convenience. In the absence of an awesome local art supply store, we have to take our art supply quest online. To help with this, I’ve rounded up a few online stores that are worth checking out:
- Jerry’s Artarama (www.jerrysartarama.com)
Jerry’s is my go-to online art supply store. I wrote a more in-depth review earlier, which can be found here. What I love about Jerry’s: reasonable shipping fees and low free shipping minimum; everything I’ve ever ordered from them has been packed very well and arrived undamaged; they carry a wide selection of items including categories that can be hard to find elsewhere (like encaustic supplies!), they have a large variety of items under their own brands, which are less expensive but still high quality. They do have one of the higher shipping charges if you’re below Jerry’s free shipping minimum, so it’s probably worth either adding a little extra to your order to meet the minimum or trying a different site for small orders.
Photo by Ylanite Koppens from Pexels
- Blick Art Materials (www.dickblick.com)
Blick (formerly Dick Blick) is a well-known art supply store that also carries a wide range of supplies. In particular, they carry a lot of ceramics and sculpture supplies as well as printmaking supplies, all of which are often difficult to find. Their free shipping minimum is higher than Jerry’s, but art supplies add up quickly, so it’s still not too difficult to meet. In addition, their shipping charges are a little confusing, with what appears to be a ‘per-item’ charge rather than a tiered ‘order total’ charge like many other places. If you’re only buying a few less expensive items, however, you might want to look elsewhere. Having said that, if you’re only buying one item, Blick seems to have the lowest shipping cost.
- Utrecht Art Supplies (www.utrechtart.com)
Utrecht is another well-known art supply store which, like Blick and Jerry’s, also has physical locations if you’re lucky enough to live near one. It’s a solid choice, though I personally don’t like the online storefront as well as the previous two. I just find it harder to navigate and harder to look at for any length of time. Their free shipping minimum is currently the same as Blick’s and they have flat rate shipping below that amount at a price that seems in line with other online retailers.
- Cheap Joe’s Art Stuff (www.cheapjoes.com)
This is a site that I have never personally purchased from, but might be worth a look. They’re selection is somewhat limited and their prices are very slightly lower than the other sites I mentioned above. It’s decent for painting and drawing supplies but doesn’t carry much for artists working in other mediums. Their free shipping minimum is very high—unless you’re purchasing a Lot or studio furniture or something, you’re probably not going to meet it. They do offer flat rate shipping below that though, and it appears to be quite reasonable. Blick still has the lowest shipping if you’re only purchasing one item though. If any of you have tried Cheap Joe’s, I’d be interested to hear what you think.
- Mister Art (www.misterart.com)
Mister Art is another site I’ve never personally tried. They do carry a variety of items that fall more under what I would consider ‘craft’ rather than ‘art’ supplies but overall they seem to have a decent selection. Some of the major brands, such as Gamblin, seem to be missing from their inventory, so this site might be a bit hit-or-miss, depending on what you’re looking for. Shipping is…pretty pricey. Their free shipping minimum is the highest of all the sites I’ve listed and below that amount they have a tiered shipping cost based on total order amount rather than the flat rate shipping the other sites offer. They offer considerably better pricing if you join their “VIP Club” for an annual fee (currently $25). I’m not a fan of this type of program but if you intend to purchase regularly and often from them, it may be worth the fee.

What art supply websites do you use? Or are you fortunate enough to have a great local art supply store? Are there any items you just can’t find anywhere? Tell me in the comments!
Favorites: Jerry’s Artarama art supply online store
It can be difficult these days to find decent art supplies at good prices. It seems like the selection of artist-quality art supplies in the major craft stores like Michaels and Hobby Lobby is always getting smaller, with the focus shifting to cheaper student-quality or craft/hobby supplies. In some ways, it’s understandable—the stores have to carry what sells. But quality is important!
Several years back, I tried out some professional, artist-quality paint brushes. Wow! I had been using decent but still student-quality brushes. The difference was definitely noticeable in the way they handled and their resilience. I was hooked! I’m definitely convinced now about the benefit of using those more expensive, higher quality art materials.

Photo by Deeana Creates from Pexels
So, since it was getting difficult to find the higher quality in the stores within a reasonable distance (there aren’t really any ‘true’ art supply stores near where I live currently) , I moved my search online. My favorite of the online stores that I’ve found so far is Jerry’s Artarama. They have a wide selection of products covering a wide range of quality. There’s something for everyone. They also have a number of brands that appear to be exclusive to them. Now, frequently ‘store brand’ art supplies are of… questionable quality. I haven’t found that to be the case with Jerry’s. I’ve used a number of their own brand products and have been pleasantly surprised at the quality, especially considering their very reasonable prices.
The shipping at Jerry’s isn’t too expensive and their free shipping minimum purchase is quite reasonable (currently $35). I’ve also always been impressed with the way my orders have been packaged—I’ve never had anything arrive damaged, and I’ve ordered some pretty fragile items. I can’t really comment on their customer service though, as I’ve never had any need to contact them about an order. Their website has a very useful blog, art contests and a variety of free art lesson videos. So, next time you are searching for quality art supplies at reasonable prices, give Jerry’s Artarama a try.
Have you tried Jerry’s Artarama? What are your favorite sources for art supplies?
Product Review: Mona Lisa Pink Soap brush cleaner
I have a confession to make—I LOVE Mona Lisa Pink Soap Artist Brush Cleaner by Speedball. I first encountered it in college when I was looking for a decent, yet inexpensive soap for cleaning my paint brushes. I gave this one a try and I was hooked. At the time, I was using oil paints, so I used it after an initial cleaning with solvent to remove the bulk of the paint from the brush. This soap was fantastic at getting rid of the last of the paint residue and leaving my brushes clean and in good condition.
Now I paint mostly with acrylic or water-mixable oil paints, and Pink Soap tackles both of these quite easily. I use a few drops of soap in the palm of my hand and work it into the bristles, then rinse and repeat until no more paint comes out of the brush. It even does a decent job at removing dried paint and residual staining from the bristles, though no product will remove All staining. And honestly, I don’t particularly care if my paint brush bristles are stained, as long as they’re clean. The scent is pleasant and it also seems to leave my hands (and brush bristles) feeling soft. It does a great job at removing dried paint from my hands too.
Photo by Steve Johnson from Pexels
Now, I’m not one of those people who leave their paint brushes covered in paint, so I don’t know how well this soap would work for thick, very dry paint (If that sounds like you, try this soap out and let me know how it works!). I’ve tried a few other brush cleaners over the years, but I keep coming back to Mona Lisa Pink Soap . It smells nice, is non-toxic, and not overly messy. It’s also easy to find, since it’s carried in several of the major craft stores, like Michael’s, as well as online.
What is your favorite brush cleaner? Have you ever tried Mona Lisa Pink Soap? If so, what did you think?
* Please note that this post contains affiliate links and any sales made through such links will reward me a small commission – at no extra cost for you.
Favorites: Golden Soft gel medium
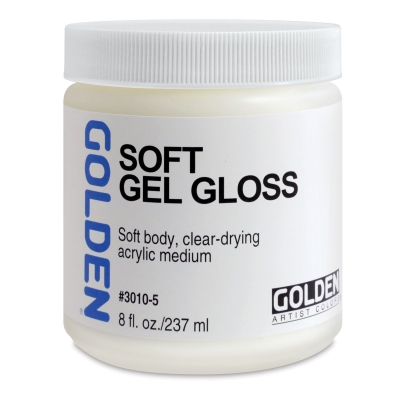
In my previous blog post, here, I talked a bit one of my go-to art materials when working on my 3-D mixed media paintings: acrylic soft gel medium. I typically use Golden Soft Gel Medium, since it’s readily available in several of the big art and craft supply stores and I like its working properties. It can also be purchased in larger size containers online, which is what I typically do since I go through a lot of it.

Photo by Steve Johnson from Pexels
Acrylic gel mediums are used to increase the transparency of acrylic paint without compromising its consistency or adhesive properties. Thicker, heavy body mediums are used to provide texture and add body to paint for impasto effects, allowing the paint to retain brushstrokes and knife marks. However, I generally use gel mediums as an adhesive in my mixed media pieces.

I like Golden’s Soft Gel Medium because it’s thick enough to fill in gaps and make a good, strong bond and it remains flexible once dry. Flexibility is an important consideration when working with organic materials, since they will flex, shrink and swell with changes in humidity. It’s also important with inorganic materials like stone or glass, since the canvas substrate of my pieces will flex with temperature and humidity changes while the inorganic parts will not. Having the ‘glue’ remain flexible allows the whole piece to hold together better and prevents pieces from popping off the canvas over time.
Golden’s Soft Gel Medium can be a little expensive, but it’s high quality and archival. It comes in several surface sheens but I usually just get the gloss version. I tend to paint over it anyway, so the surface sheen isn’t important to me. The gloss version doesn’t contain the extra mattifying agents that the other versions do and tends to be more transparent, which is important if I’m using it to attach materials like glass fragments that need to be seen through the gel medium.
Buying it in larger containers online tends to be more economical, but I’ve also purchased it using coupons at Michaels when I don’t want to wait for it to get shipped to me.
Have you tried any acrylic mediums? How do you use them in your work?
* Please note that this post contains affiliate links and any sales made through such links will reward me a small commission – at no extra cost for you.

Product Review: Two-Way Glue

One of the materials I use in my torn paper collages is a two-way, acid-free scrapbooking glue. There are a couple brands; I haven’t noticed any difference between them so I usually buy whichever one is available or least expensive. I’ve tried other types of adhesives, but haven’t been very happy with their working properties.
It’s available in a
large, chisel-tip dispenser as well as a couple
small, pen-like dispensers. I use the large chisel tip one for laying down adhesive over larger areas of my paper and the small chisel tip pen version for working close to areas I’ve already finished, adding details, and securing edges where the paper fragments overlap. The glue is also relatively easy to find. It’s typically available in all the major craft stores as well as online.
The glue is blue when it is first dispensed and turns clear as it dries, though it remains tacky. The “two-way” refers to the formulation of this glue where it creates a permanent bond if the materials are stuck together while the glue is blue and a ‘temporary’ bond if the glue is allowed to dry first (in other words, if the materials are stuck together after the glue has turned clear). While I don’t need a removable adhesive for my purposes, I do like how the glue stays tacky, so I can still attach the pieces of paper even if it took me a little longer to fill in an area than I expected when I applied the glue to the paper.
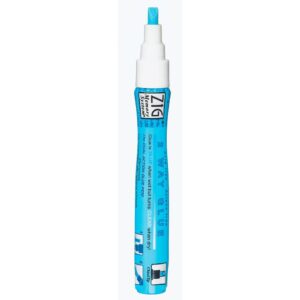
It’s not perfect—like I said, I don’t need a repositionable adhesive and I’d really prefer it to always provide a permanent bond. It’s also a bit messy, since it remains sticky. I tend to get adhesive all over my fingertips, which can make it hard to place tiny paper fragments accurately and it can also pull the color off the surface of some of the magazine papers, leaving pale fingerprint marks. The small chisel tip pen can dispense glue unevenly, either not putting anything on the paper or allowing large amounts of glue to pour over the tip and onto the paper in an uncontrolled manner. This appears to be more of a problem when the pen is partially or mostly empty than when it is new. I also haven’t noticed this problem much with the chisel tip dispenser version, though that may be due to the larger, flatter tip, which seems to be more absorbent and holds the glue better than the thin pen tip.
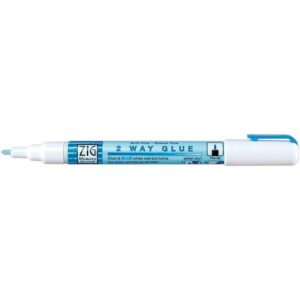
Overall, I like this product and it is my go-to adhesive for making my torn paper collages. I will probably continue to try out other adhesives, but so far I haven’t found anything that works nearly as well.
*Please note that this post contains affiliate links and any sales made through such links will reward me a small commission – at no extra cost for you.
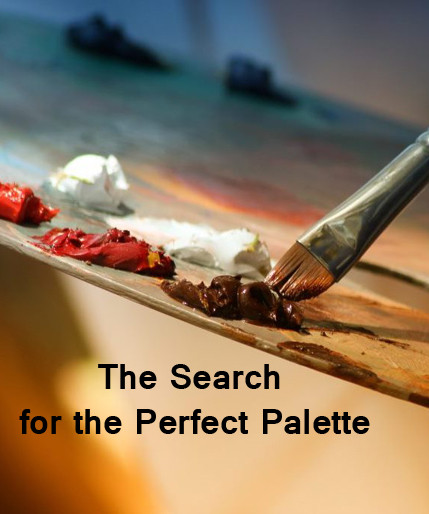
The Search for the Perfect Palette
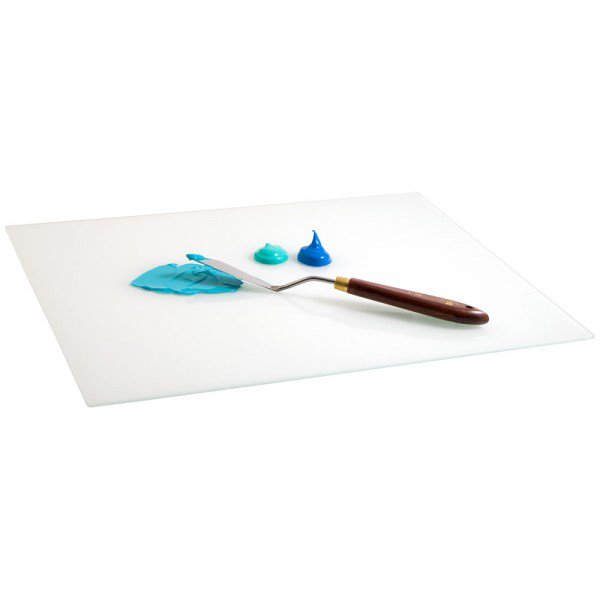
In a painting class I took in college we had these wooden carts with glass tops for storing our supplies. The glass top acted as your palette, so you could sit or stand and work and didn’t have to hold your palette in your hand. I’ve never personally been a fan of hand-held palettes. Partially because so many of them are cut to hold in your left hand, so the angle is wrong for a lefty like me to use it with your right hand but also because I tend to get pretty… involved in my painting. At times, I even forgo brushes and use my fingers to get just the right effect (I guess I never quite grew out of the whole childhood finger painting thing?). So I find it awkward and difficult to use a handheld palette. I Loved those glass-topped carts. They were old and ratty from years of abuse by art students, but the glass still worked great.
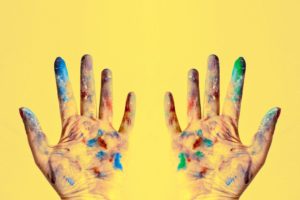
Photo by Lisa Fotios from Pexels
Once I was out “in the real world” I realized just how poorly the typical artist’s palettes worked for me. They were the wrong size or the wrong shape. They never had quite enough room. They were impossible to clean. I needed something better. I missed those carts with their glass tops.
Aha! A quest! After a great deal of searching, I discovered the perfect solution: Amaco Classic Glass Palettes. It’s a rectangular glass palette, just like the tops of those carts, but I could put it anywhere I wanted. No bulky cabinet attached! It comes in two sizes of rectangular palette as well as a more traditional oval hand held style. I got the smaller size, since at the time I was living in an apartment without a dedicated studio space. My kitchen breakfast nook served multiple roles: kitchen table, computer desk, art workspace. I needed something that wouldn’t overhang the edges of the tabletop and was small enough to stash somewhere else after a painting session. Recently, I’ve been considering getting the larger size, since I now have a dedicated studio space. It never hurts to have more room for mixing colors!
Anyway, this thing is great. It has a nice, smooth surface that’s perfect for mixing paints. It’s not absorbent so it doesn’t stain or discolor and cleans up easily. I use it solely with oils, though acrylics are supposed to peel off easily. Wet oil paint just wipes off and dried paint can be scraped off with a razor blade. On the downside, it Is glass, so it’s heavy and fragile. Since I paint indoors in my studio, that’s not really an issue for me, though caution is warranted. It’s best to keep it out of reach of pets, small children, or clumsy roommates!
What about you–have you found Your perfect palette?